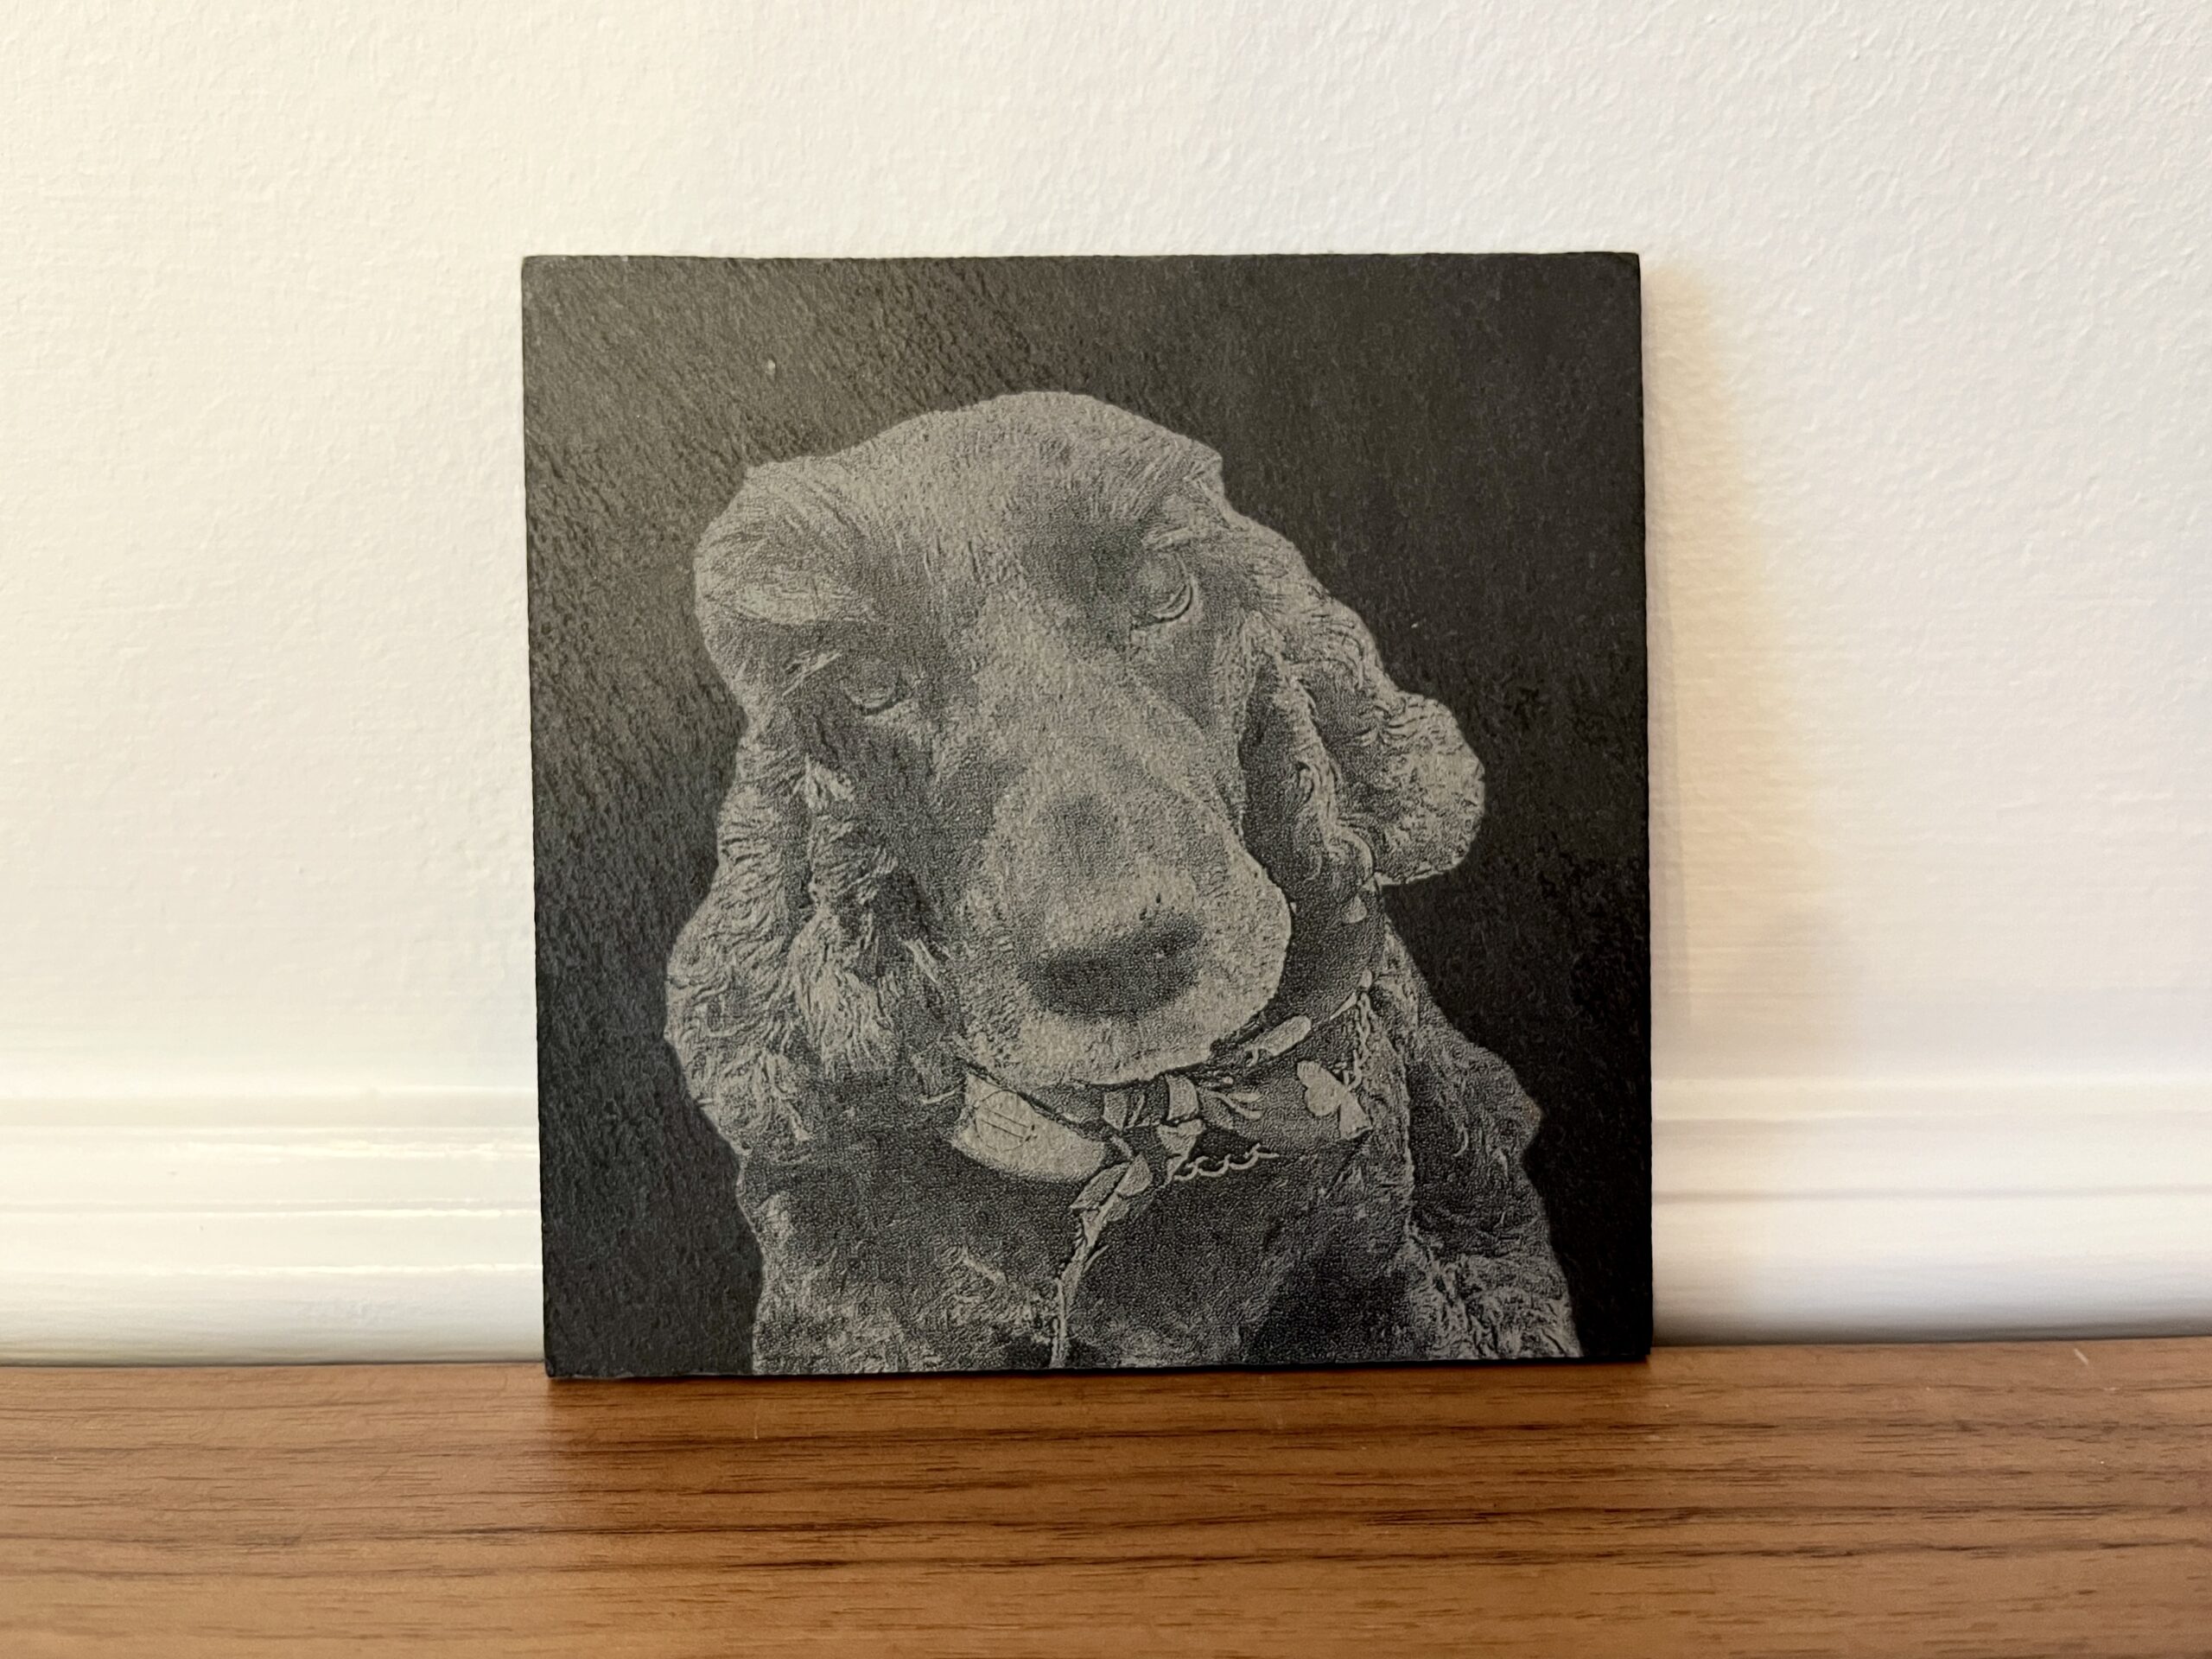
Image Engraving on Coasters
Coasters are a must have item in any wood-respecting household. If you or anyone you know has a beloved end or coffee table they want to protect from scratches and condensation, but is tired of boring, store-bought coasters, this project is for you.
What You'll Learn
In this guide, we'll show you how to etch an image of your choosing on a slate coaster. We'll cover how to:
- Import an image into LightBurn
- Find and apply appropriate settings to etch your material
- Adjust the image to get it laser-ready
- Use tool layers to reate a template to represent your coaster, and use it to Mask an image
- Select a Start From mode in LightBurn, and position your coaster in your laser's workspace
Materials
- An image you want to immortalize in coaster form. You can select any image you like, but some will work better than others - if you try to engrave a photo of your pet bunny in a snowstorm, you may have a hard time. Images with sharp contours and contrast will work best.
- Premade coasters of any material. We used slate, but you can use wood, tile, or anything else you'd like. Slate makes a great beginner material, while wood can sometimes be a bit more challenging.
- A laser capable of etching the material you choose.
Steps
1. Import Your Image Into LightBurn
-
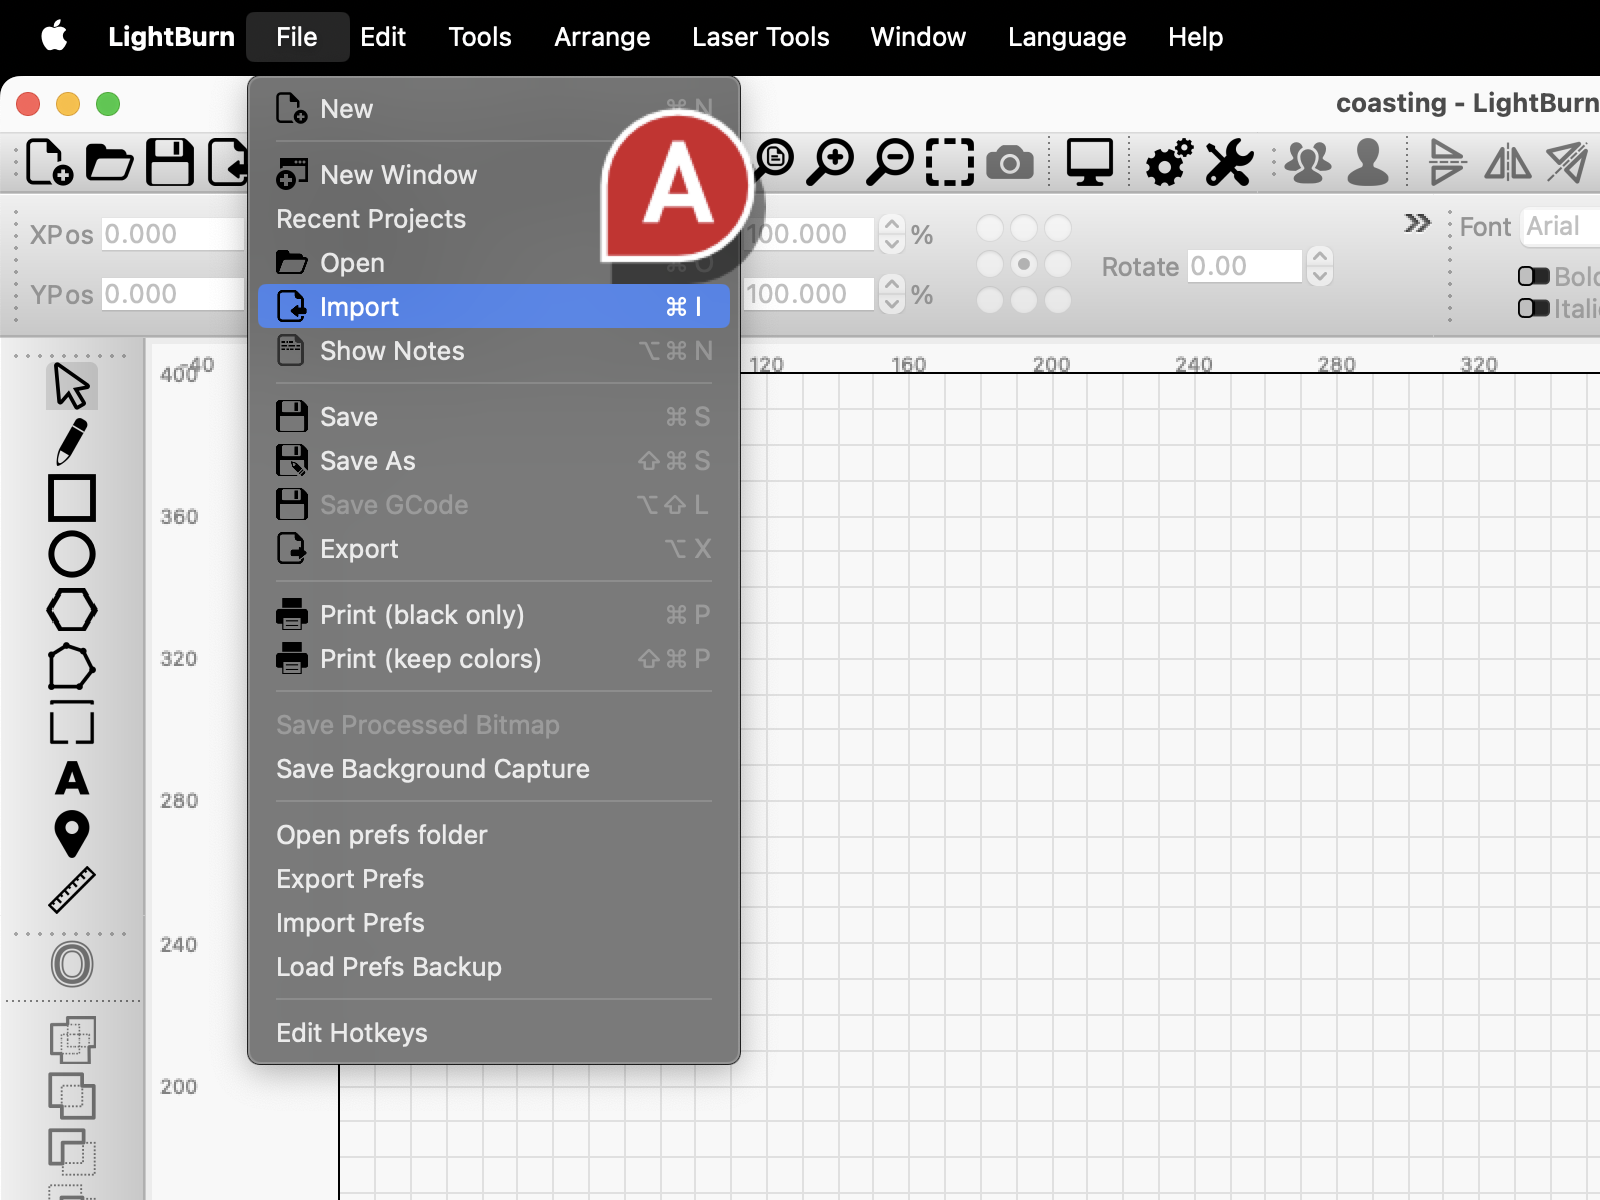
Go to the File menu and select Import, or press Ctrl+I for Windows, or Cmd+I for Mac.
-
Navigate to the location your image is saved to on your computer and select it.
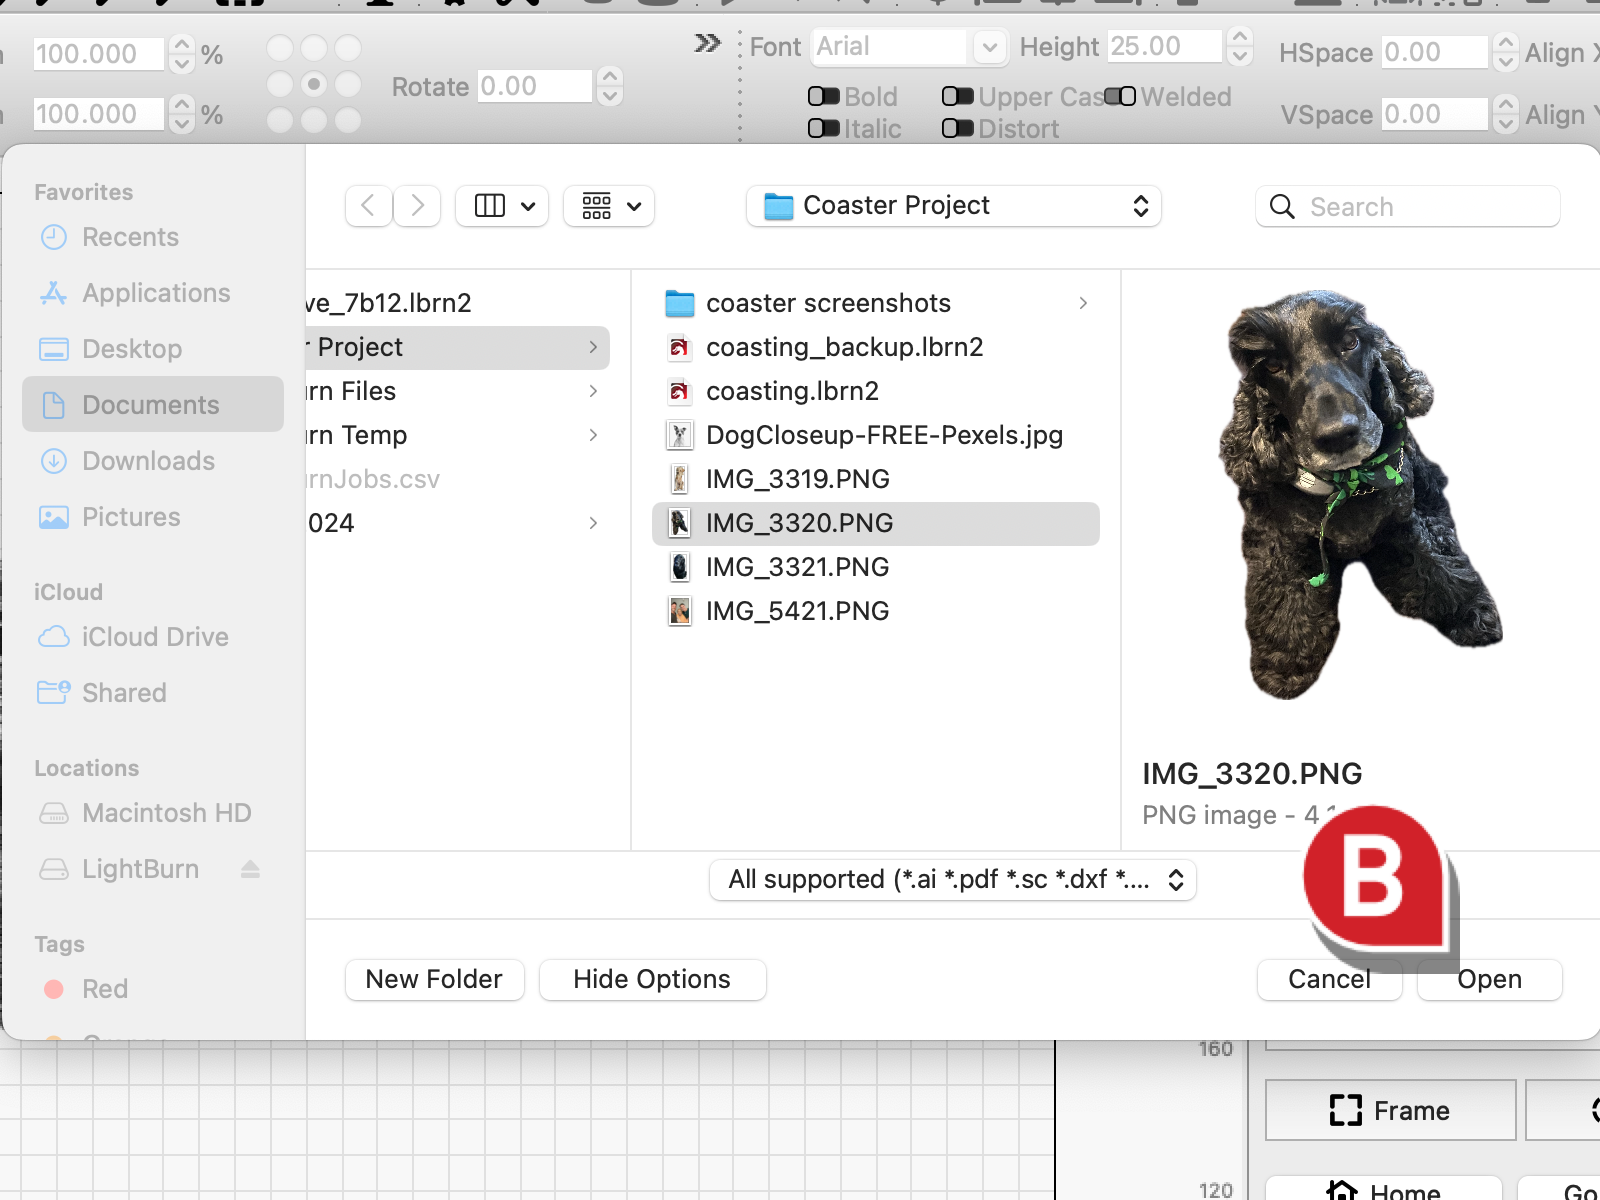
Note: I removed the background from this photo using my iPhone's Lift feature, but you can also use a free tool like Pixelcut or delphitools to do the same.
2. Apply Layer Settings
-
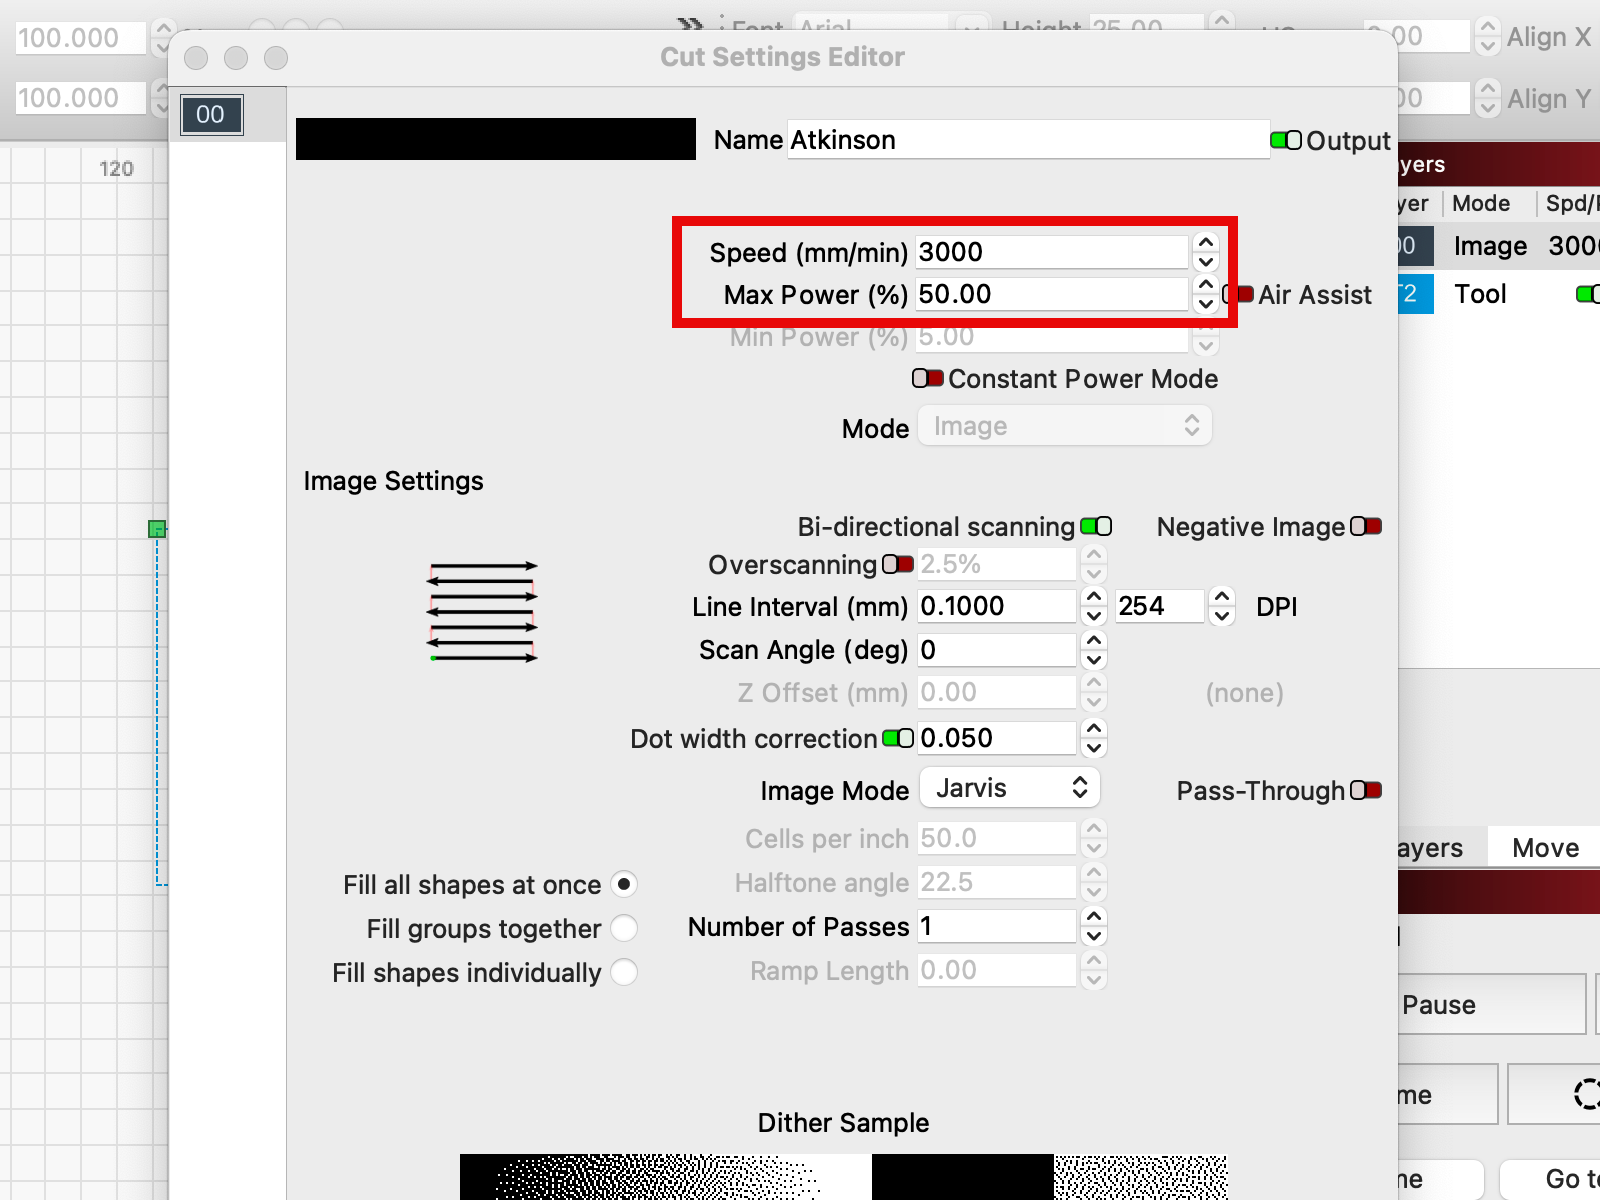
Double-click the Image layer in the Cuts/Layers window to open the Cut Settings Editor and apply Speed and Power settings.
-
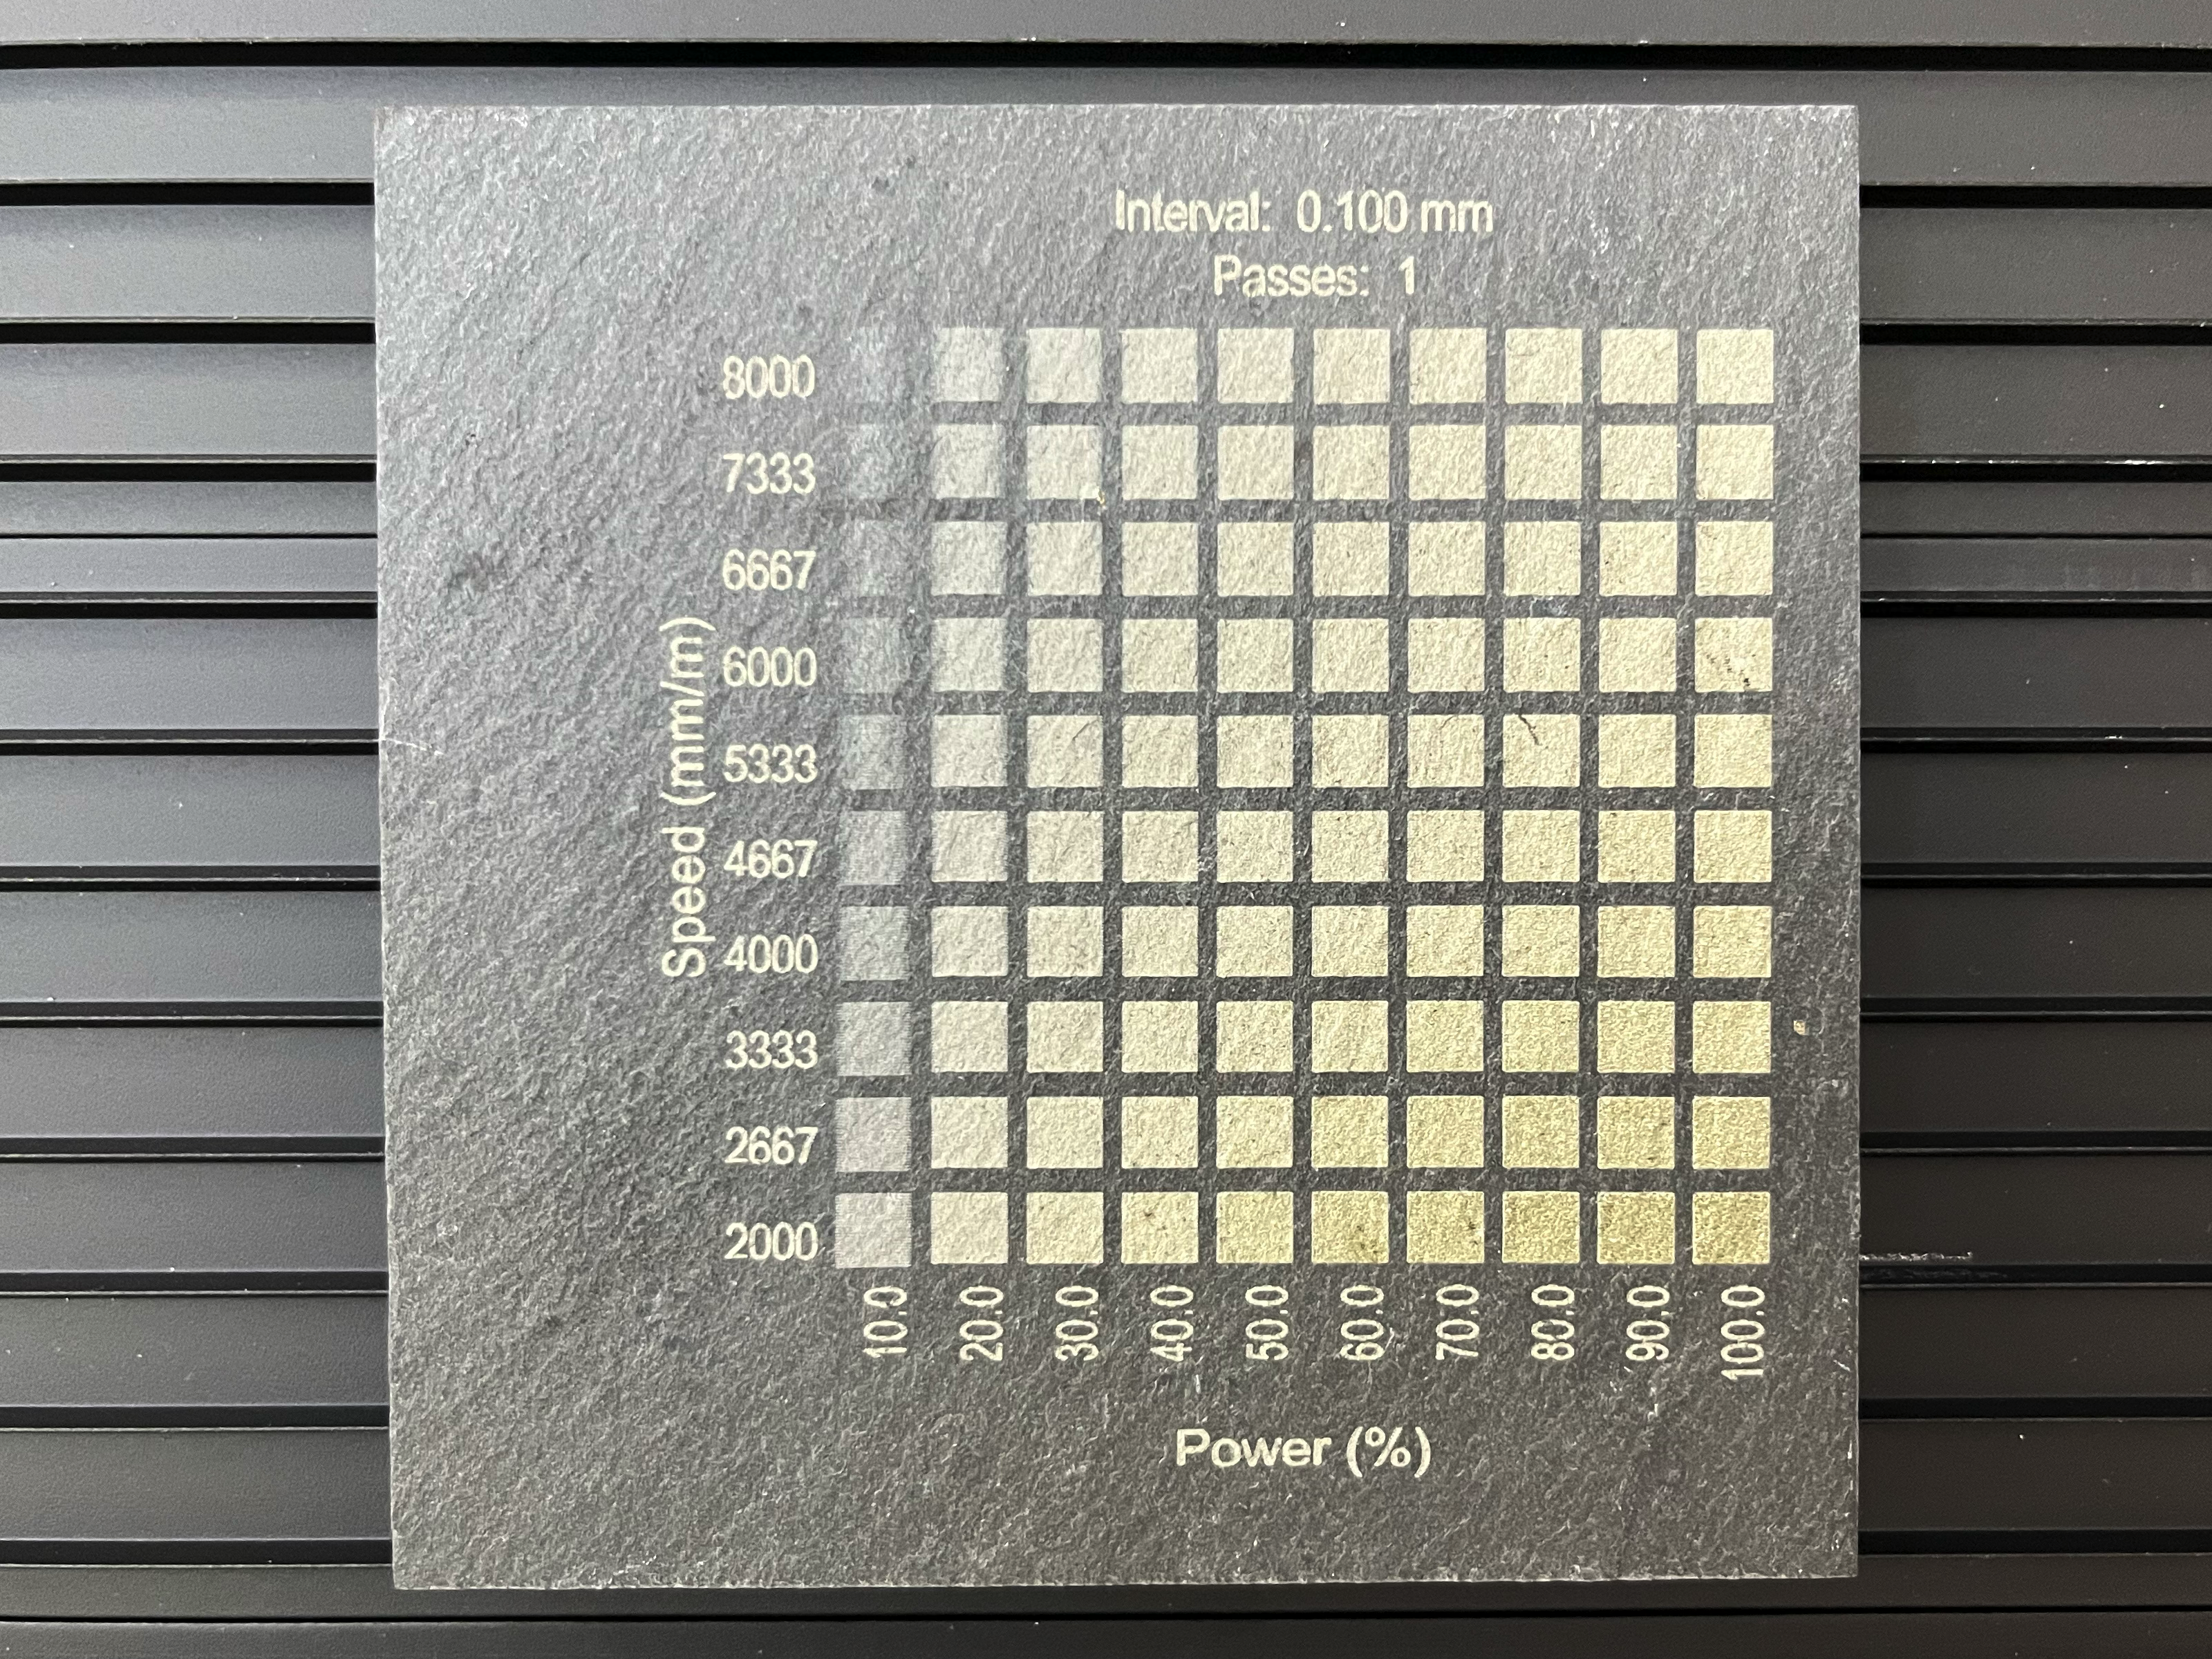
If you're unsure what settings to apply, try running a Material Test. A test grid ranging from 10% to 100% power, and 2000 mm/minute to 8000 mm/minute is a good place to start. Watch our full video guide on setting up a Material Test here. You may also enjoy our guide to better image engravings.
-
You may also be able to find some suggested settings on your laser manufacturer's website.
There is a lot of variability between lasers, and no one-size-fits-all settings, so be prepared to test and experiment with your settings.
3. Adjust Image
-
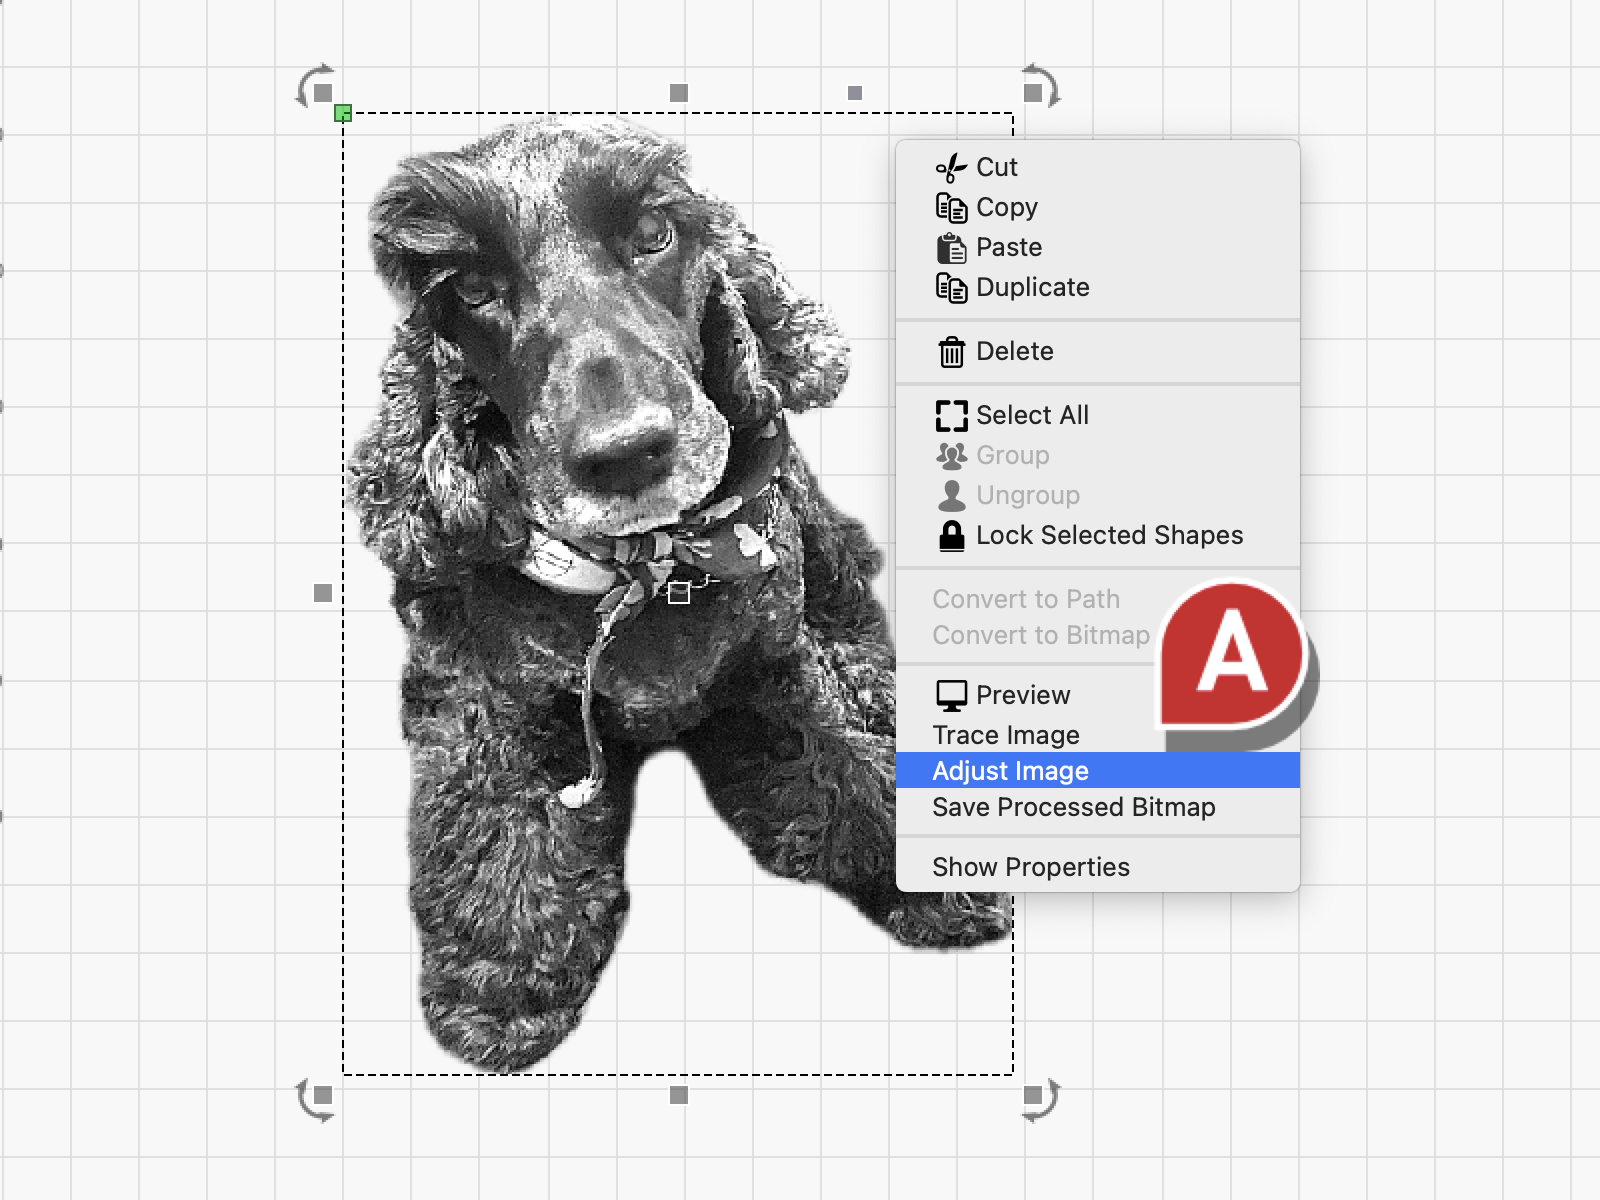
Right-click the image and select Adjust Image.
-
Apply some standard starting point settings:
-
Stucki or Jarvis Image Mode
-
DPI: 254
-
Gamma: 0.800
-
Contrast: +5
-
Brightness: -5
-
Enhance Radius: 5
-
Enhance Amount: 150
-
Gamma adjusts mid-tone shading. Lower values make the mid-tones brighter, and higher values make them darker. Contrast makes bright shades brighter, and dark shades darker. Brightness makes all shades brighter or darker. Together, Enhance Radius and Enhance Amount increase contrast along edges.
-
-
When engraving on a dark surface like a slate coaster, you'll want to enable Negative Image.
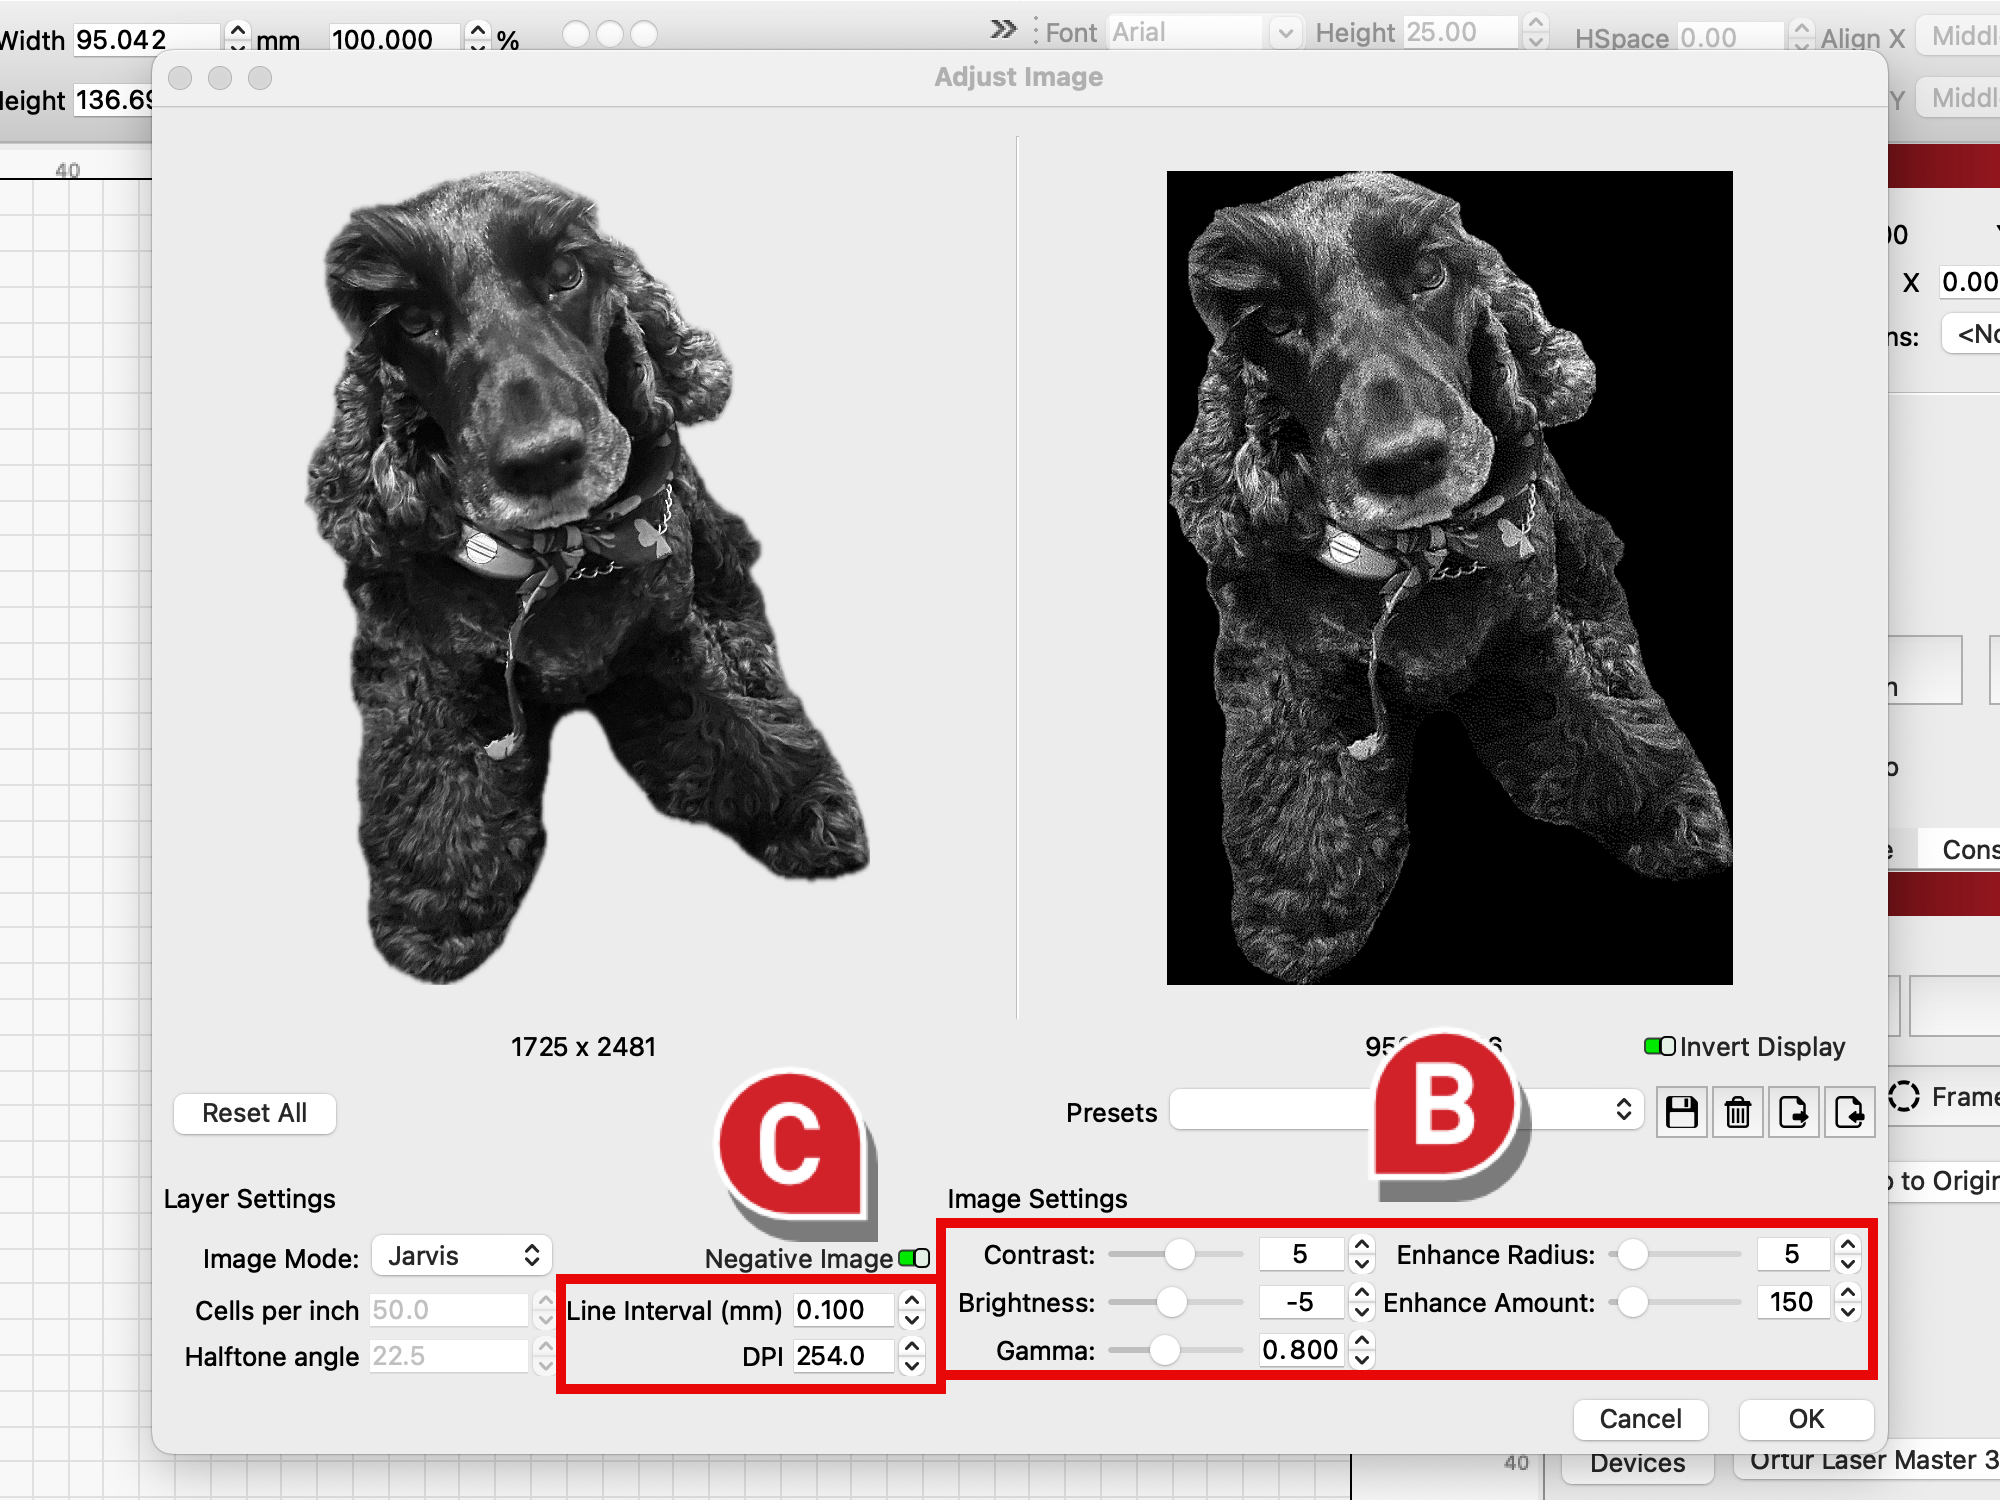
As with the Layer settings, be prepared to test these settings, and adjust according to the results you see.
4. Create a Template of Your Coaster
-
Measure your coaster.
-
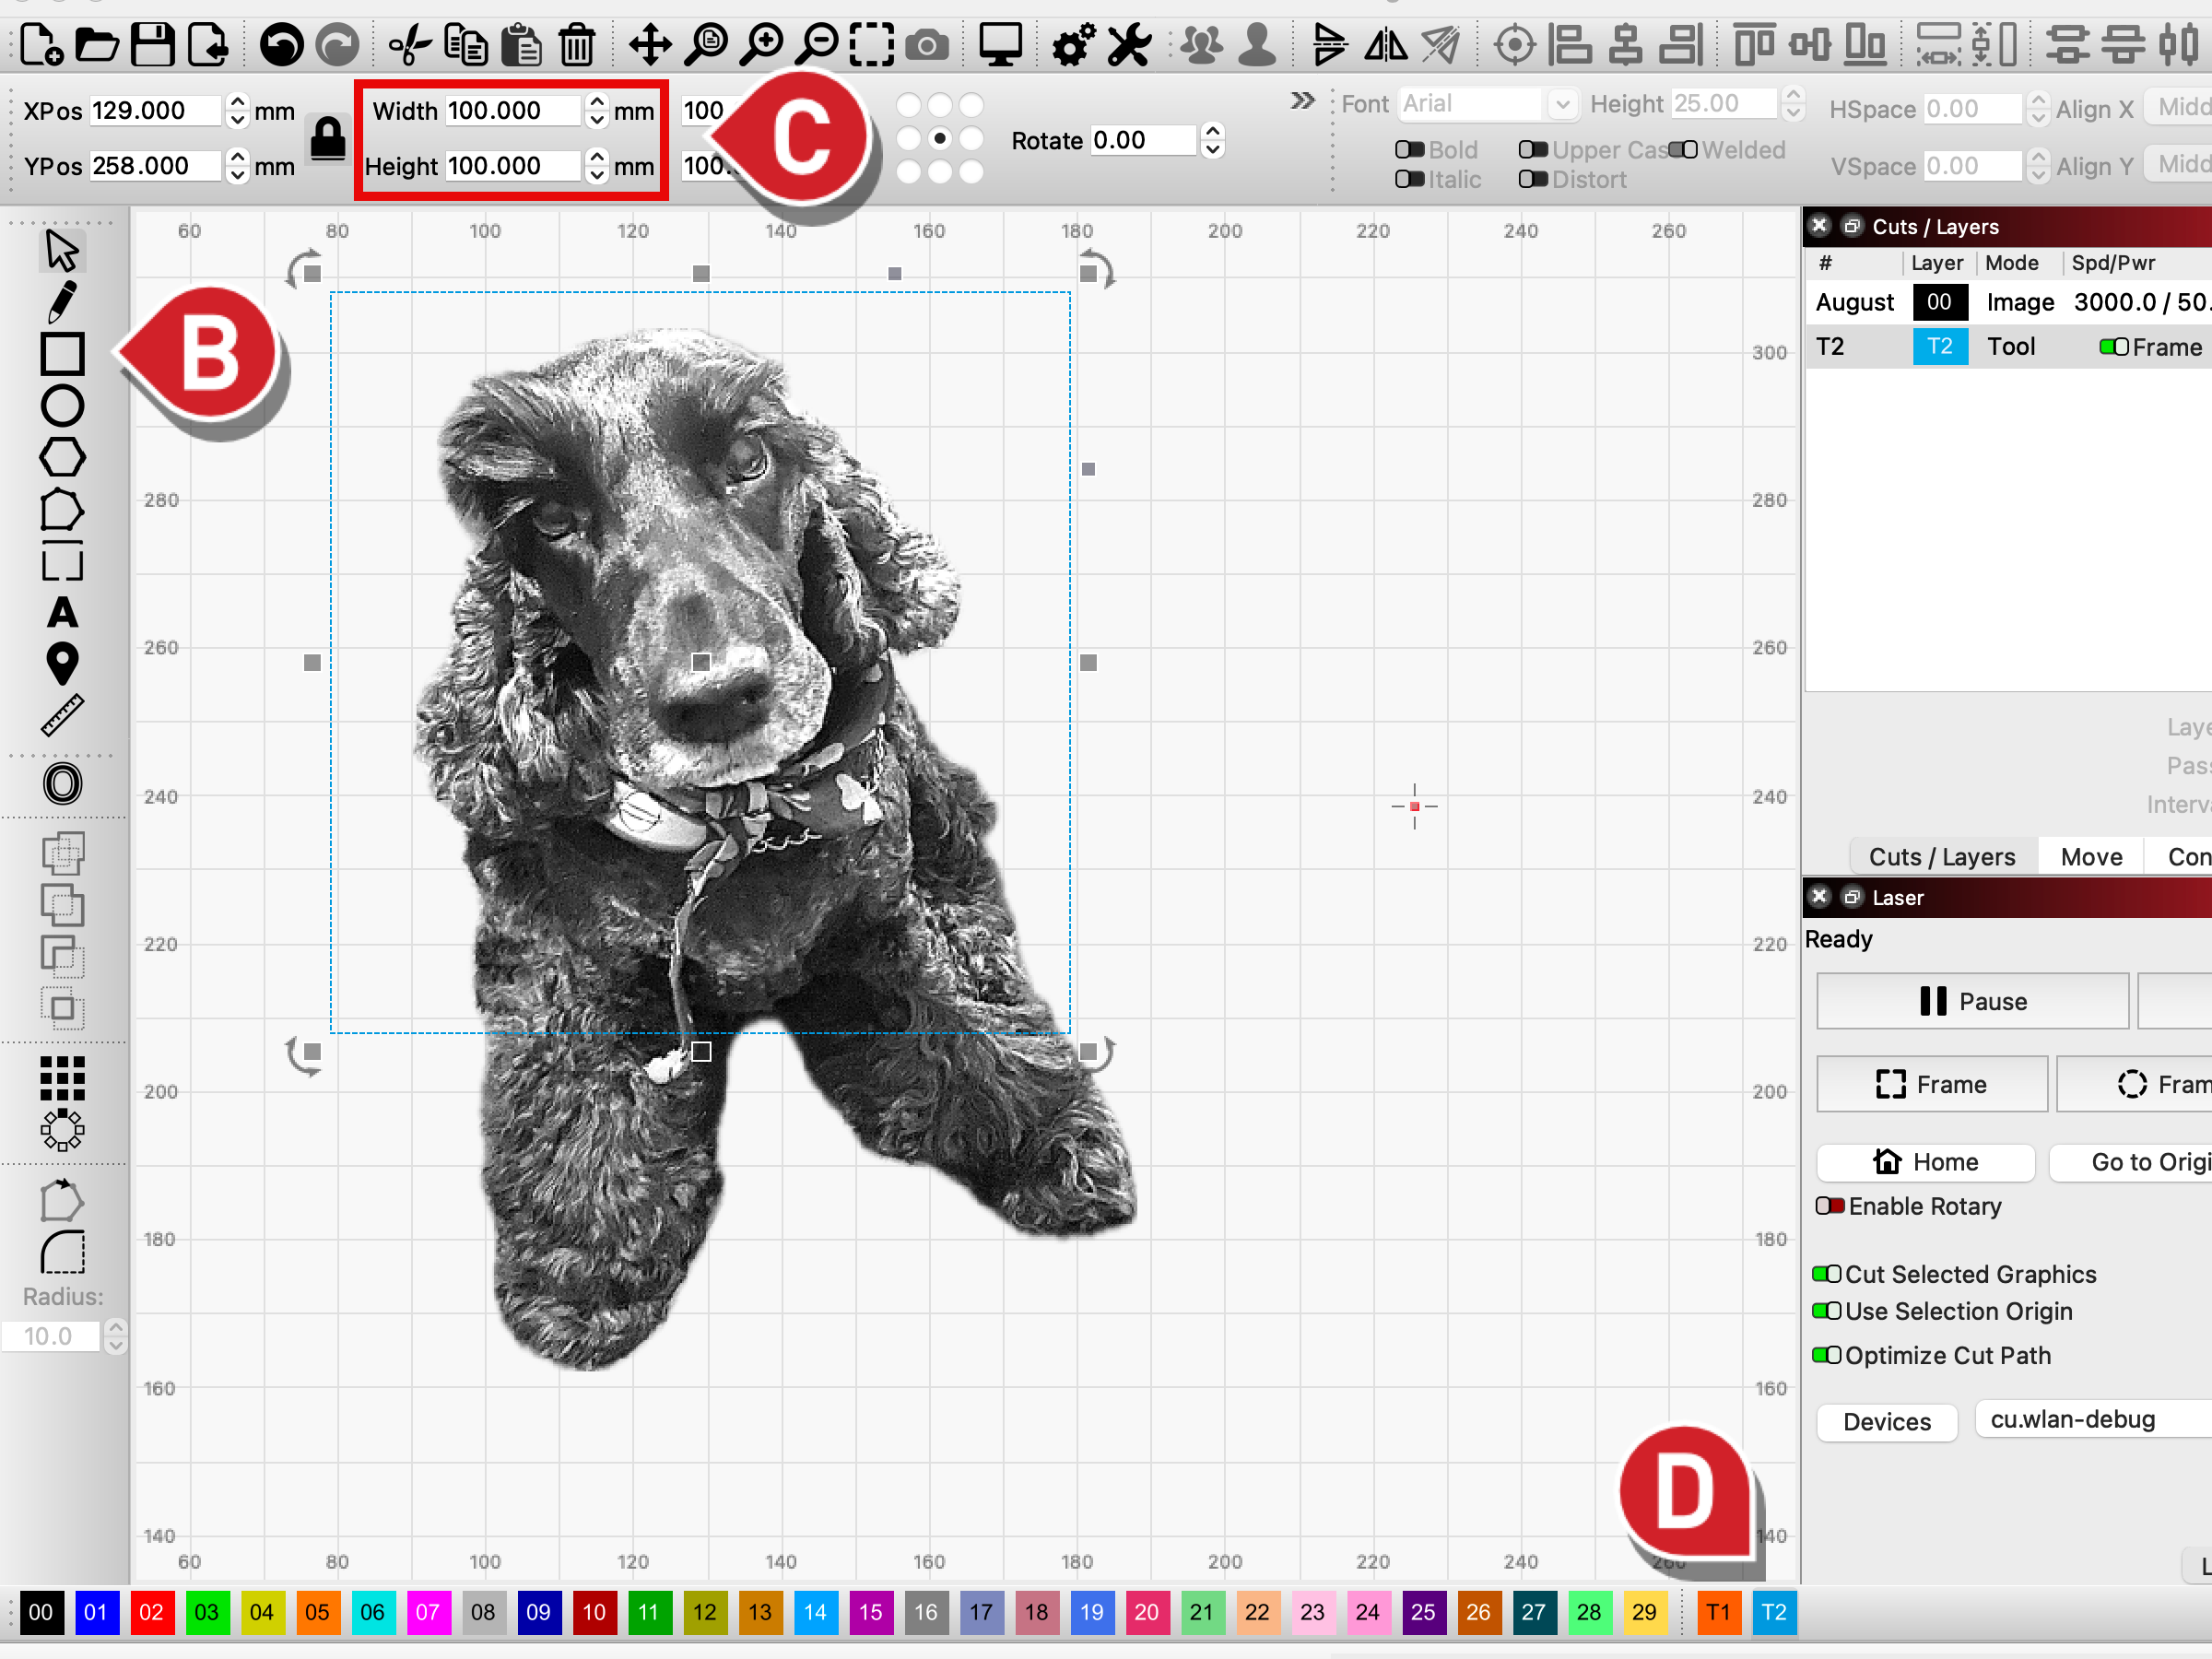
Create a shape in LightBurn using the Rectangle tool, for square coasters, or Ellipse tool, for circular coasters. Holding the Shift key while creating the shape will keep it perfectly square or circular.
-
In the Numeric Edits toolbar, set the shape's dimensions to match the measurement you took of your coaster.
-
Set it to a Tool layer.
-
Resize the image to fit to the shape - it's ok to leave some of the image outside the shape, we'll take care of that in the next step.
5. Apply Mask to Image
-
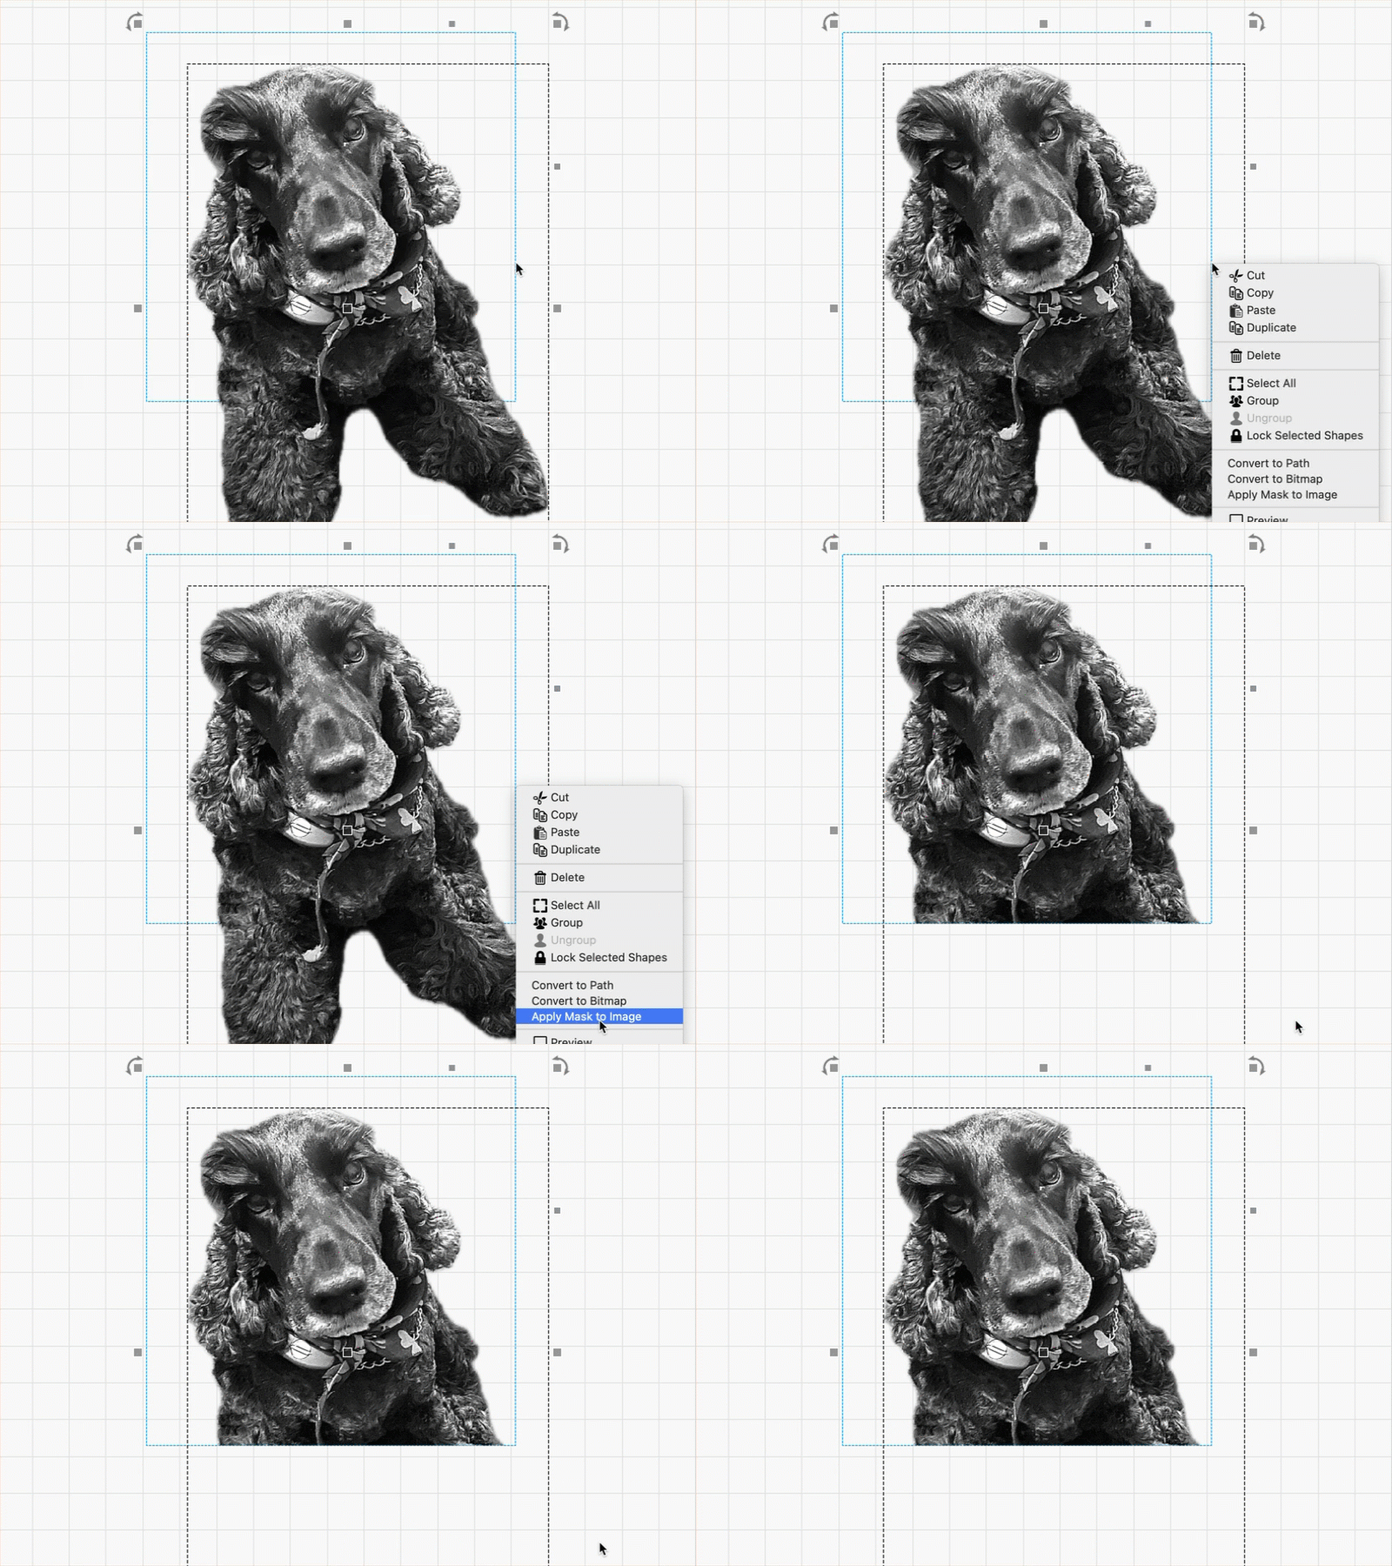
Select your image and the Tool layer, then right click and select Apply Mask to Image, or go to Tools → Apply Mask to Image.
-
You can move the Tool layer around after applying the mask, if you'd like to adjust the area of the image that is masked. To remove a mask, right-click and select Remove Mask from Image.
-
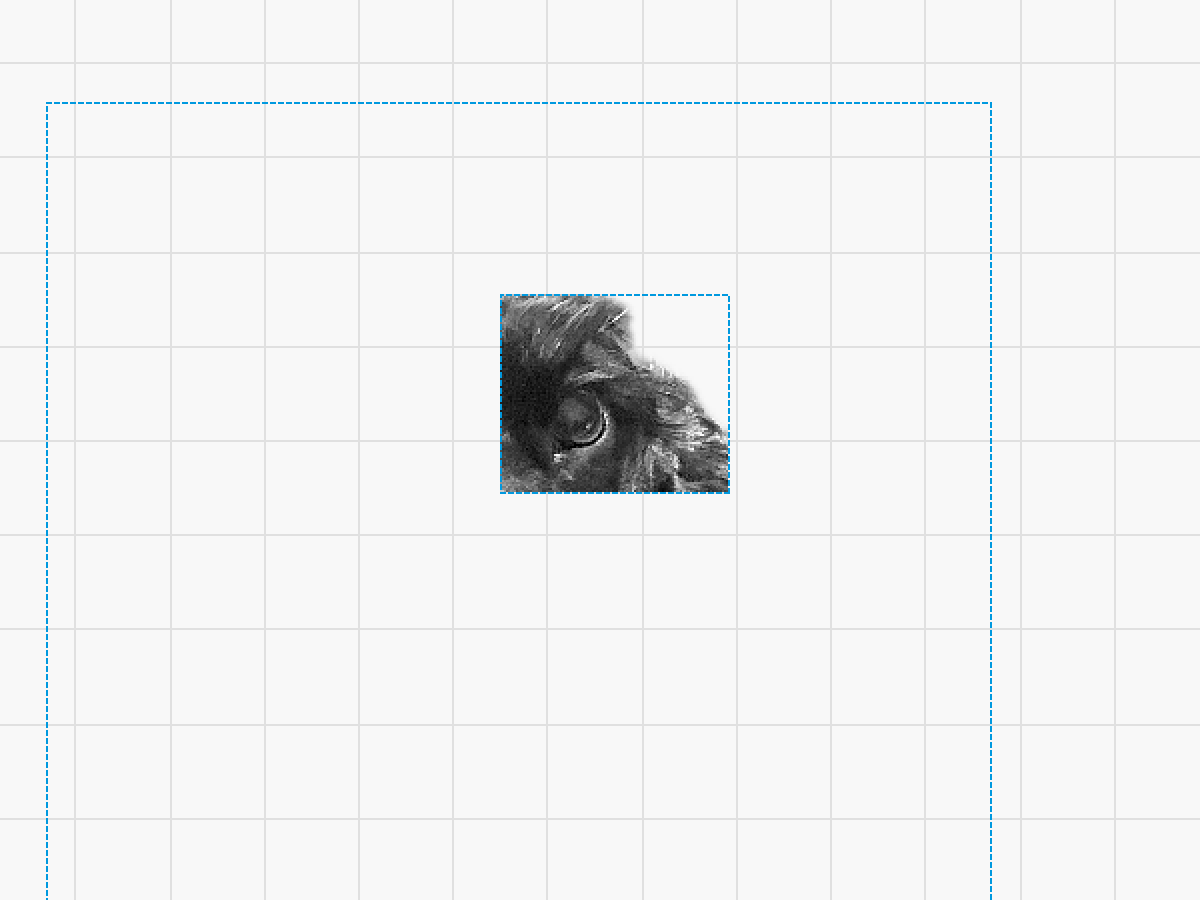
Masking can also be a great help in testing settings. You can mask off a small area of your image and etch just that section to keep runtimes low as you test different settings.
6. Select a Start From Mode and Job Origin
-
Select Current Position as the Start From mode.
-
Set Job Origin to a corner if you're engraving on a square coaster. If your coaster is circular, select the center.
For more information on the different Start From mode options, watch our full video guide here.
{ class="spaced-image"}
7. Position the Coaster and Run the Job
-
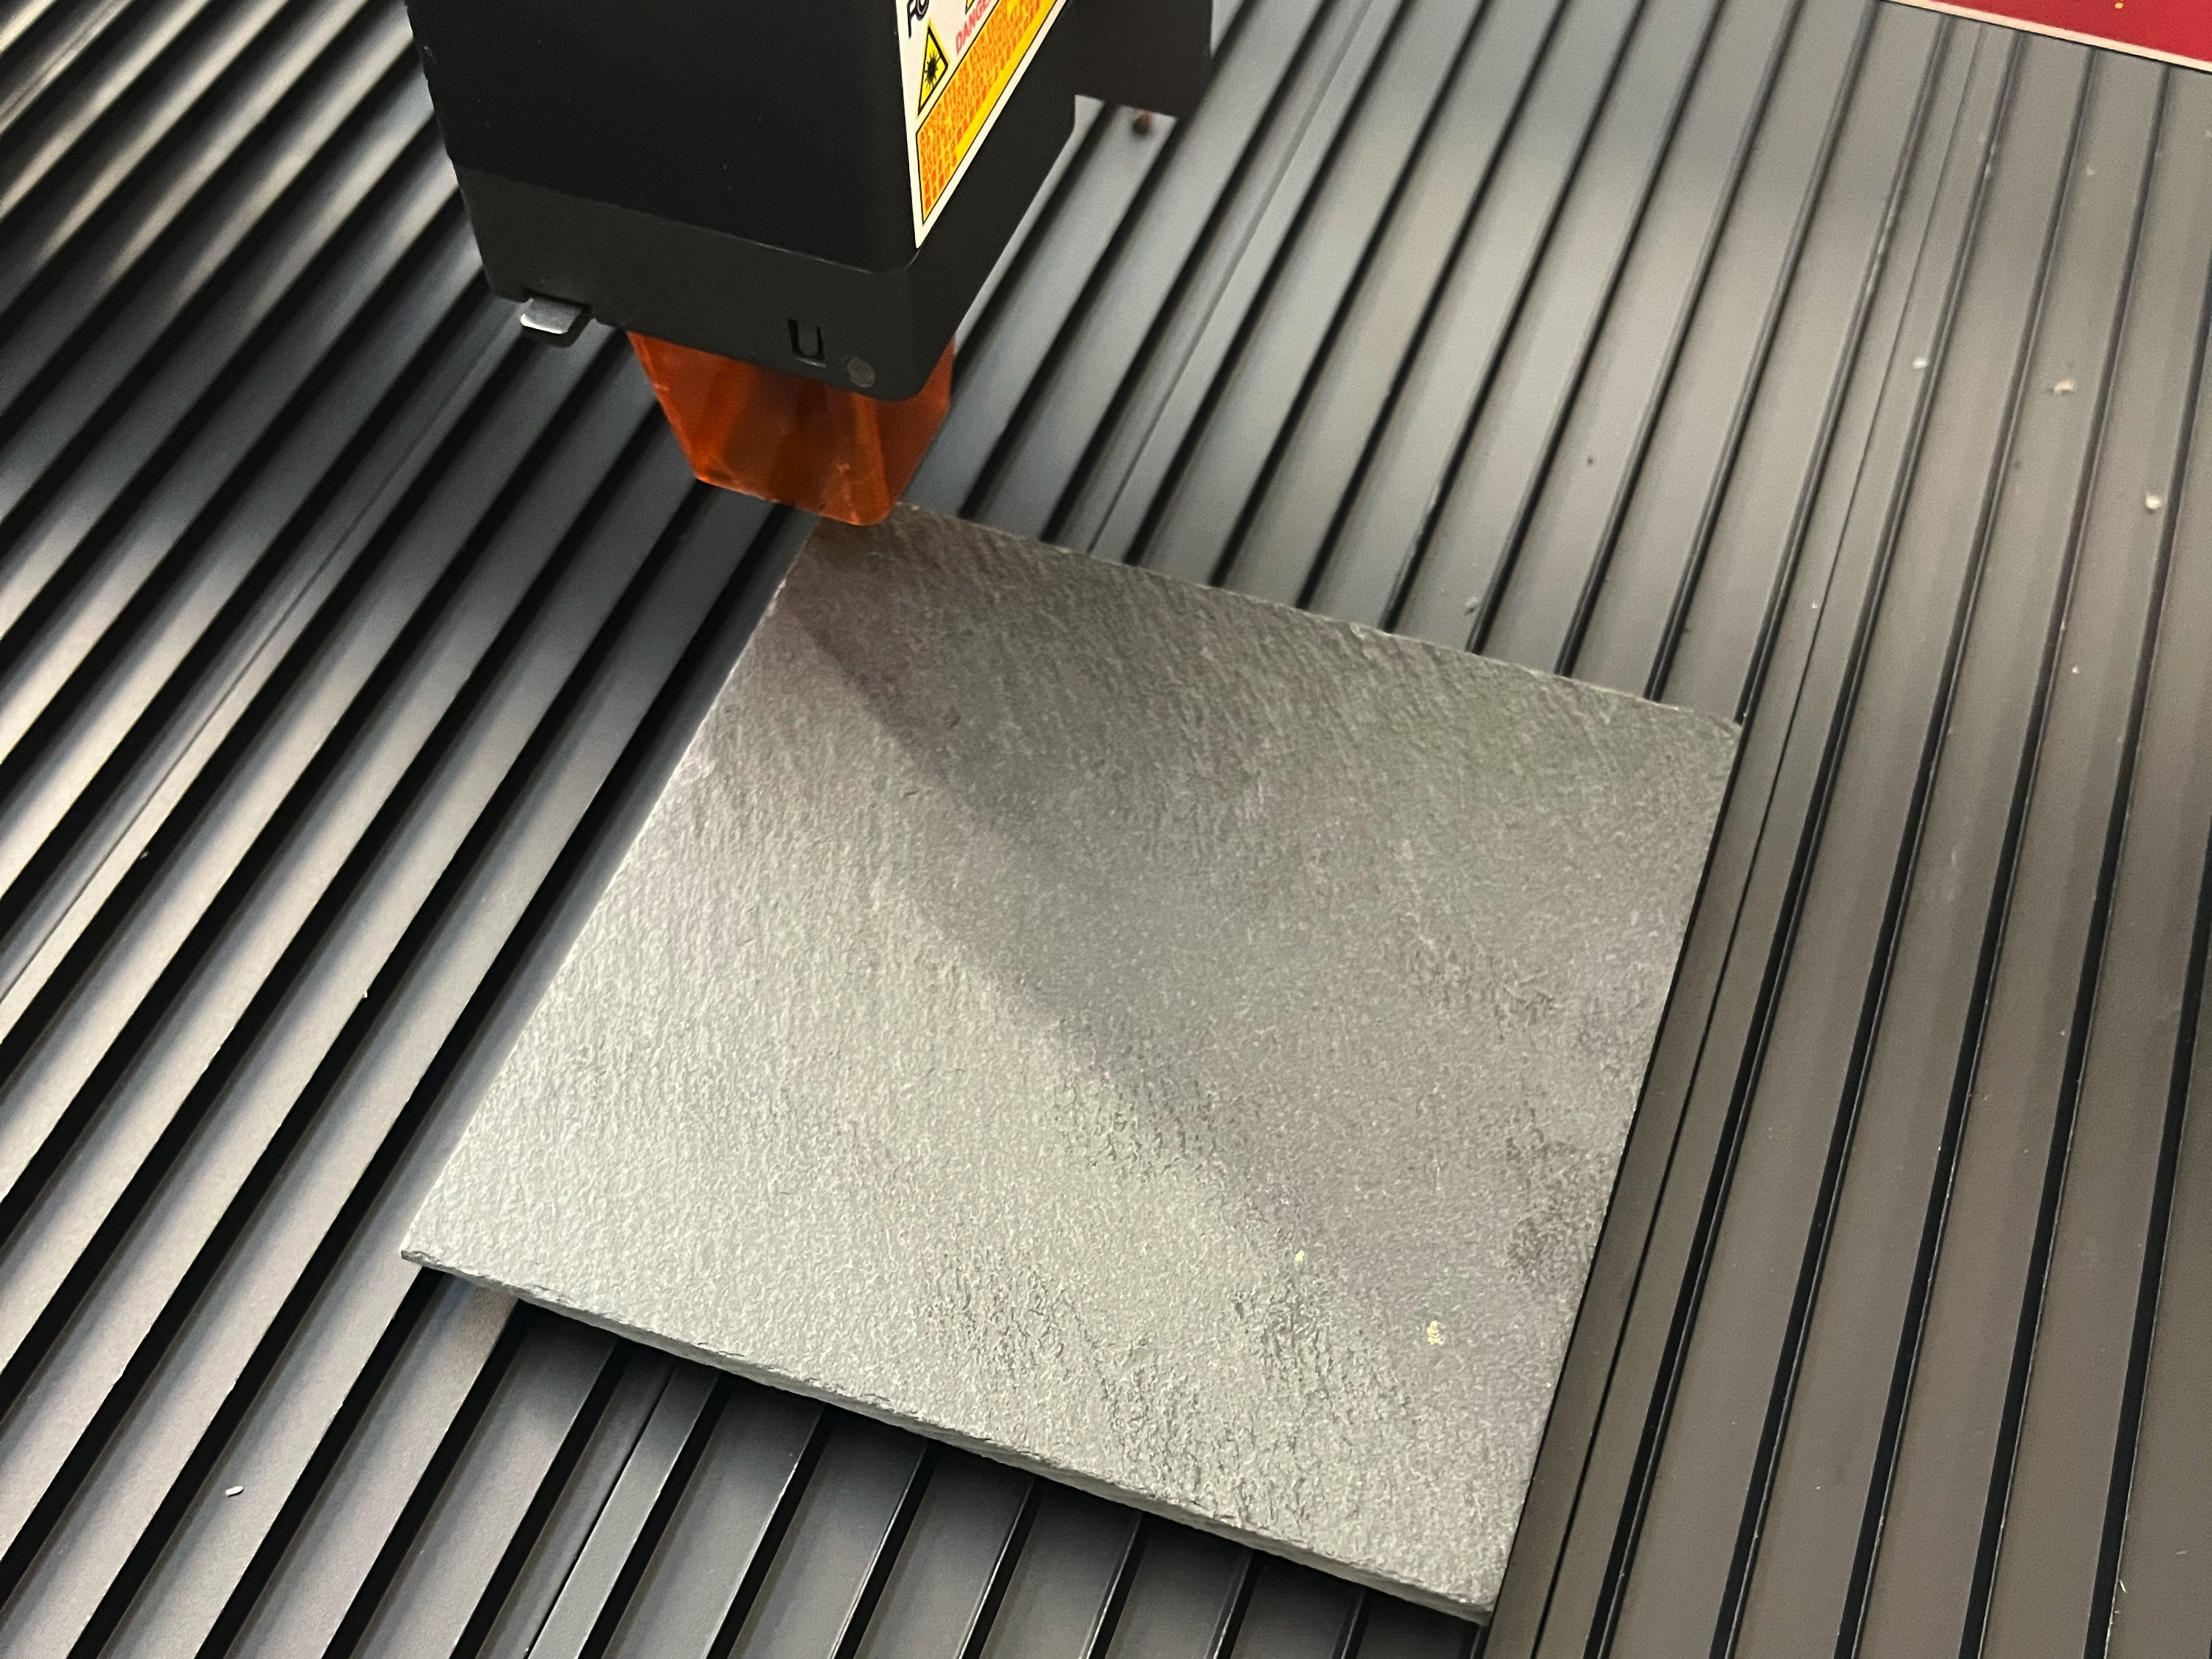
Place the coaster near the center of your laser's workspace. It doesn't have to be exact, but try to provide roughly equal space from each side of the coaster to the edge of your workspace.
-
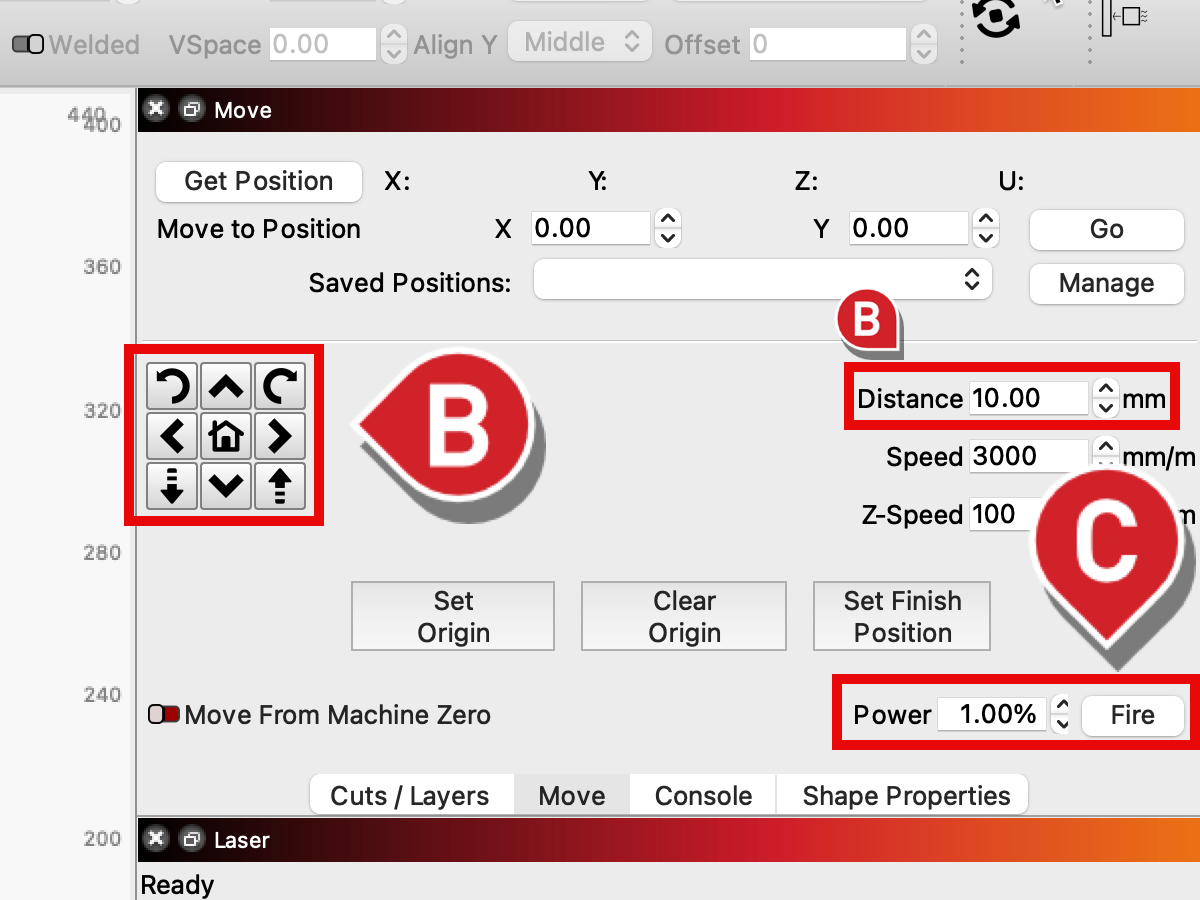
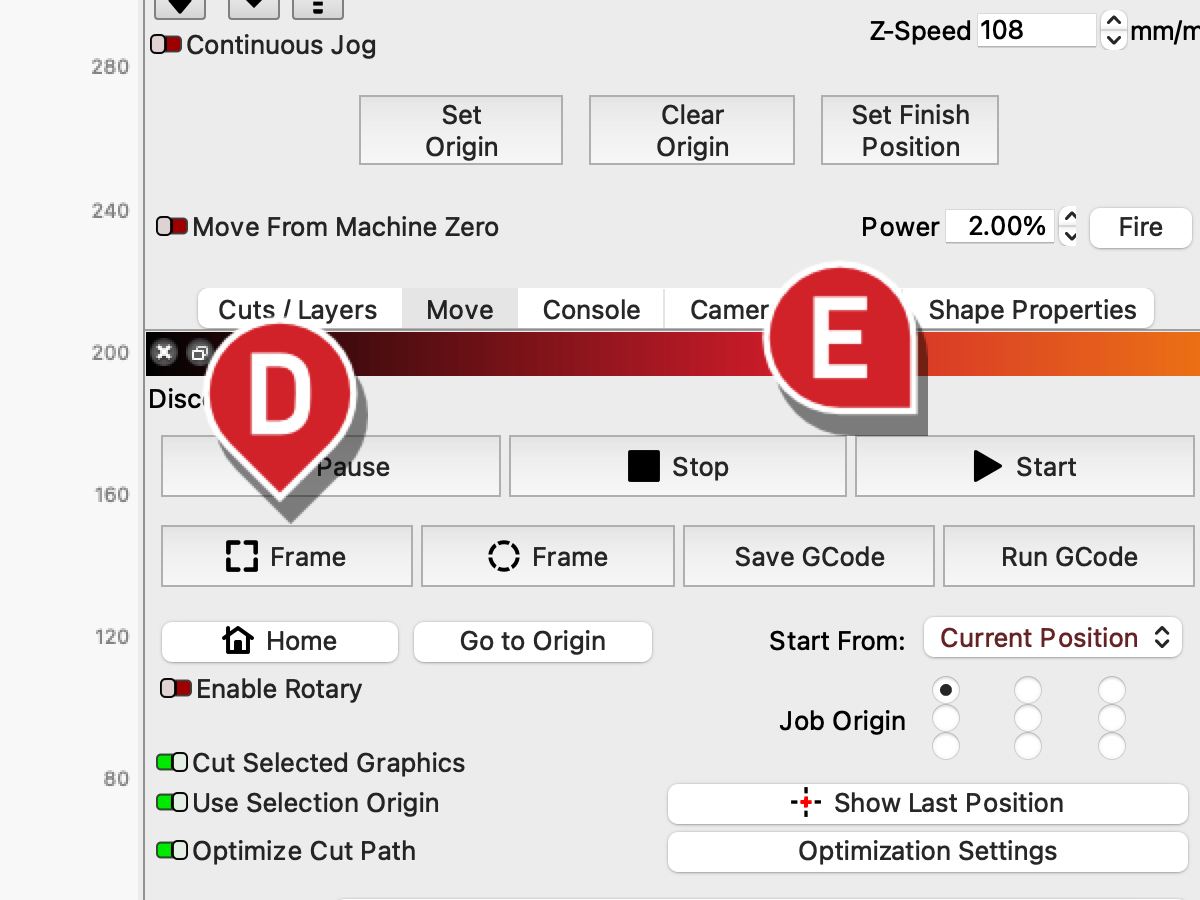
Using the arrow keys in the Move window, Jog your laser to the same location on the coaster as you selected for the Job Origin. To refine positioning, you can lower the increment in the Distance field.
-
For our project, we selected top left for Job Origin, so we jogged the laser up and over to the top left corner of the coaster.
-
If you're using a circular coaster, you may want to pre-mark the center of the coaster with a ruler and pencil, and align to that mark. Alternatively, you can use the Center Finder tool.
-
-
If your laser does not have a red dot pointer, you can enable and use the Fire button to aid in alignment. When you Fire the laser, it should pulse directly over the position on your coaster that corresponds to the Job Origin you selected. Make sure you are wearing safety glasses before ever firing the laser.
-
Frame your project to verify alignment.
-
Press Start to run the job!
Other Ideas

That's it, you've got a coaster! No one wants just one coaster, so you'll surely want to make more. Here are some ideas for your next coaster project:
-
Use the Grid Array tool to lay out duplicates of the same coaster you just made, and run a full batch at once. You can even use Variable Text to customize each one with someone's name.
-
Create a series of coasters with different images on each.
-
Etch something other than an image - favorite graphics, logos, or inspirational quotes can all make excellent coasters.
-
Instead of using premade coasters, you can also cut your own - just turn the Tool layer you used as a coaster template into a Line layer instead, and give it appropriate settings to cut through a material of your choosing.