Add A Camera
Before you can use a camera with LightBurn, you'll need to add it. If you've already configured your camera on an older version or a different computer, you can export a LightBurn Camera File (.lbcm) and import it. Otherwise, you'll need to create a new camera.
Quick Start
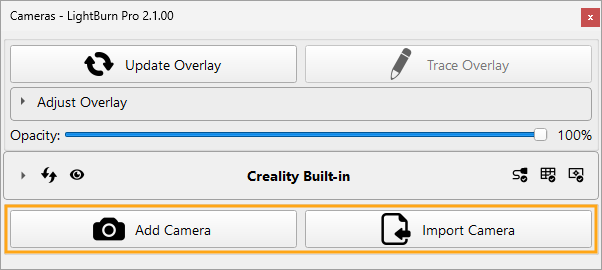
If you want to dive right in with adding a camera, you can use the Add Camera or Import Camera buttons in the Cameras Window, and follow along with the onscreen directions.
Add Camera
Use this if you don't have an existing .lbcm file to import.
- Select your camera type.
- Select your camera source or preset.
- Follow the on-screen directions to adjust settings and calibrate and align your camera, if needed.
- Click Finish to save your settings.
Import Camera
Use this if you're importing an existing LightBurn Camera (.lbcm) file.
- In the dialog box that opens, select your
.lbcmfile and click Open. If you are importing from an older version and need help with the warning, jump to the full directions. - Follow the on-screen directions to adjust settings and calibrate and align your camera, if needed.
- Click Finish to save your settings.
Need more help? Continue for the full directions.
Create a New Camera
Click the Add Camera button to start the process of adding a new camera to LightBurn.
1. Select Camera Type
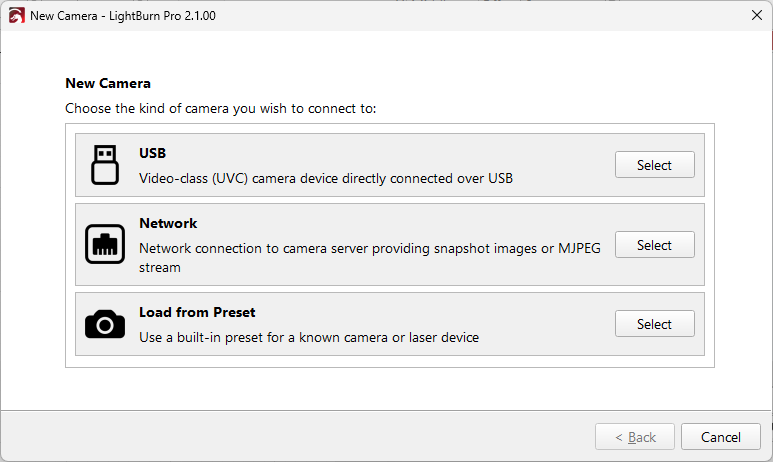
LightBurn 2.1 offers three options for camera type. Select the one that matches your setup.
- USB for typical USB cameras with a direct wired USB connection to your computer.
- Network for cameras you connect to over a wired or wireless network.
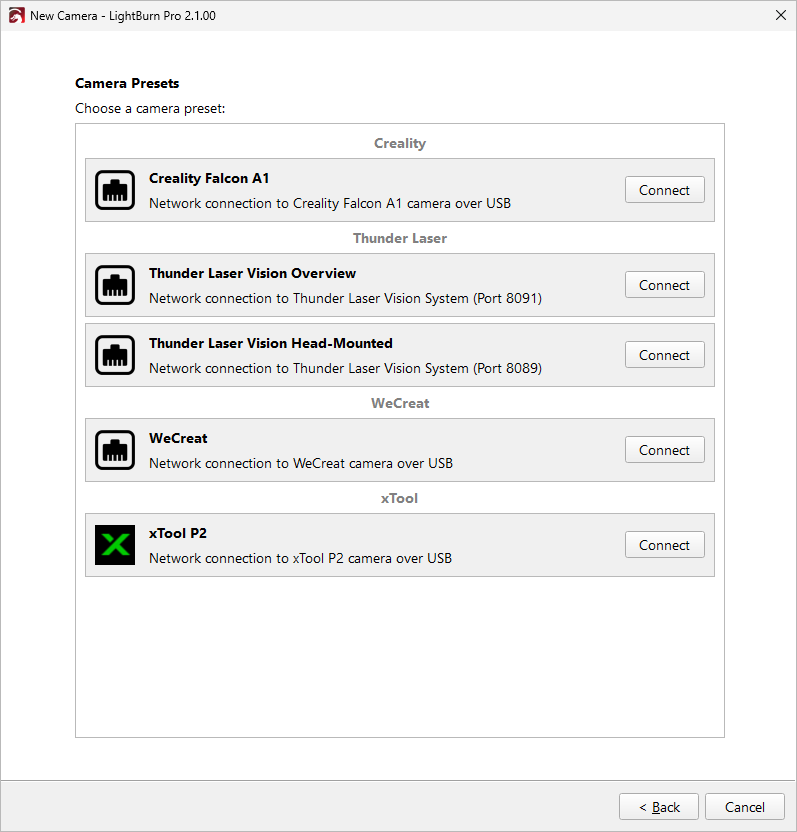
- Load from Preset to load a preset, if one exists for your device. Currently, LightBurn has presets for the following camera setups:
- Creality Falcon A1
- Thunder Laser Vision (both Overview and Head-Mounted)
- WeCreat
- xToolP2
2. Find Camera Source
For USB or network cameras, you'll start by selecting your camera, or telling LightBurn how to find it. This is slightly different depending on the type of camera you're using.
If you're loading a preset, the process is similar but looks a little different - after selecting camera type you'll go to the Edit Camera screen, which shows you the camera name, type, source, calibration, and alignment all in one place.
After selecting or connecting to a camera, the left side of the window will show additional information about the camera, and the right side of the screen shows you a preview of the camera feed.
Click the appropriate tab below to view more detailed directions for connecting to USB or network cameras.
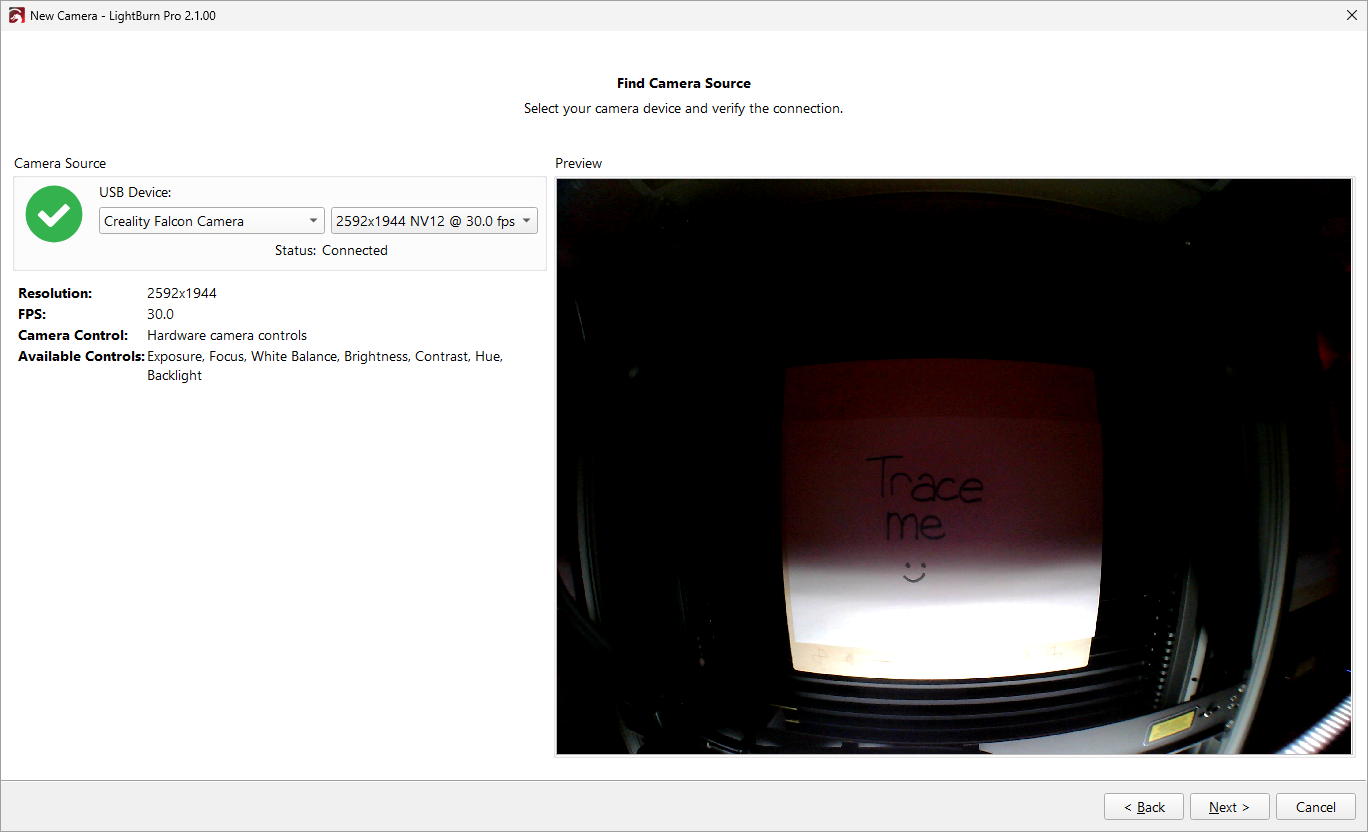
To select your USB camera, click the dropdown under USB Device and select the camera you want to use. You may have additional options for framerate or resolution in the second dropdown. Higher resolutions will give you more detailed images, and higher framerates will give you more responsive previews, but at the cost of requiring a more powerful computer.
If you don't see the camera you want to use, make sure it's connected. Check our Camera Troubleshooting or email support for more help.
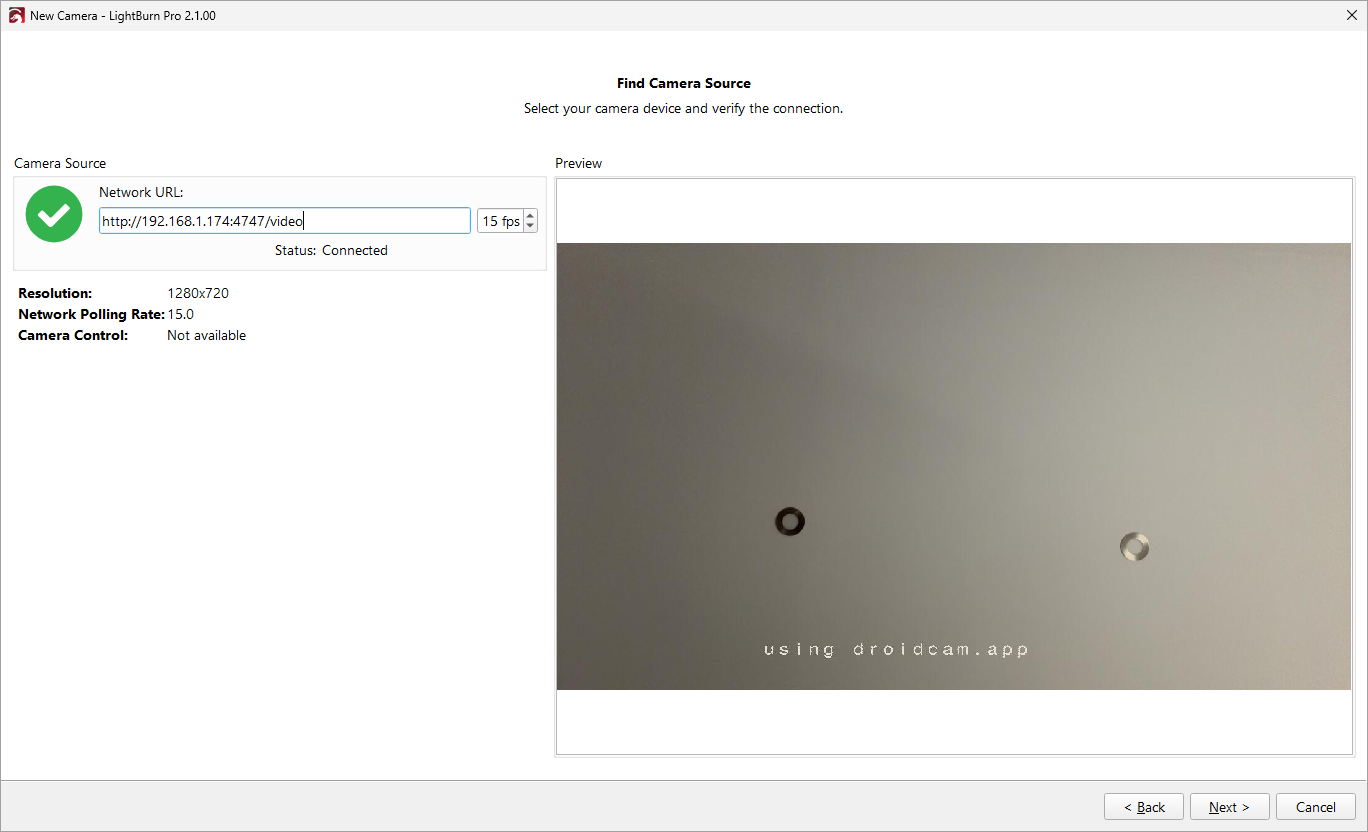
To connect to your network camera, type the URL for the camera feed into the box under Network URL and set the framerate you want to use. Higher framerates will give you more responsive previews, but at the cost of requiring a more powerful computer.
If you can't connect to your camera, check that you've entered the URL correctly, and that your video feed is accessible. Check our Camera Troubleshooting for additional help with getting the correct URL or email support for help.
Select the camera that matches your hardware and click Connect to continue to the Edit Camera screen, where you'll make sure the computer can find the camera, preview the camera feed, and manage lens calibraton and workspace alignment.
Camera presets currently support:
- Creality Falcon A1
- Thunder Laser Vision
- WeCreat
- xTool P2
3. Calibrate and Align Camera Lens
After selecting your camera type and finding your camera source, LightBurn will walk you through the steps to calibrate your camera lens and align your camera to your workspace.
This will look a little different depending on how you added your camera:
After adding a USB or Network camera, LightBurn takes you to the Calibrate Camera Lens screen.
After loading a Camera Preset, LightBurn takes you to the Edit Camera screen, where you can manage lens calibration and workspace alignment.
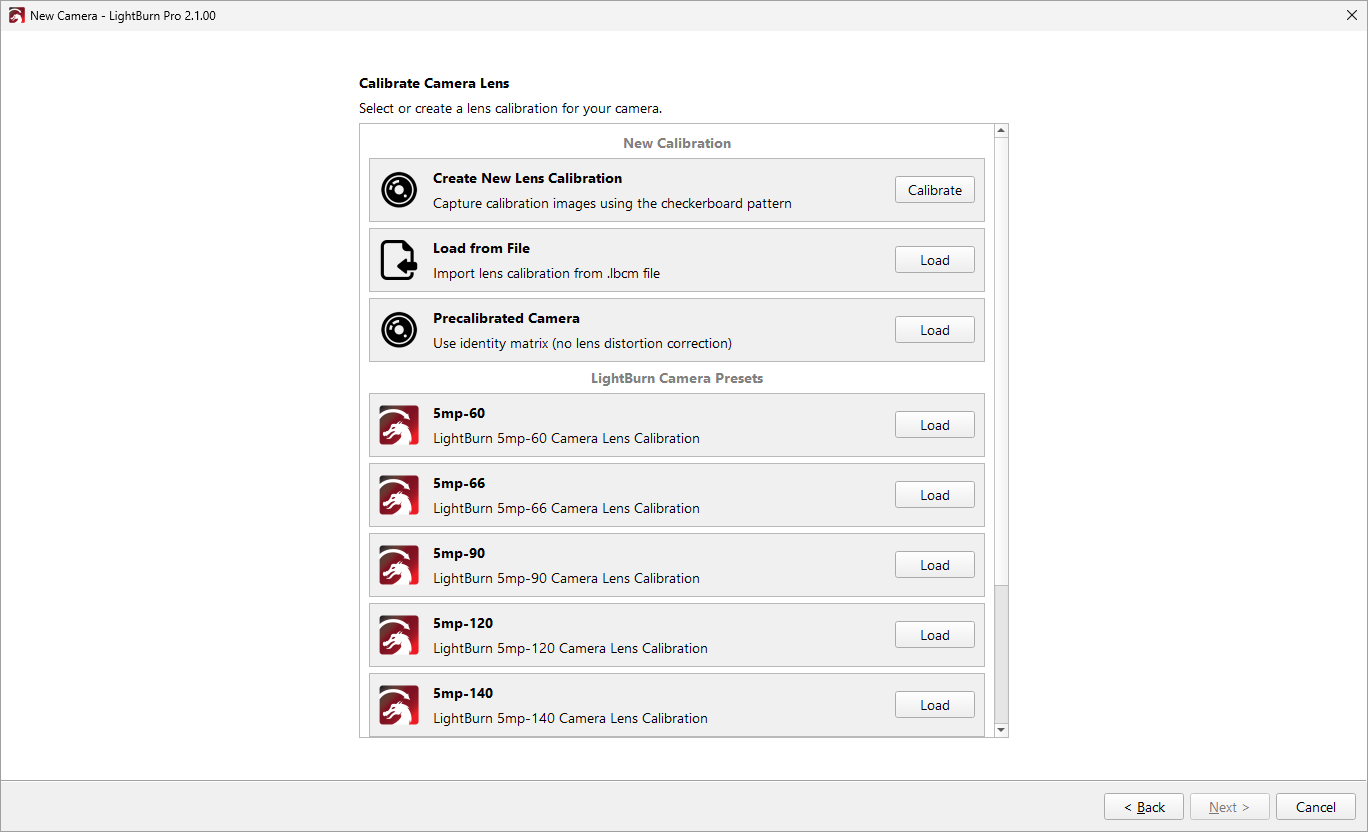
There are a few paths you can take for lens calibration.
- Create New Lens Calibration will walk you through calibrating your camera lens yourself.
- Load From File will import a camera calibration from a
.lbcmfile, which you can create by exporting the camera settings from an existing camera setup. - Precalibrated Camera is for cameras that are already calibrated and don't require additional distortion correction.
- LightBurn Camera Presets will automatically apply the appropriate settings for cameras purchased directly from LightBurn.
Regardless of which one you choose, you can follow the on-screen directions or jump ahead to our Camera Lens Calibration page.
Import an Existing Camera
If you've already set up your camera before and exported your configuration, then congratulations! You get to do this on easy mode.
Click the Import Camera button to get started.
Are you importing a camera from an older version of LightBurn?
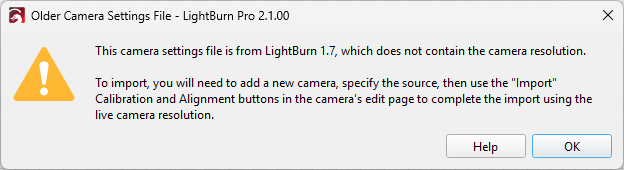
If you're importing a camera into LightBurn 2.1 from LightBurn 1.7 or older, you'll see the following Older Camera Settings File warning.
This Camera settings file is from LightBurn 1.7, which does not contain the camera resolution.
To import, you will need to add a new camera, specify the source, then use the "Import" Calibration and Alignment buttons in the camera's edit page to complete the import using the live camera resolution.
You can still import your camera, but there is an extra step to make it work:
- Create the camera, following the directions in Step 1 and Step 2 of Create a New Camera. Don't worry about Calibration and Alignment, you'll import those.
- Once you've added the camera and connected to it, you'll be able to import the Lens Calibration and Camera Alignment from your camera settings file, as described in Import Calibration and Import Alignment.
Why did this happen?
You're seeing this message because the older camera settings file you're using doesn't have information about the camera resolution, so LightBurn can't import it in one step. Once you create the new camera in LightBurn 2.1 and connect to it, LightBurn has the information it needs to be able to import the Lens Calibration and Workspace Alignment.
1. Select Your LightBurn Camera File
A LightBurn Camera File has the .lbcm extension and contains information about your camera.
In the file picker that opens when you click Import Camera, find and select your .lbcm file.
2. Edit Camera
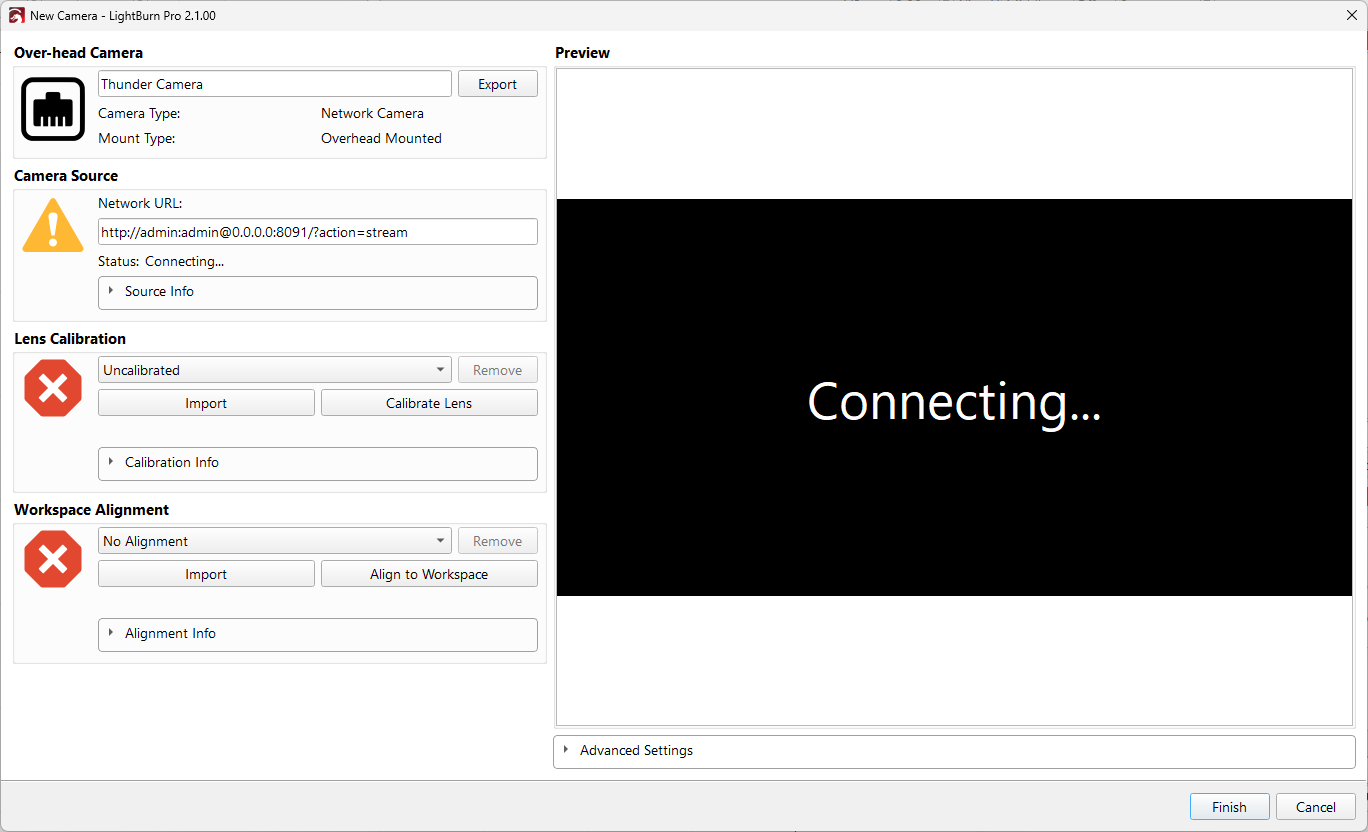
After importing your camera, you'll be taken to the Edit Camera window. You'll probably want to change the name of the camera in the text box to something a little more descriptive than "Camera", especially if you'll be using more than one.
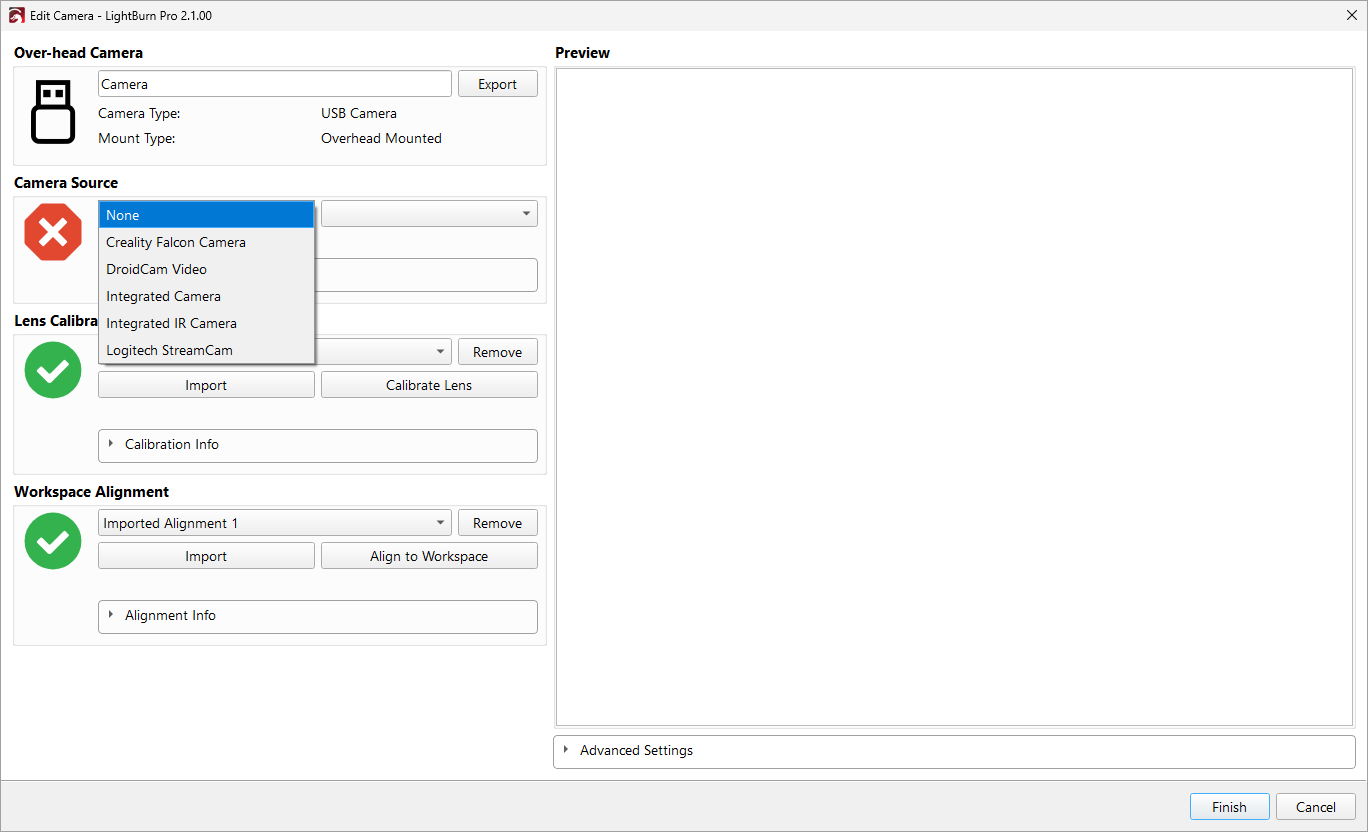
Because you've imported your existing camera data, Lens Calibration and Workspace Alignment should both have green checkmarks and show the imported calibration data. If you got the Old Camera Settings File warning described above, you'll need to select your camera source from the dropdown under Camera Source. Otherwise, that should also have a green check mark and show the camera name.
The screenshot here shows the Edit Camera window after getting the Old Camera Settings warning - to fix it, you would select the appropriate camera option under Camera Source.
3. You're (Probably) Done
You can certainly redo your Lens Calibration and/or Workspace Alignment if you want, for instance if you weren't happy with your results previously, but your camera should be set up and ready to go as soon as you click the Finish button.