Cameras Window
About The Cameras Window
Use the Cameras window to view and manage connected cameras. To enable the Cameras window, go to Window → Cameras.
By default, the Cameras window floats over the Workspace. You can dock it by dragging it to the top or side of the LightBurn window.
Click any option in the image below to jump directly to more information about it, or scroll down for a list of options and descriptions.
Using the Cameras Window
Overlay
Update Overlay
Click Update Overlay to update the background of the Workspace with your camera image.
Trace Overlay
Click Trace Overlay to open LightBurn's Trace Image tool and trace directly from the camera.
Overlay DPM
Use the Overlay DPM slider to increase or decrease the resolution (in Dots Per Meter) of the camera overlay.
Overlay Opacity
Use the Overlay Opacity slider to increase or decrease the opacity of the camera overlay. Higher (more opaque) values make the overlay easier to say, while lower values fade out the overlay and make it easier to see your own artwork.
Overlay Width / Height
Adjust the size of the camera overlay.
X Shift / Y Shift
Shift the camera image in the X and/or Y directions, if the entire image is shifted over from where it should be.
Cameras
This section will show you all the cameras you've added to LightBurn, including previews. See Managing Cameras for more information.
Camera Preview
When a camera is connected and is expanded in the Cameras Window interface, you can see a preview of the camera feed here.
Camera Status Area
| Name | Description |
|---|---|
| Arrow | Use this to expand or collapse individual cameras. |
| Streaming Indicator (Green Dot) | If a camera is connected and streaming video to LightBurn, a green circle appears in the status area. |
| Update Overlay | Click this button to update the Camera Overlay. |
| Camera Connection Indicator | Has a red background if the camera is disconnected. Click to open the Edit Camera window. |
| Camera Calibration Indicator | Has a red background if the camera is uncalibrated. Click to open Camera Calibration. |
| Camera Alignment Indicator | Has a red background if the camera is not aligned to the workspace. Click to open Camera Workspace Alignment. |
Context Menu
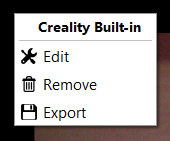
Right-click in the Camera section to open the context menu. The first line on the menu tells you which camera you're working with. In addition:
- Edit opens the Edit Camera Window for the selected camera.
- Remove will remove the selected camera.
- Export will export a LightBurn Camera File so you can back up your camera settings or copy them to a different LightBurn installation.
Camera Settings
The Camera Settings section contains settings for adjusting your camera image.
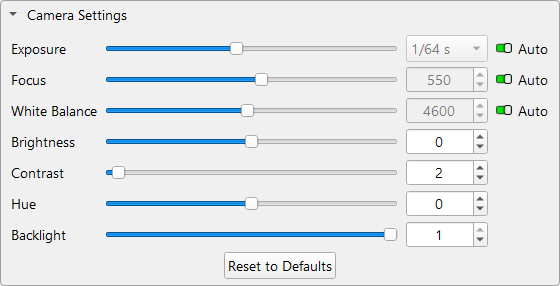
The default settings here are chosen to work for most setups, but you can adjust your settings using the sliders or numeric entry boxes. For Exposure, Focus, and White Balance, you can also enable or disable automatic adjustment here.
Advanced
The Advanced section contains less commonly used camera settings.

Preview FPS
Use the dropdown to set the framerate of your camera. Higher numbers capture more images per second, giving you a more responsive preview, but also increasing the demand on your computer.
If your camera seems to be slowing down your computer, try lowering the framerate. On the other hand, if you've got a powerful computer and want a more responsive preview, you can try increasing the framerate.
Capture Image
Use either of these buttons to capture the image from your camera and insert it into your LightBurn Workspace. The Calibrated button will insert the image after applying your lens calibration, and Uncalibrated will ignore your lens calibration.
Add Camera
Click the Add Camera button to open the New Camera Wizard and set up a new camera in LightBurn.
Import Camera
Click the Import Camera button to import a pre-configured camera with a LightBurn Camera File (.lbcm).
Context Menu
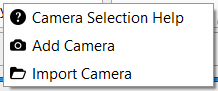
Clicking anywhere in the Cameras Window other than inside a camera preview will open a context/right-click menu.
- Camera Selection Help will open the Camera Selection Help window to help you find an appropriate camera.
- Add Camera will open the wizard for Adding a Camera.
- Import Camera will open a dialog box to Import a Camera