Repeat Marking
The Repeat Marking tool enables the use of a Rotating or Linear axis table with Galvo lasers, to move parts past a laser while running repetitions of identical jobs.
By specifying an Increment of movement as well as a desired number of repetitions, or Count, you can command your laser to mark a design, move an external axis by the specified increment, then run the project again, and repeat that process until it has completed the set number repetitions.
To open the Repeat Marking tool, go to Laser Tools → Repeat Marking.
Warning
The Repeat Marking tool is separate from, and incompatible with, Rotary Mode. When using Repeat Marking, make sure that Rotary Mode is disabled.
External Axis Setup
Before you use Repeat Marking for the first time, you must configure the settings for the Rotating or Linear axis table connected to your laser.
Click the Setup button in the Repeat Marking window to open the External Axis Setup window.
Click any option in the image below to jump directly to the relevant section for that option, or scroll down for a list of options and descriptions.
Motor #
If your laser has two motor outputs, select which is connected to your Rotating or Linear table.
Axis Type
Select whether your device is a Rotating table that can make continuous, complete revolutions, or a Linear table that moves back and forth along an axis.
Axis Settings
Orientation
If your Axis Type is set to Linear, select whether it is orientated along your work area's X or Y Axis.
Reverse Direction
Enable Reverse Direction to tell your device to travel in the opposite direction it travels by default, without changing its orientation or rewiring it.
Steps Per
This value is the number of pulses required for the stepper motor to make one complete revolution.
Your table's manufacturer should provide you with the correct value for your device, or you can access its stepper driver and read or adjust the value there.
Unit Count
The amount of movement of the table that results from one complete rotation of the stepper motor.
- For Rotating tables the unit of movement is Rotations.
- For direct-driven tables, this value should be set to 1.
- For belt-driven tables, the value may vary based on gear ratio.
- For Linear tables the unit of movement is mm.
- This value should be set to match the amount of linear movement of your table that results from one complete revolution of its stepper motor.
Your table's manufacturer should be able to provide you with the correct value for your device — if you're unsure consult the documentation for your device, or contact the manufacturer.
Steps Per Unit
This value is automatically calculated by dividing your Steps per value by your Unit Count.
The calculated value equals the number of steps required to move your table in a single increment of your Unit:
- 1 complete rotation for Rotating tables
- 1 mm for Linear tables
Min Speed
The minimum speed at which in the table will travel, in Steps/second.
Max Speed
The maximum speed at which in the table will travel, in Steps/second.
Acceleration Time
Time to accelerate the table to full speed, in milliseconds. Lower values mean the table will accelerate faster.
Return to Start Position
Enable Return to starting point to have the table return to its starting point after the job is complete.
Return Speed
The speed at which the table will return to its starting position, in Steps/second.
Test
For Rotating tables, when the Test button is pressed, and both Steps per and Unit Count are correct, the table will rotate a full 360 degrees, pause, then rotate back to the starting point.
For Linear tables, when the Test button is pressed, and both Steps per and Unit Count are correct, the table will move 50 mm, then back to its starting point.
Homing
Home on Start
Enable Home on start to have LightBurn send a command to home a Linear table at the start of a job.
Note that homing may require special wiring — do not enable this setting if you are not sure if your table is wired for homing.
Speed
The speed at which the table will home.
Timeout
Amount of time before the table will abort the homing process.
Repeat Marking Window
Use the Repeat Marking window to jog your table into its starting position, set the number of repetitions it will run, and determine the amount of movement between each repitition.
Click any option in the image below to jump directly to the relevant section for that option, or scroll down for a list of options and descriptions.
Count
The number of times (repetitions) your laser will mark a given set of graphics.
Your laser will mark a single set of graphics once, then the table will rotate or move, and the laser will mark the same set of graphics again, and so on until it reaches the Count you've set.
Increment
For Rotating tables, the angle, in degrees, to rotate the axis between repetitions.
For Linear tables, the distance, in millimeters, to move the axis between repetitions.
Calculate
The Calculate button is only available if the axis type in External Axis Setup is set to Rotating, and can automatically determine the correct rotation Increment based on the number of positions in your Rotating table. To use it, set Count to the number of positions in your table, then click Calculate.
Afterward, you can change the Count to any other number of repetitions, but make sure not to click Calculate again, or the correct Increment value will be lost.
Pause After Move
If your Rotating table wobbles when it stops, adding a pause here gives it time to settle before marking starts again.
Completed
The total number of runs of a given project, from the time you first open the Repeat Marking window, until you close it. Use this number to track the total number of parts you have marked.
Clear
Resets the Completed count to zero.
Positioning
Position
The value displayed next to Pos. shows the current location of the Rotating or Linear table.
Go to Zero
Commands the table to return to the zero point on the axis.
Jog
The Jog << / >> buttons command the table to turn (or move) forward or backward in the increment set in the field above the Go to Zero button.
Set Zero
Sets the current position of the table as the zero point.
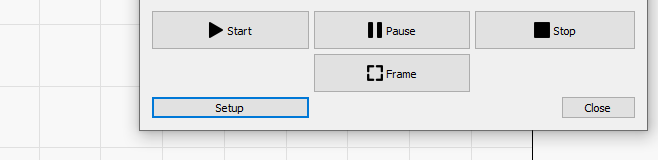
Start, Pause, Stop
These options work exactly as they do in the Laser Window during regular marking operations to begin (Start), temporarily pause (Pause) a job until your press Resume, or permanently halt (Stop) a job.
Frame
Framing works as it does with regular marking operations.
Tip
The Rotating or Linear table will not jog to Frame each repetition — to verify that your Increment and Steps per rotation or Steps per mm values are correct before running a job, try Jogging the table by the amount you've set for your Increment, and Framing multiple positions on the table.
Setup
Click the Setup button to open the External Axis Setup window and configure the settings for your table table.