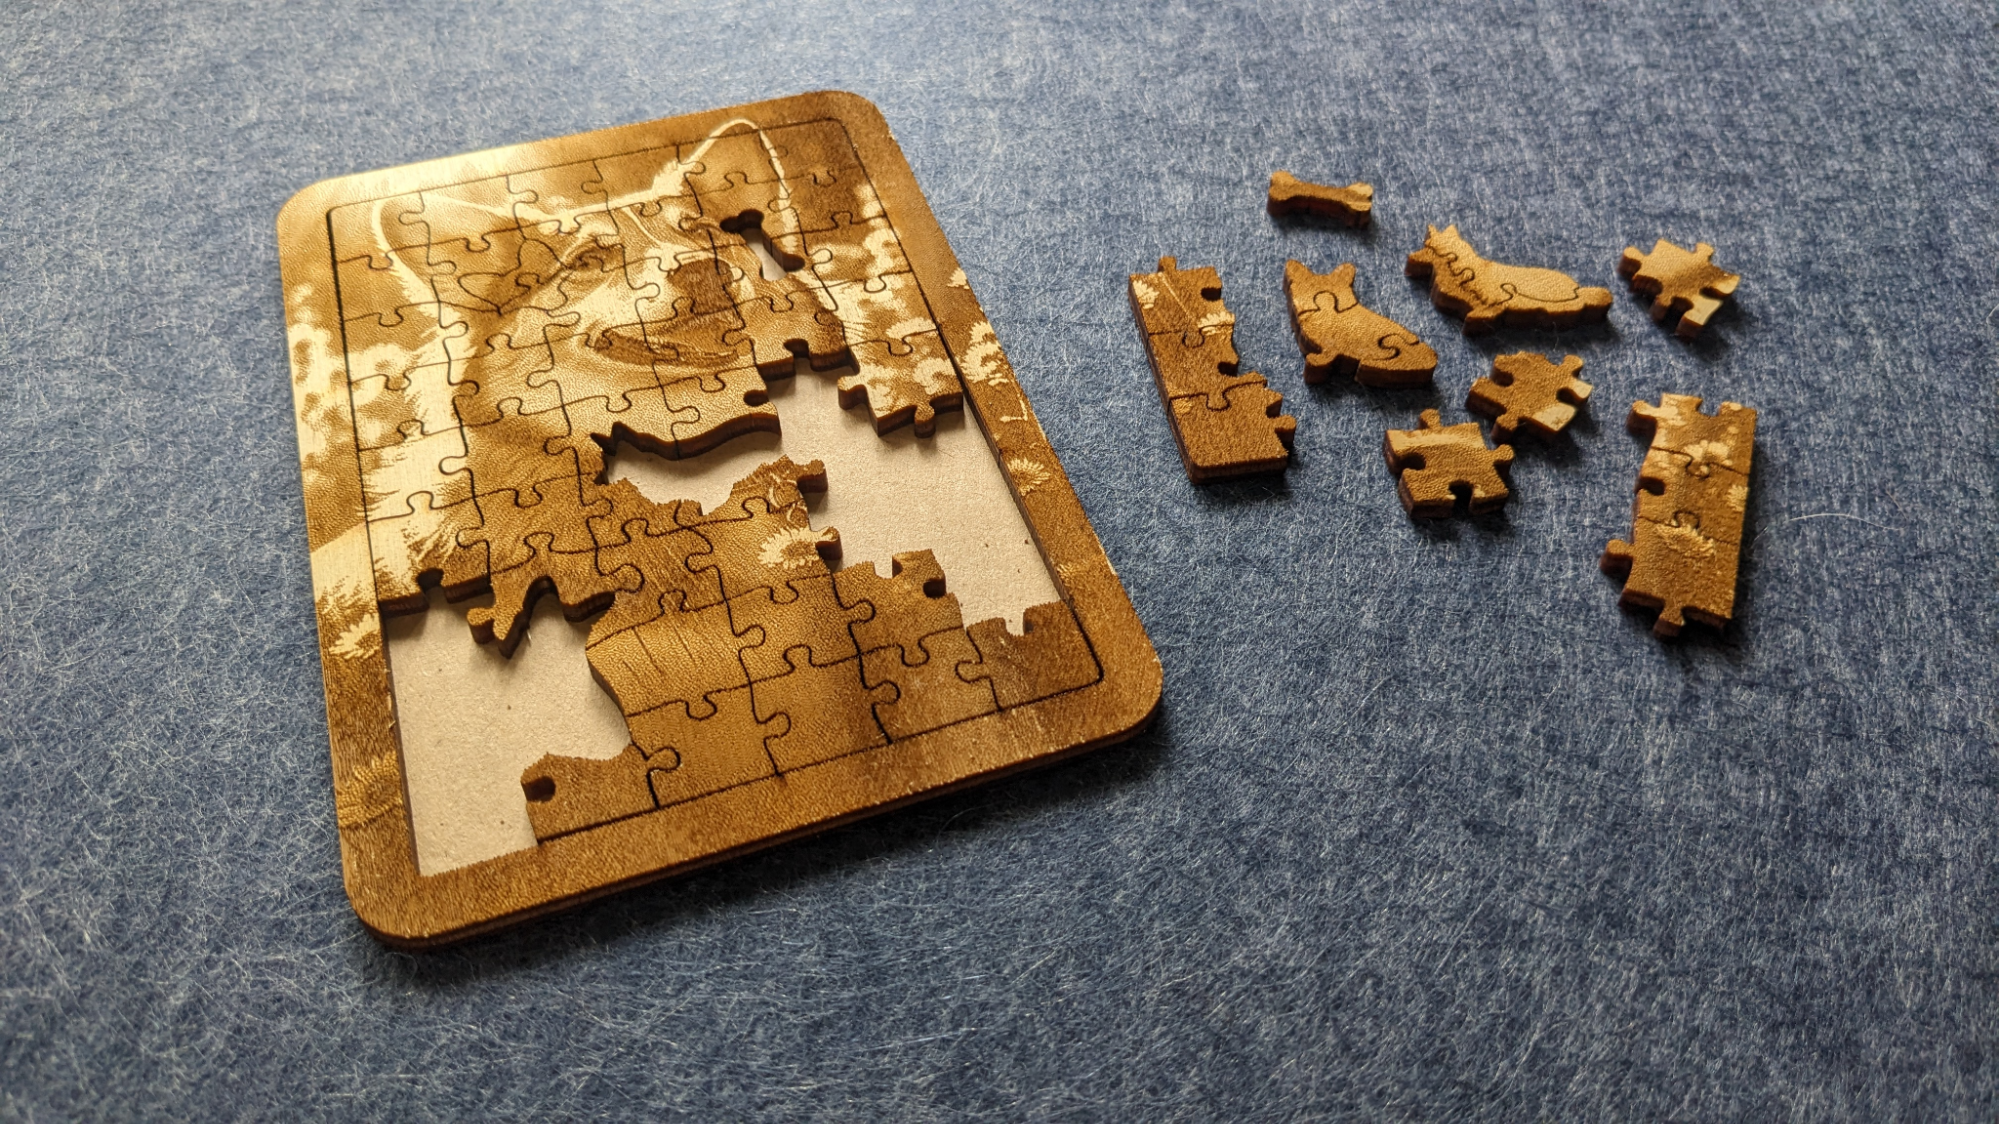
Purrfect Present: Pet Puzzle Postcards
Birthdays, holidays, illnesses, and engagements - no matter the occasion, people love seeing their pets! And most of us don't mind a little puzzle either...
This quick and personalized gift is the perfect project for a beginner. Design it, cut it, and send it to your loved one. Imagine putting together a bunch of random puzzle pieces and slowly realizing it's your very own furry friend!
What You'll Learn
- How to use a free puzzle generator and import it into LightBurn.
- How to add a border to your puzzle with the Offset tool.
- How to create fancy custom-shaped pieces with the Draw and Node Edit tools.
- How to add your photo and crop it to the size/shape of the puzzle with the Image Masking tool.
- How to set up your job with optimal Cut Settings.
We'll also give you a bunch of tips for how you can take what you've learned and customize it further to suit your own goals!
Materials
- Your chosen material. Roughly 1 - 2mm ( ≈ ⅛ - ¼ in) thick + corresponding cut and engrave settings: laser plywood is nice!
- If you don't know your settings for this material yet, you can read more about the image (engrave) and line (cut) settings in our Cut Settings Documentation. You might also like to use LightBurn's Materials Test Generator to automate the settings-finding process.
- An image you wish to engrave.
- You can raid the social media of the pet-parent for some good ones!
-
Dimensions of your card. If you are sending it in the mail, this will be a bit smaller than your chosen envelope.
-
I'm going to create a border for my puzzle of 8mm so the puzzle within will be 89 x 132.5mm
Steps
1. Create The Pieces
Use a free online Jigsaw Puzzle Generator, such as this one by Manual Kasten (Draradech), to create the puzzle pieces.
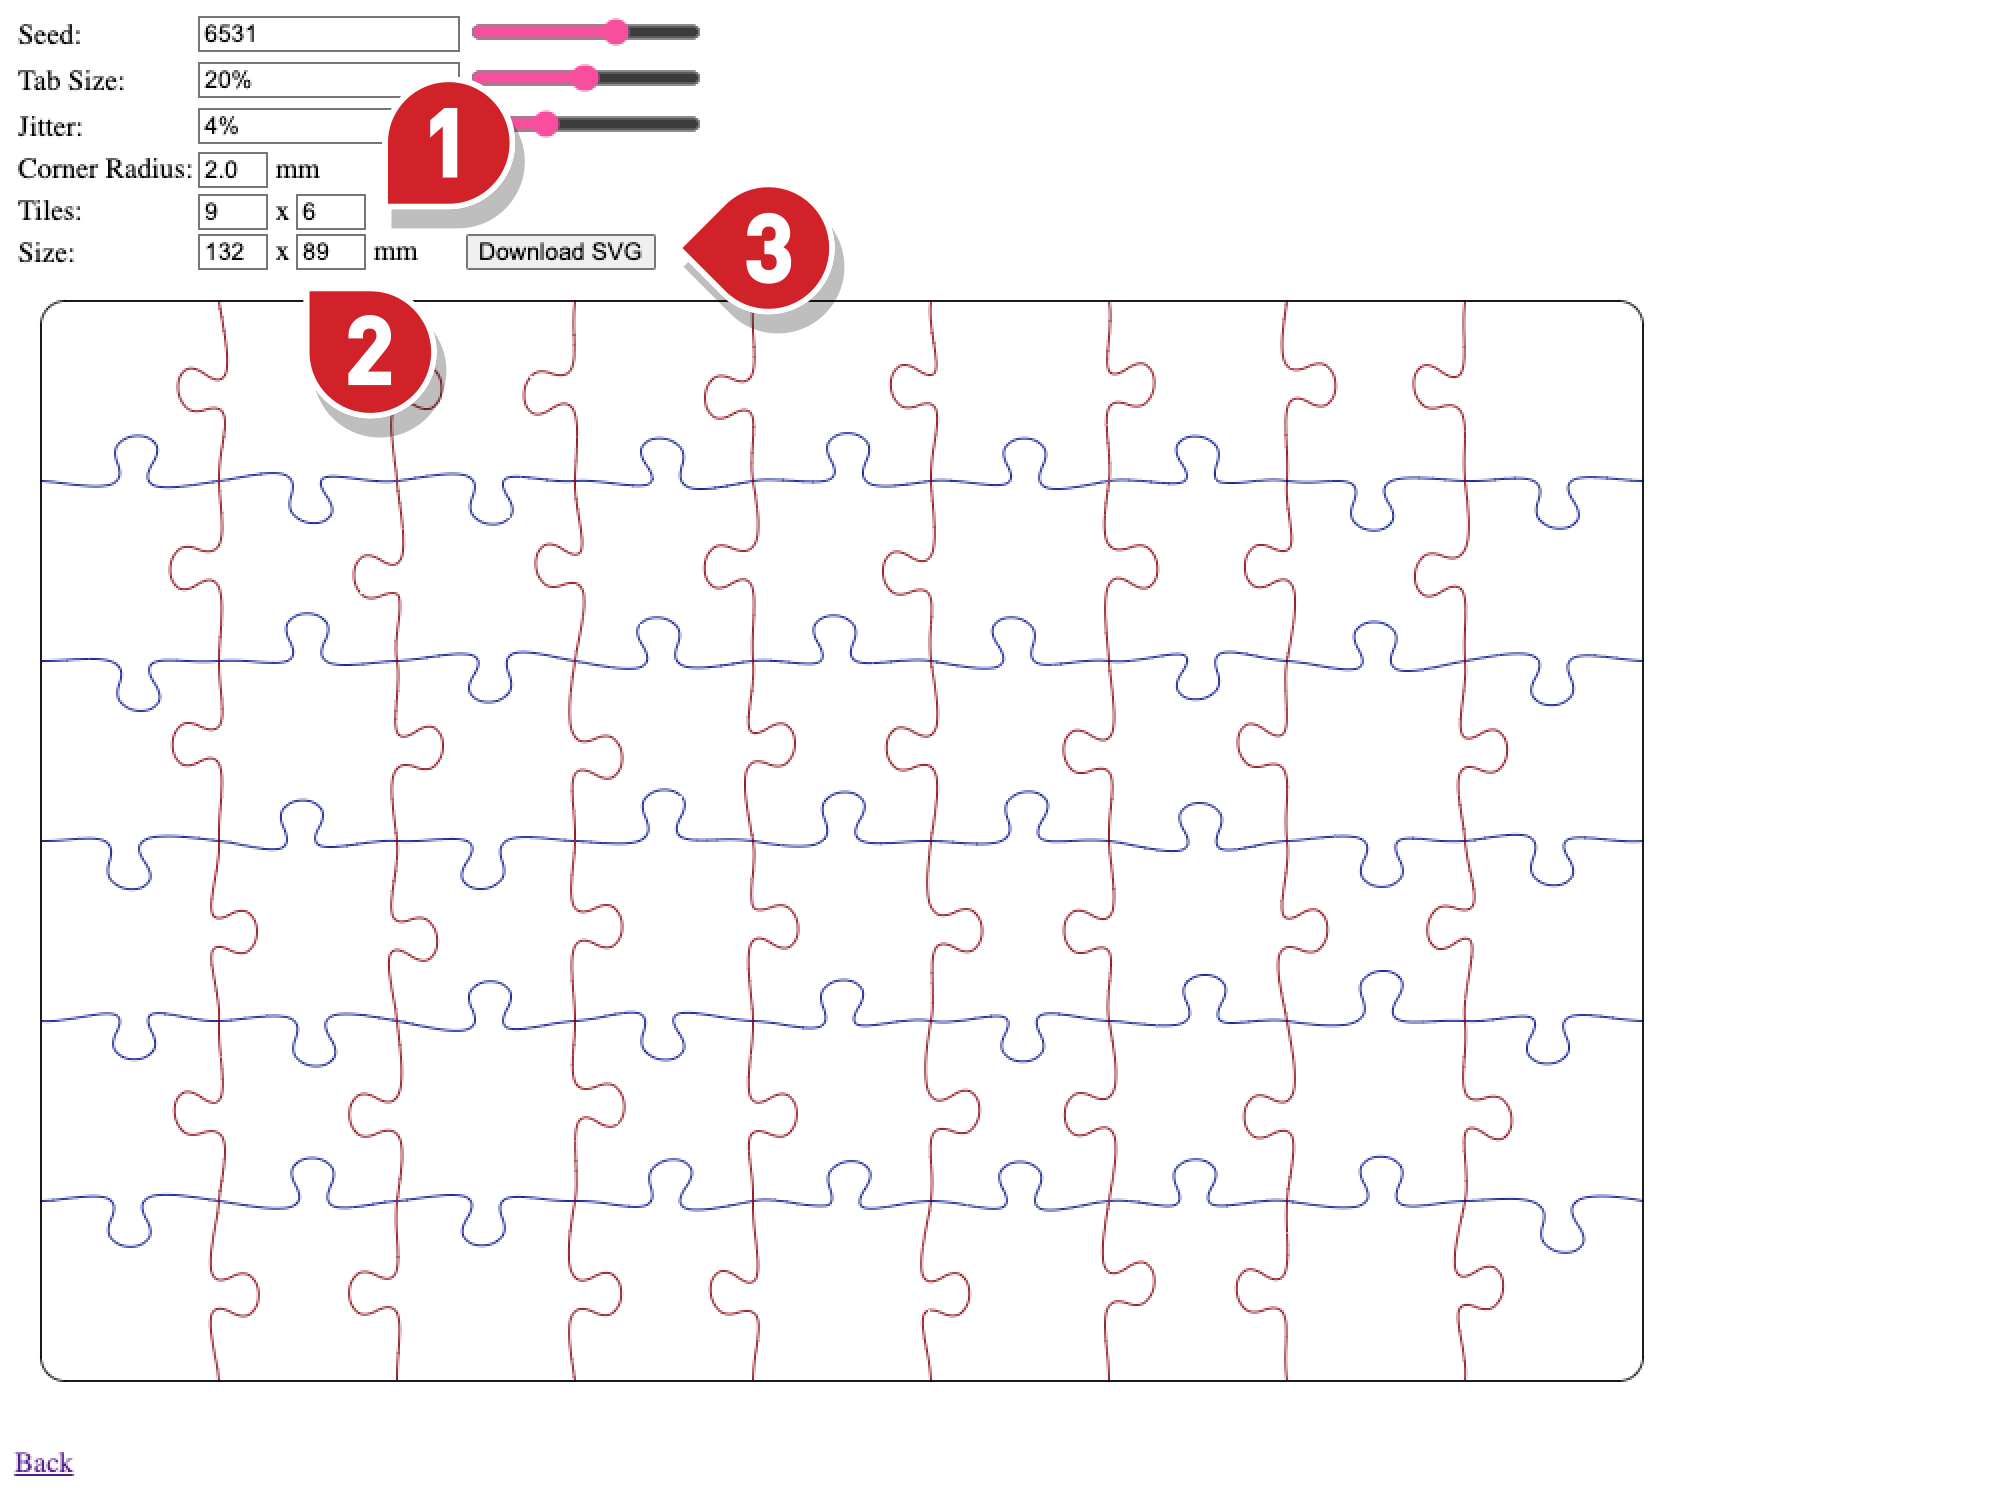
- Set the Tiles to the number of puzzle pieces you want across and down (I used 9 x 6).
- Set the Size to the width and height of your puzzle (I used 132 x 89mm)
- Click Download SVG to save the vector file to your computer.
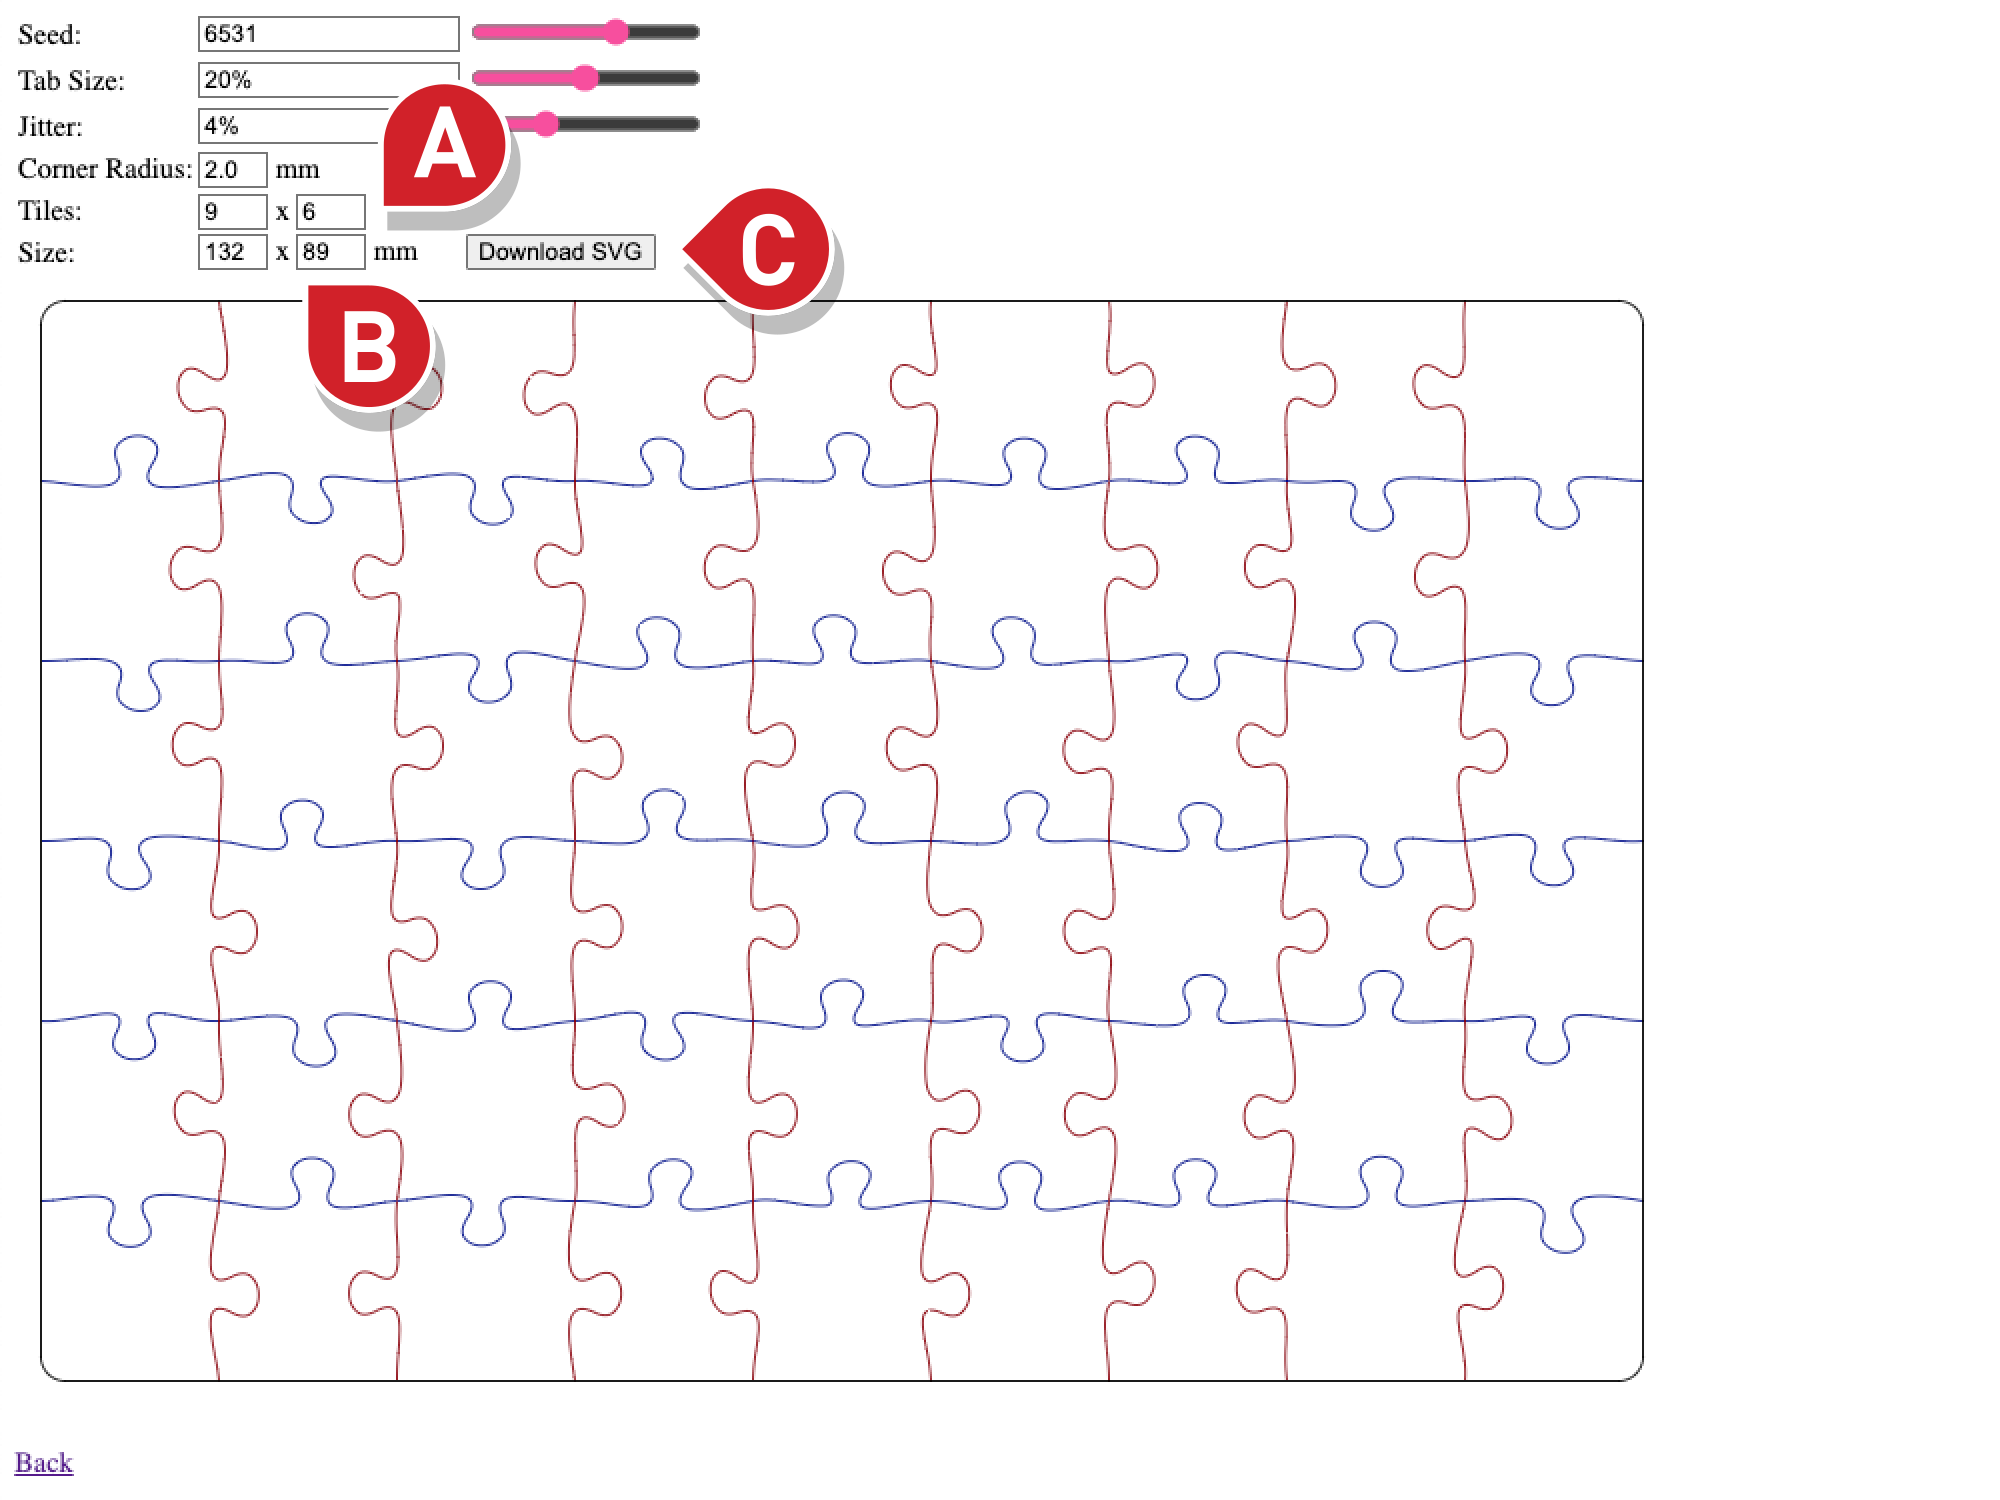
Go To The Puzzle Generator Website
2. Import The Jigsaw Into LightBurn
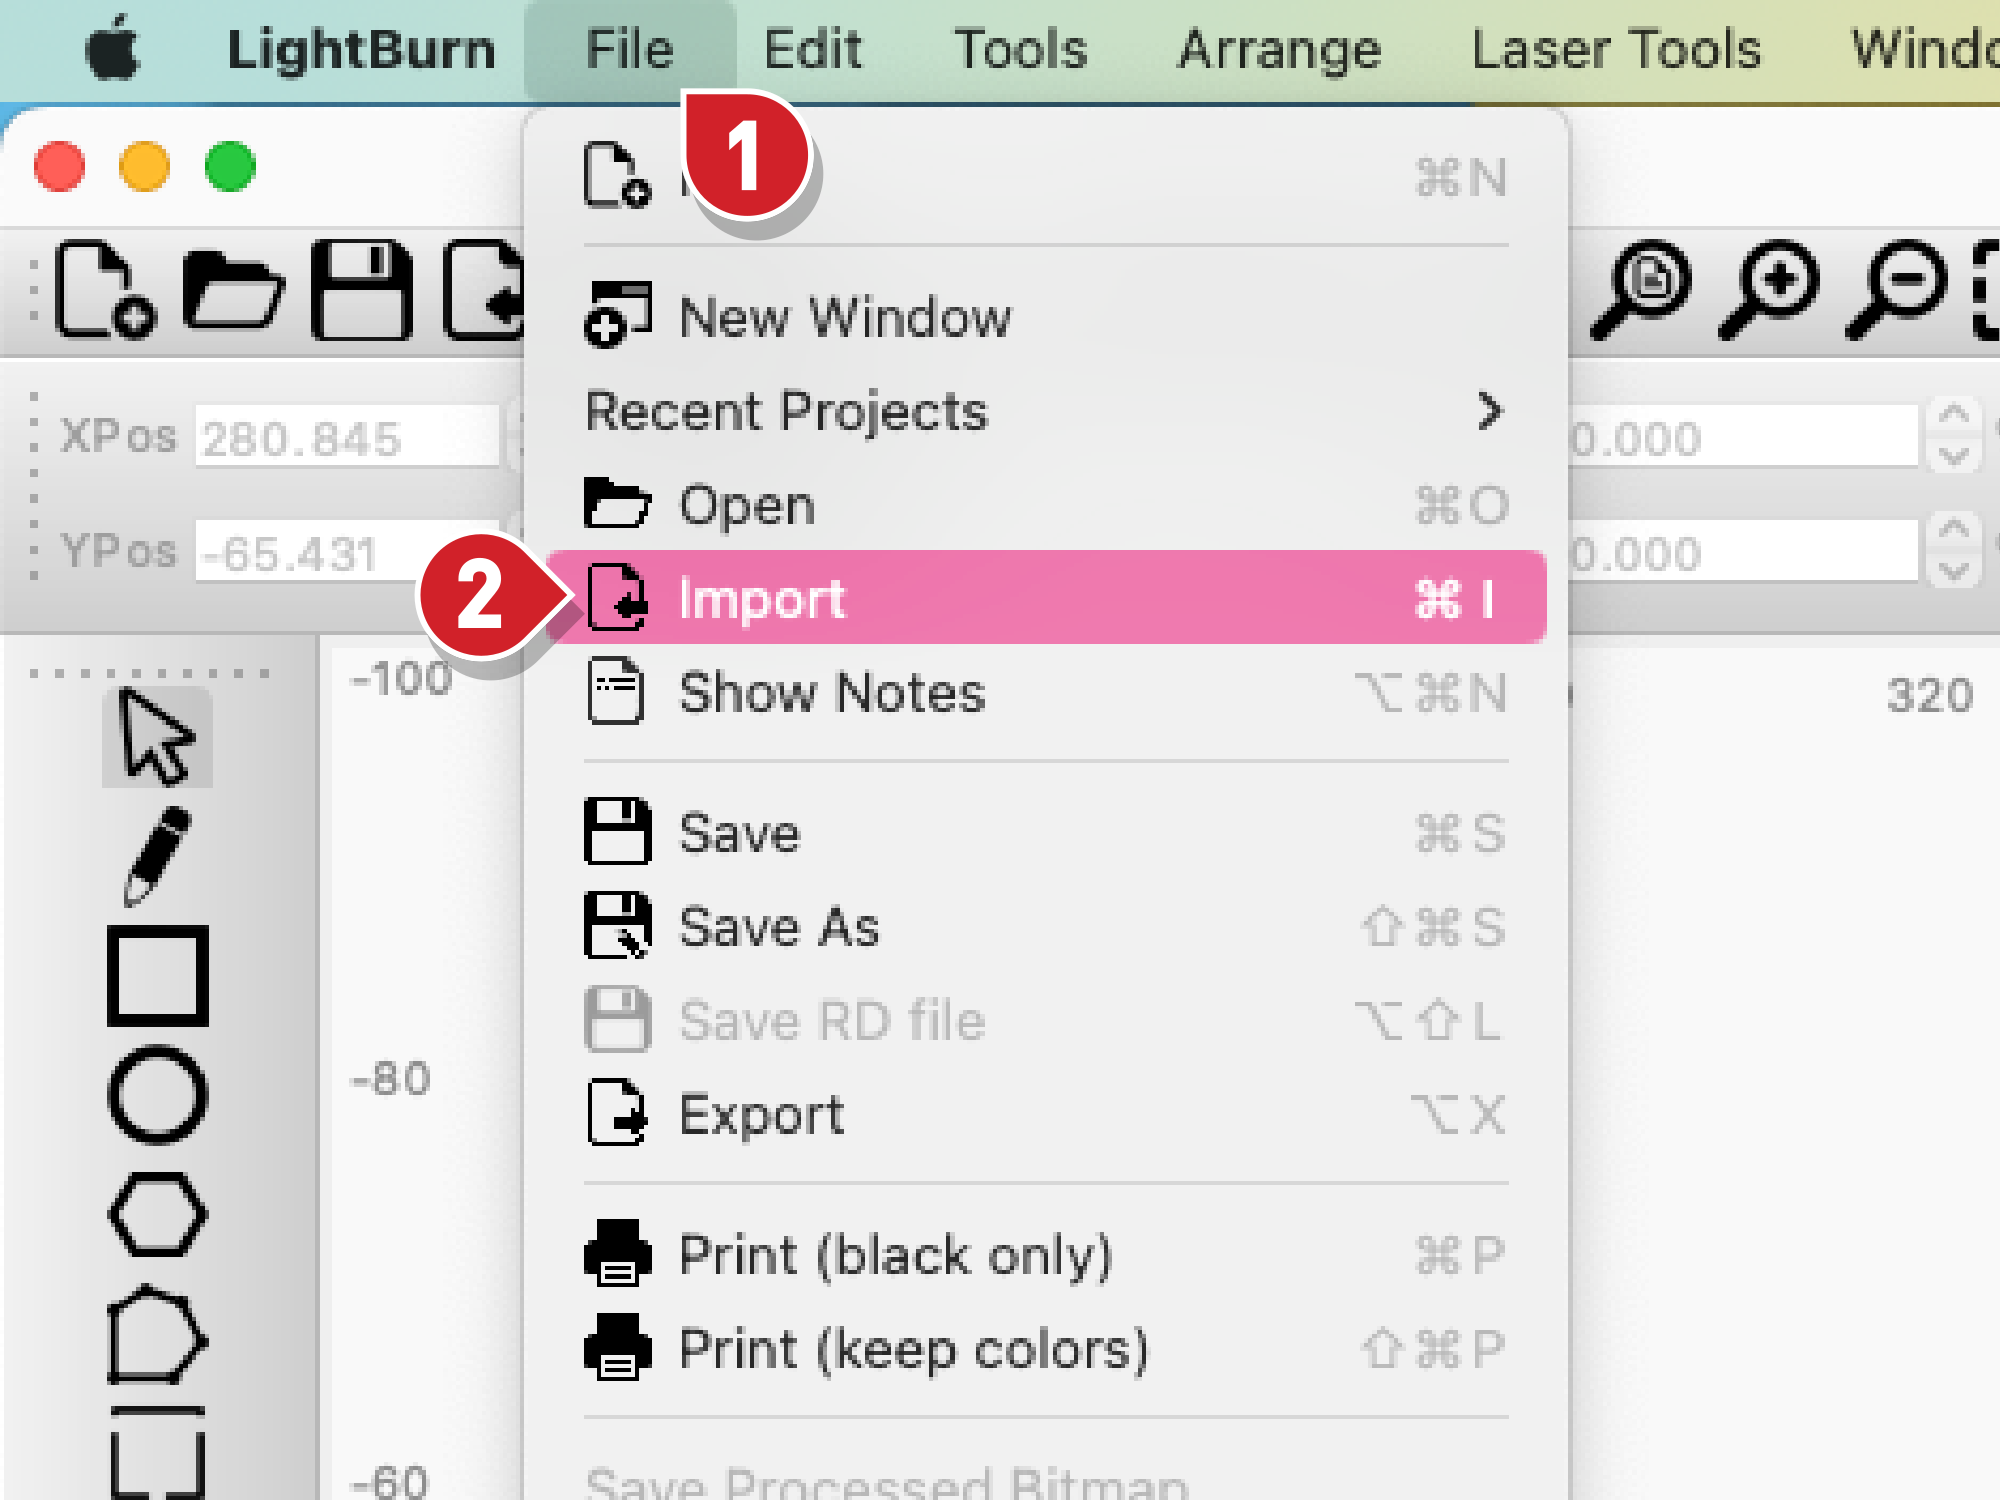
- Open LightBurn and click File → Import (or Ctrl+I / Cmd+I on your keyboard).
- Navigate to your jigsaw file, and click Open.
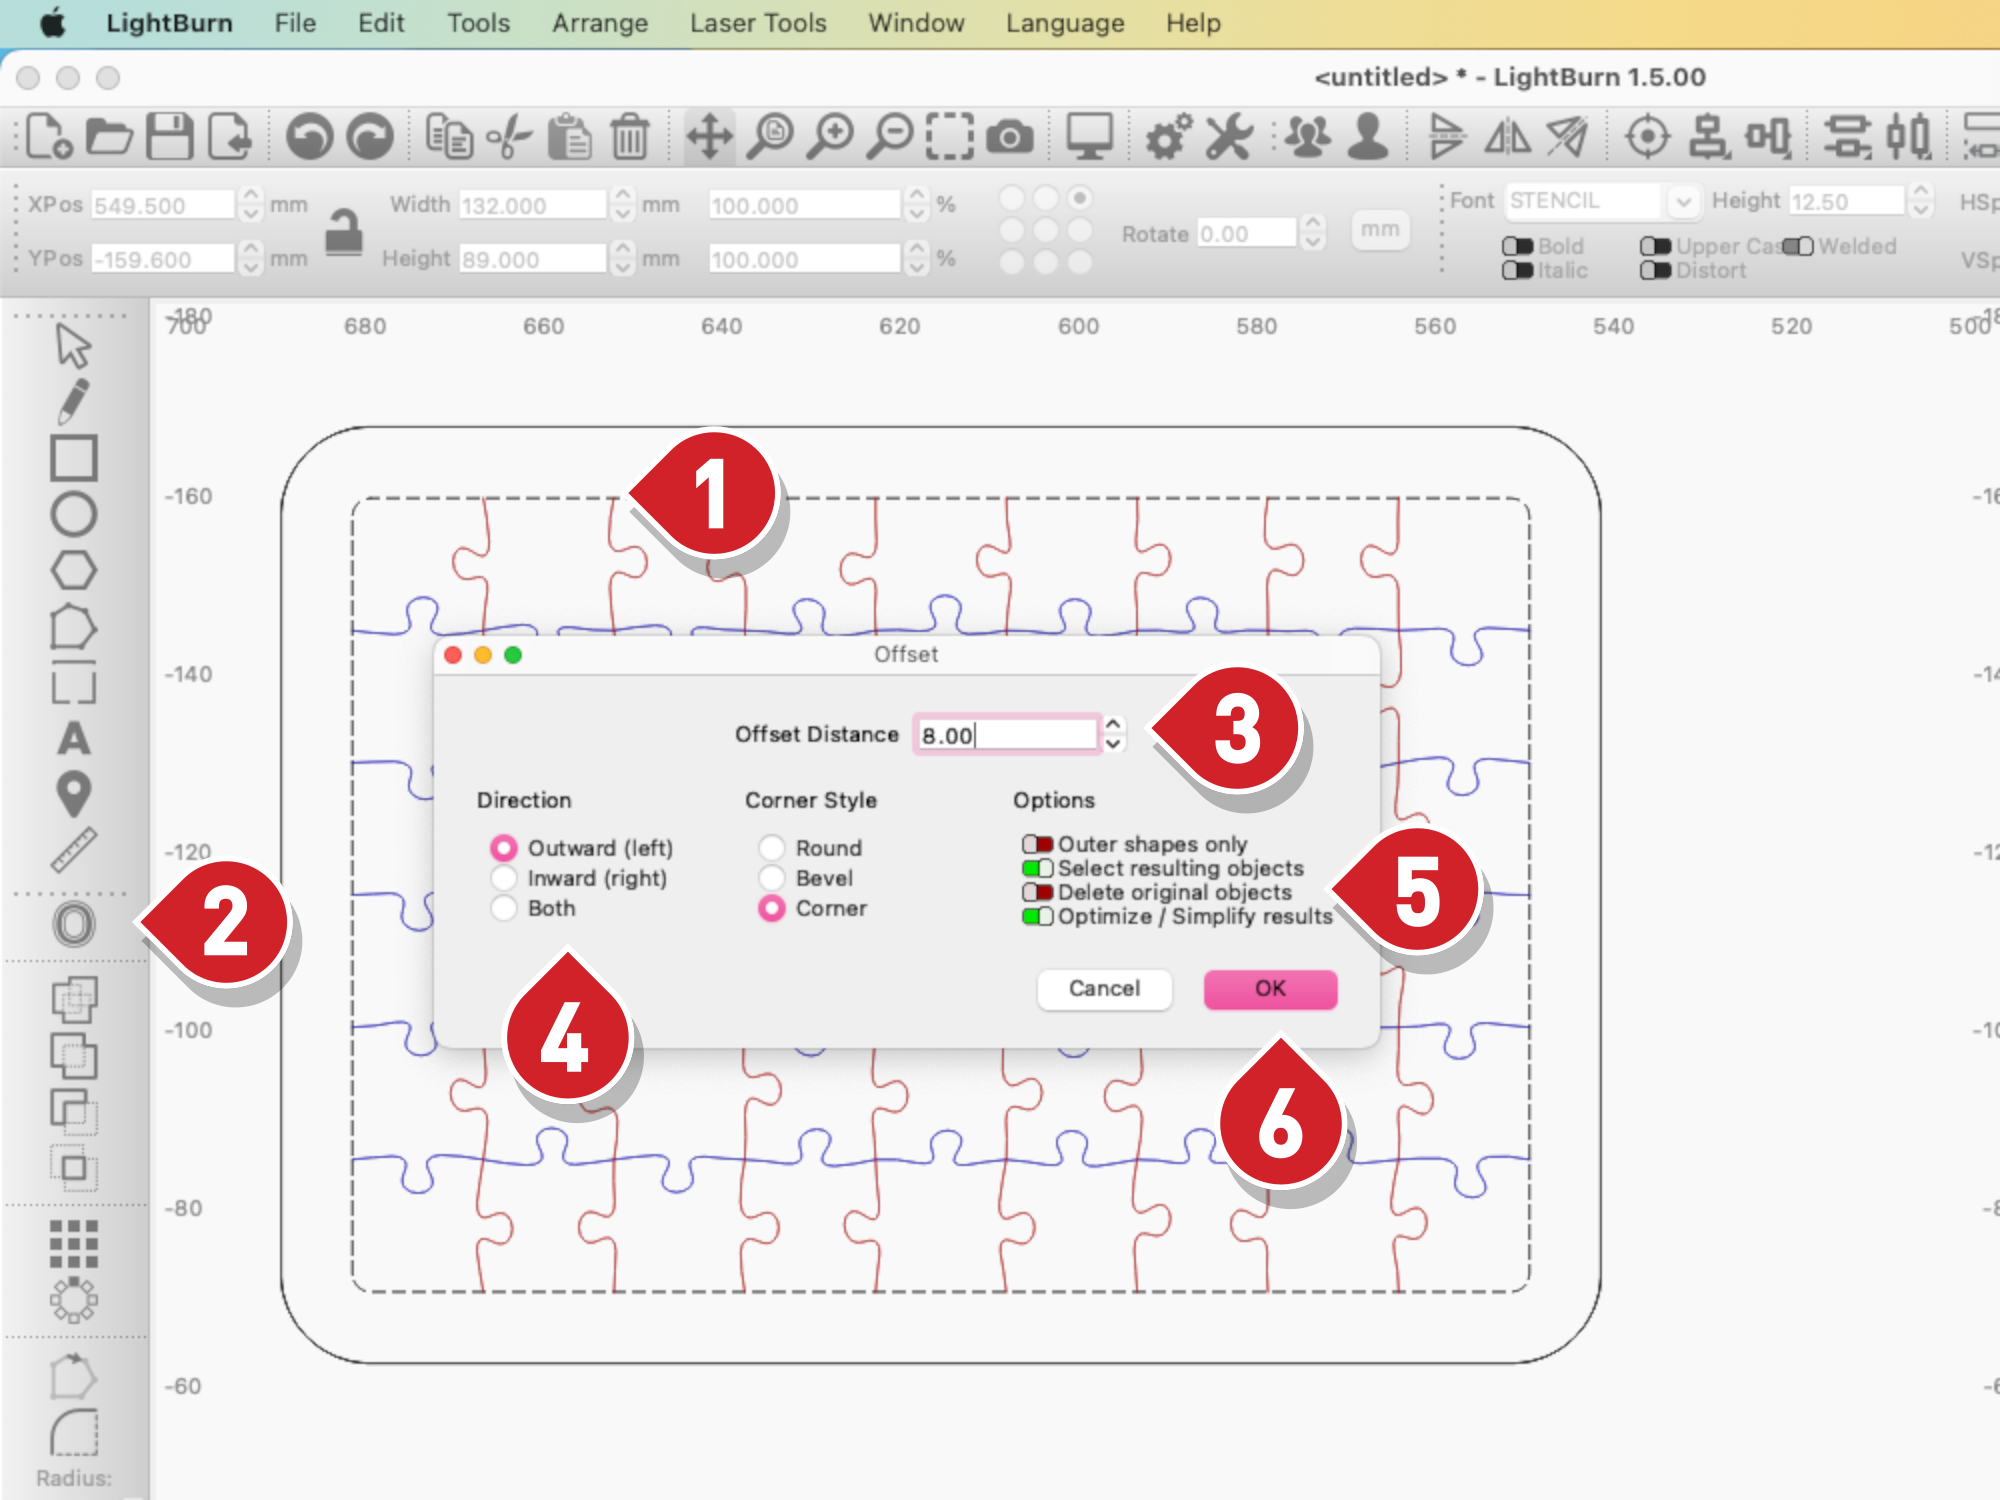
3. Create A Border Using Offset
- Click the black outline around the puzzle to select it.
- Click the Offset Tool from the toolbar on the left.
- Change the Offset Distance to the thickness of your border (in my case, 8mm).
- Ensure the direction of the offset is set to Outward
- Ensure Delete original objects is off.
- Click Ok.
4. Add Fancy-Shaped Pieces
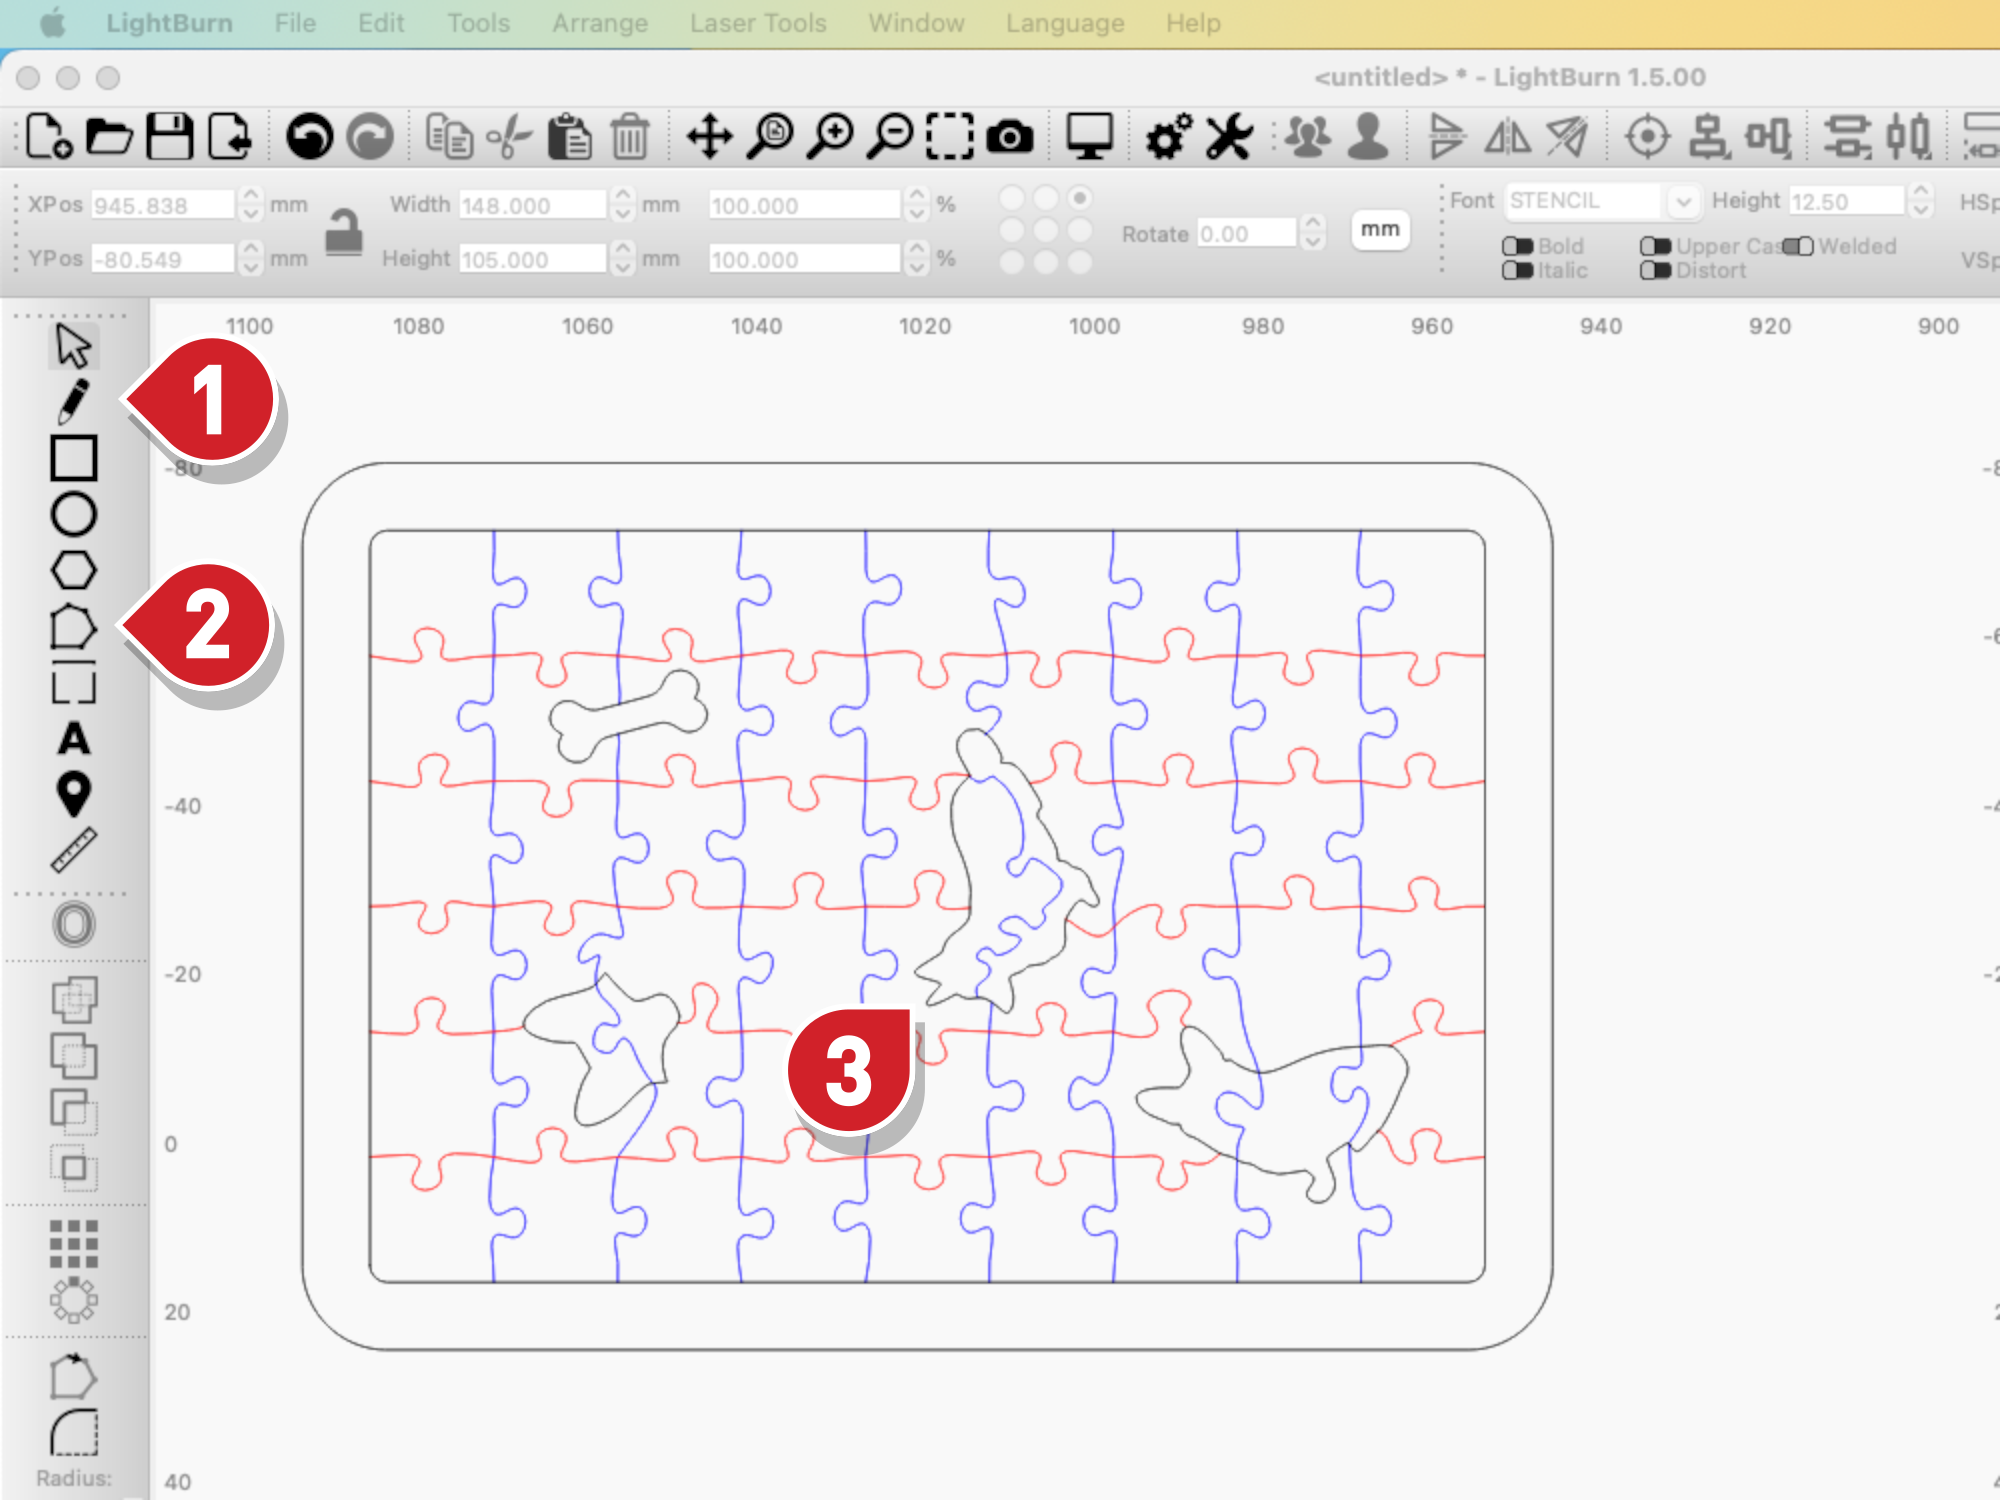
- You can create new shapes using the Draw Lines tool, or find an existing vector online from somewhere like The Noun Project and import it. You also might want to get LightBurn to trace a pixel-based image for you.
-
You can edit both the new shapes and the puzzle using the Edit Nodes tool.
Tip
You can hover over the node edit tool icon to see a list of hotkeys! The Cut Shapes tool might also be helpful.
-
As you customize the pieces, remember your shapes still need to be able to lock together, so add nubbins, and be sure not to make any parts too small, or they may end up too delicate!
5. Add The Pet Photo
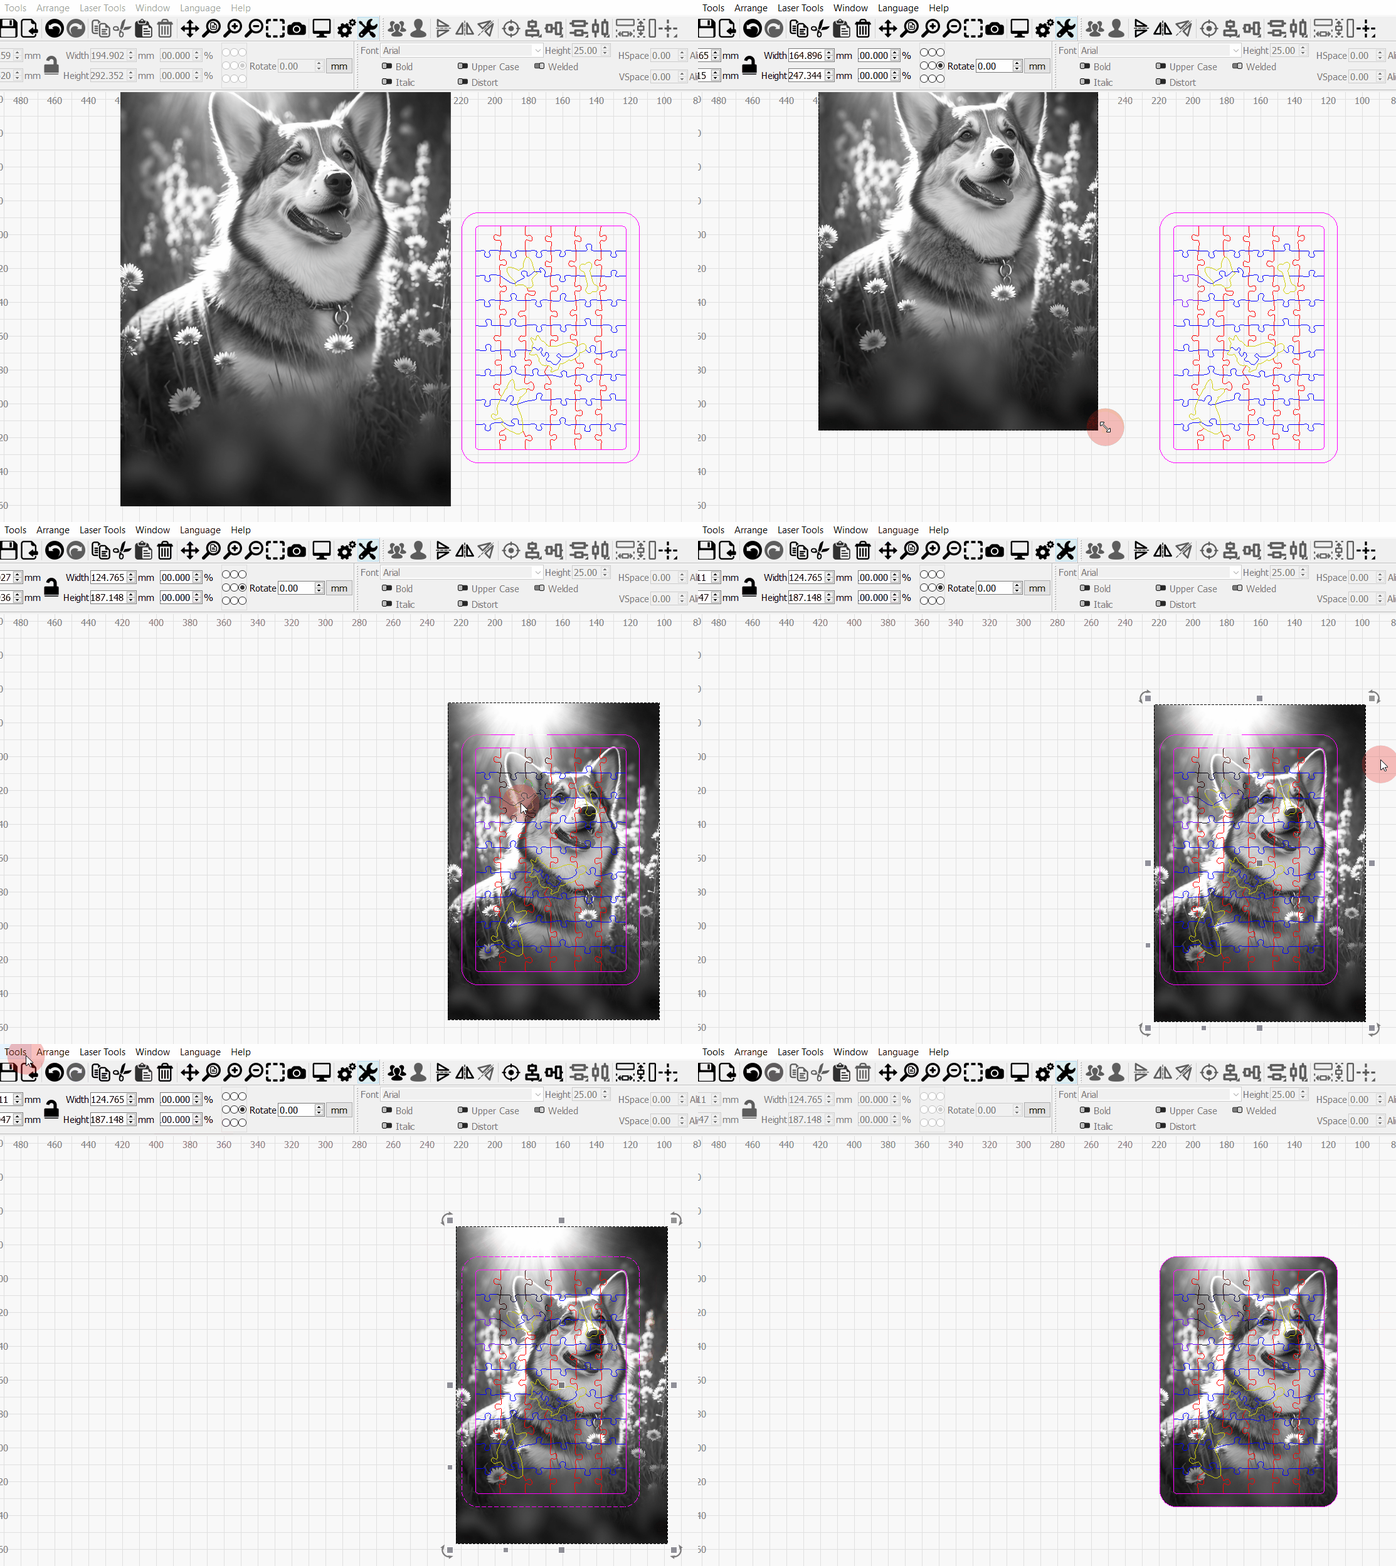
- Import the image using File → Import (or Ctrl+I / Cmd+I on your keyboard)., navigate to your pet photo file, and click Open.
- Move and scale it into position using the Transform Controls, making sure your image is at least as big as the outer border of the puzzle.
- Trim off the excess of the image to the outermost border line using the Image Masking tool. You can toggle the image to not show in the cuts/layers menu, if you're having a hard time selecting the border line.
6. Set Up The Cut
- The order of your cut layers should be as follows:
- Engrave Image
- Cut Vertical Pieces
- Cut Horizontal Pieces
- Cut Fancy Shapes
- Cut Border
- Set your cut settings appropriately for your material for each layer. If you haven't found settings for your material, you can use the Material Test Generator.
- Move your job into cut position as per your normal routine. If this is your first job, you may need to check your coordinates and job origin settings.
- Preview your job.
- Start your job.
7. Gift It To Someone You Love
Now that it's done, pop it in an envelope and send it to someone you love!
If you ever get stuck, please reach out to us , we're here to help!
Other Ideas
This is only one way to make a puzzle, you can customize this project to suit your own goals!
- Perhaps your loved one doesn't have a pet, but you could instead make it a picture of their kids, their marriage photos, a great holiday, a new house, a favorite movie poster, anything they love!
- Or you might like to use a printed color photo, in which case, our Print and Cut tool will come in handy when you go to align your puzzle to the image in real life.
- You could add a name, date or title to the puzzle, our Text tool is great for that! You'd then set that text layer to Fill Mode, to color it in.
- You don't have to make a little card, you can make it a full-sized puzzle by changing the size and number of pieces (tiles) in the puzzle generator.
No matter what you do, we hope you enjoy making it!