Laser Cut Fridge Magnets
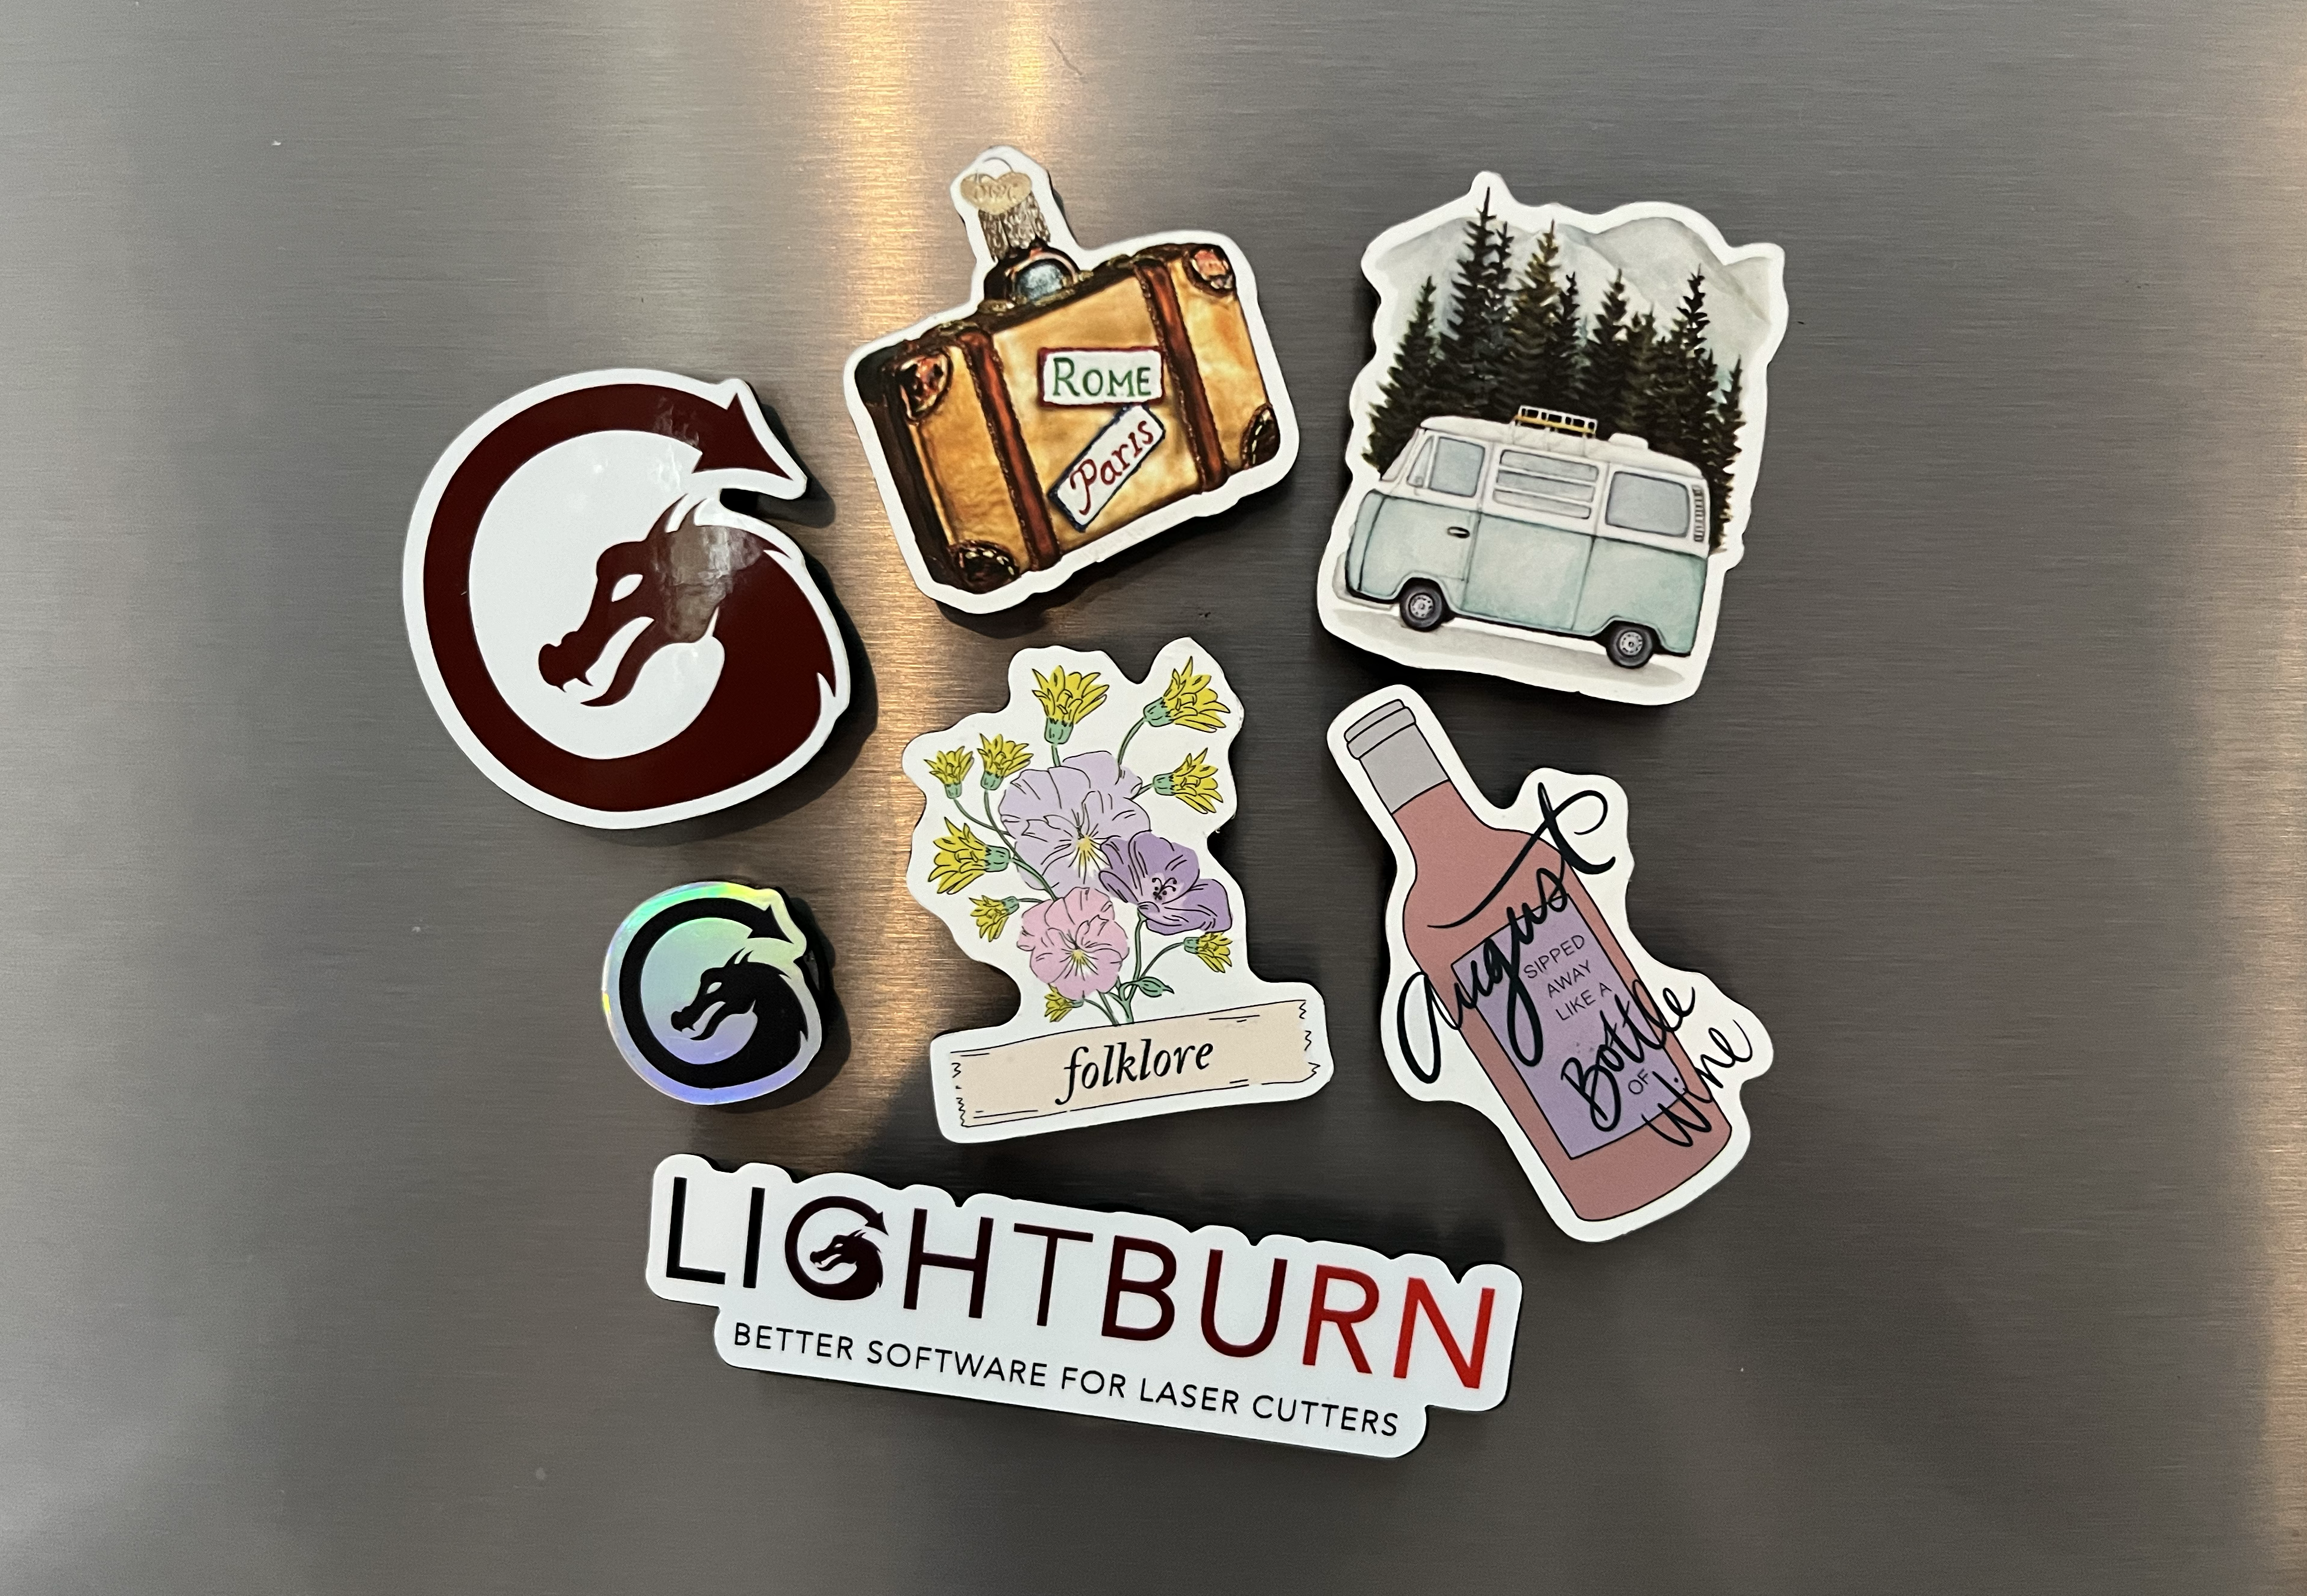
If you’re anything like me, you’ve got a few stickers lying around that you don’t know what to do with. It’s not that I don’t like them — quite the opposite, I’m afraid to commit them to anything impermanent. Finally, it hit me — you know what’s not going anywhere? Magnetism or refrigeration. One’s a law of nature, the other of food safety. Thus was a project idea born - turning stickers into fridge magnets by using a laser to cut out form-fitting backing pieces for the stickers, and then attaching magnets to them.
What You'll Learn
Below, we'll describe two different methods for cutting the backing pieces. In the first method, we'll:
- Check and adjust our Camera Alignment using the Shift fields in the Camera Control window
- Use the Trace feature to produce vector graphics from a camera capture of our stickers, pre-stuck to black acrylic in our workspace
- Edit the resulting vectors so we're left with just outlines of our stickers
- Use Absolute Coordinates positioning to cut those outlines precisely around the stickers
In the second, we'll:
- Take a photo of our stickers, laid out on black acrylic, with a digital camera or smartphone
- Import the photo into LightBurn
- Trace the imported photo to create outlines of the stickers
- Edit the resulting vectors so we’re left with just outlines of our stickers
- Precisely rescale the outlines to size them correctly
Materials
- A USB camera, mounted above your laser and calibrated and aligned in LightBurn OR any digital camera you can use to take a photo and transfer to your computer. A smartphone will work.
- To calibrate Camera Alignment and follow the first method, you will need a laser that has limit switches and can home automatically.
- 1/16” black acrylic. Very thin acrylic is great for this project because it's easy to cut and lightweight. You can choose any color you like, but black is strongly recommended because it will make it easier to get a clean Trace.
- One or more of your favorite stickers.
- Magnets with adhesive backing.
Method One — Stick & Cut
This method makes use of LightBurn's ability to produce an overlay from a USB camera mounted above your laser's workspace. Your stickers will be attached to the backing acrylic, and the laser will cut around them, so you'll need to have high confidence in the accuracy of your overlay's alignment, or the stickers may get cut into. If you're not prepared to risk your stickers, skip ahead to method two.
1. Verify and Adjust Camera Alignment
Before beginning this project, you must Calibrate your Camera Lens and Camera Alignment in LightBurn. After the initial setup, you should check on the alignment before proceeding with the project.
-
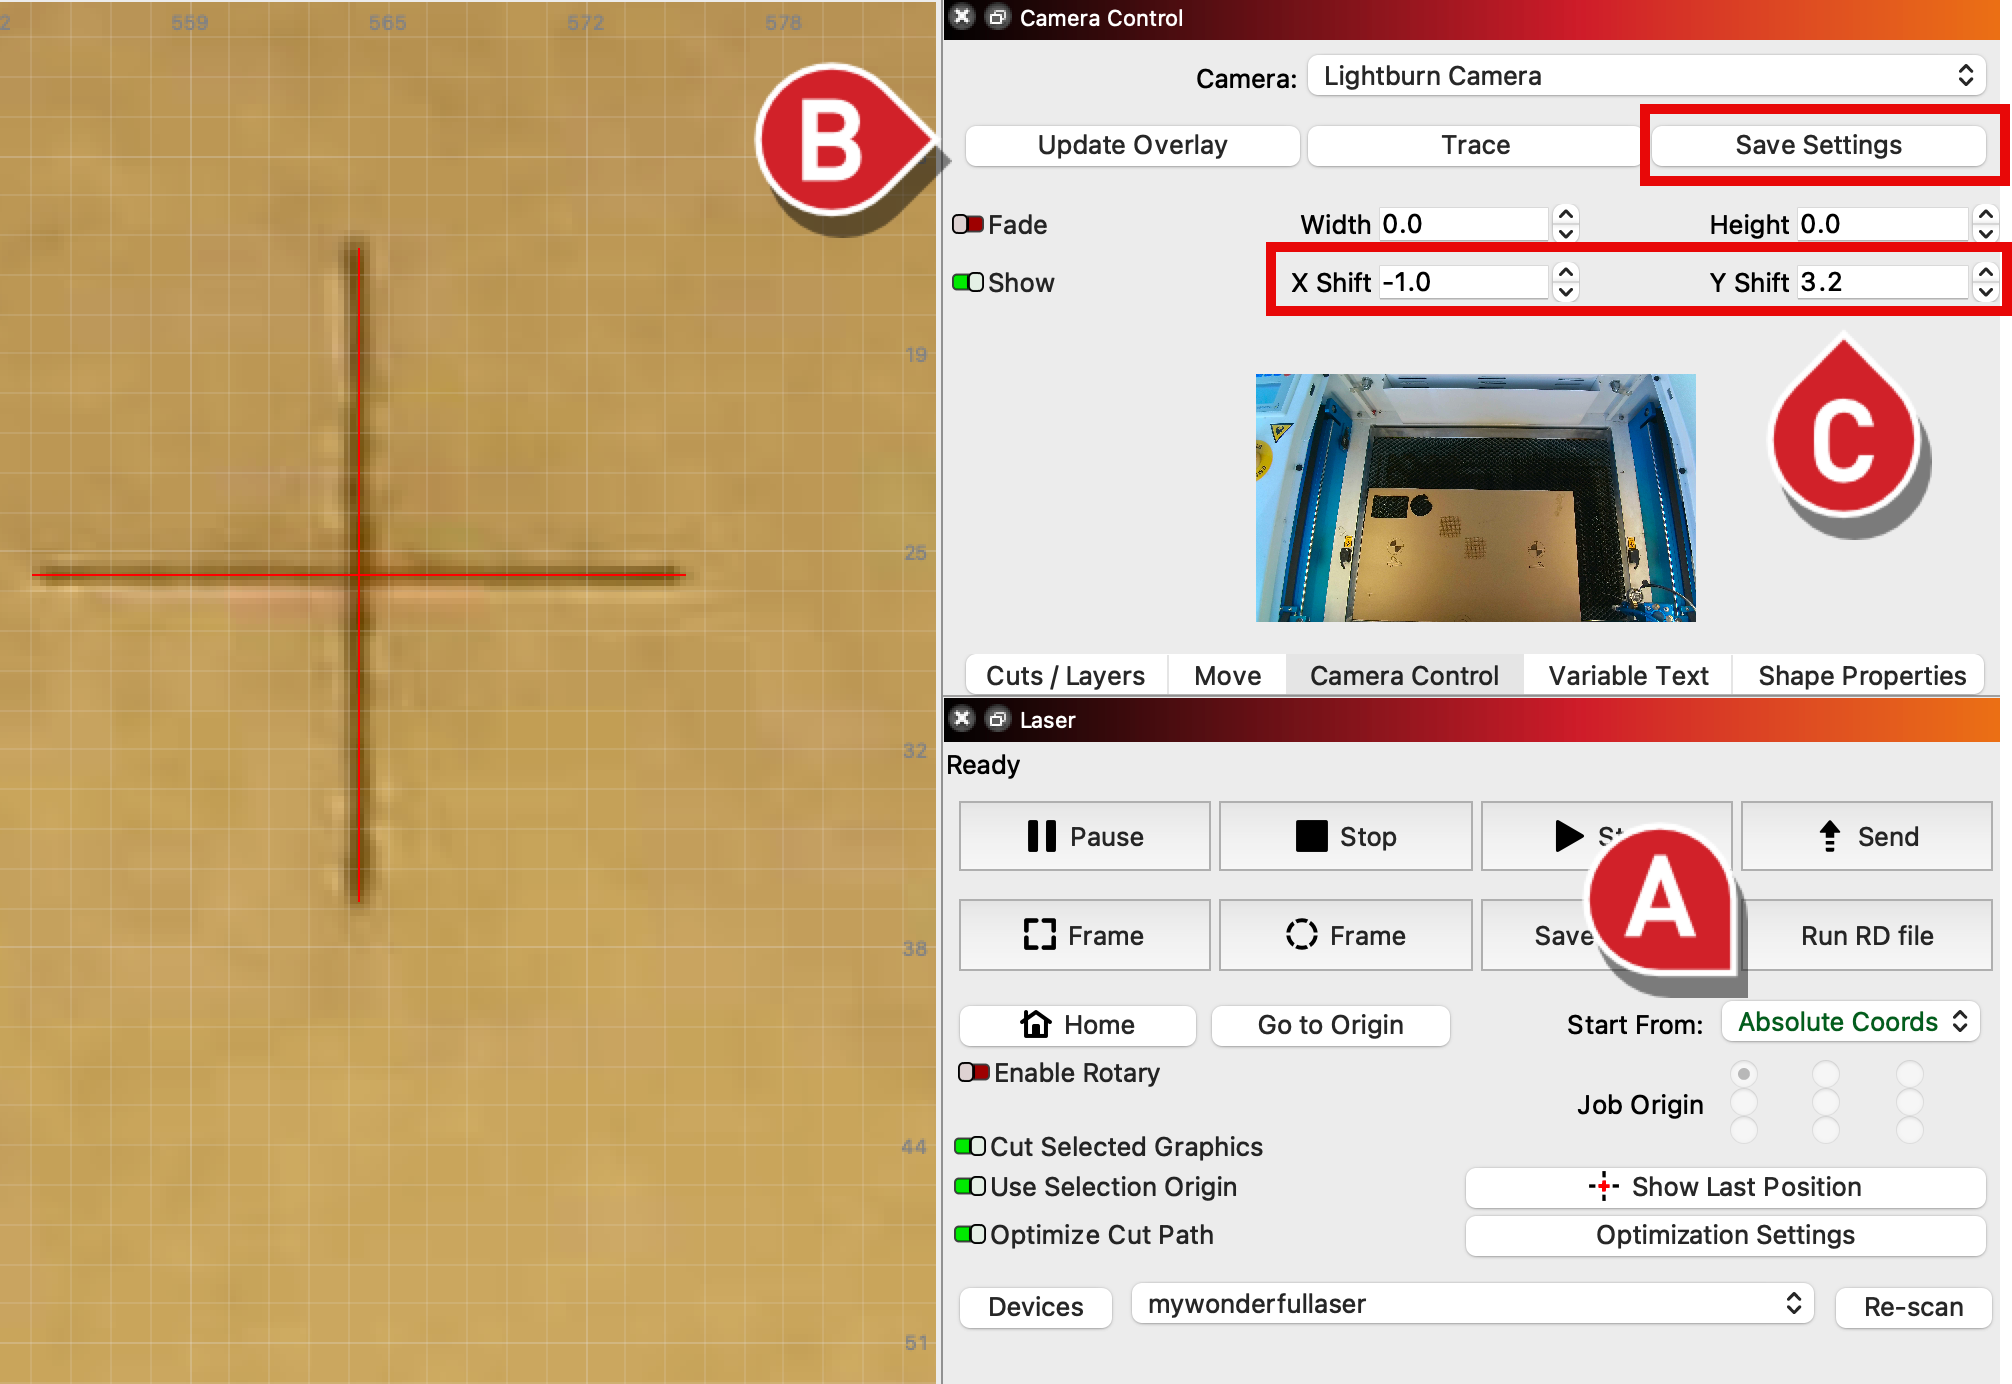
To test Camera Alignment, use the Draw Lines tool to create a crosshair mark set to a Line layer in your LightBurn workspace. Set the Start From mode to Absolute Coords, and mark the crosshair onto piece of material placed in your laser. Cardboard works great for this step — you want a strong contrast.
-
Then, click Update Overlay in the Camera window, and see how far off the marked crosshair is from the crosshair design in LightBurn. If they're perfect, you're all set!
-
If they're not perfect but relatively close, adjust X Shift and Y Shift until they overlap perfectly, click Save Settings, then re-test.
-
If they're very far apart, re-run Camera Calibration and Alignment, then re-test.
If you're having trouble getting a consistent alignment, here are some tips:
-
Make sure your camera is securely mounted, with no wiggle on its mounting point.
-
If it's mounted to a lid, make sure the lid is returning to the exact same position each time you open it.
-
If your laser does not have an adjustable height bed, make sure the material you use in the Camera Alignment step is the same height as the acrylic you use for the project. An alignment is only valid for a constant distance between the camera and a given surface height.
-
Even subtle changes in the camera’s position relative to your laser’s workspace or material surface can make an important difference in alignment.
2. Stick the Stickers, and Load the Acrylic
Next we'll adhere the stickers to the acrylic. There's no turning back after this point - your stickers are committed now!
-
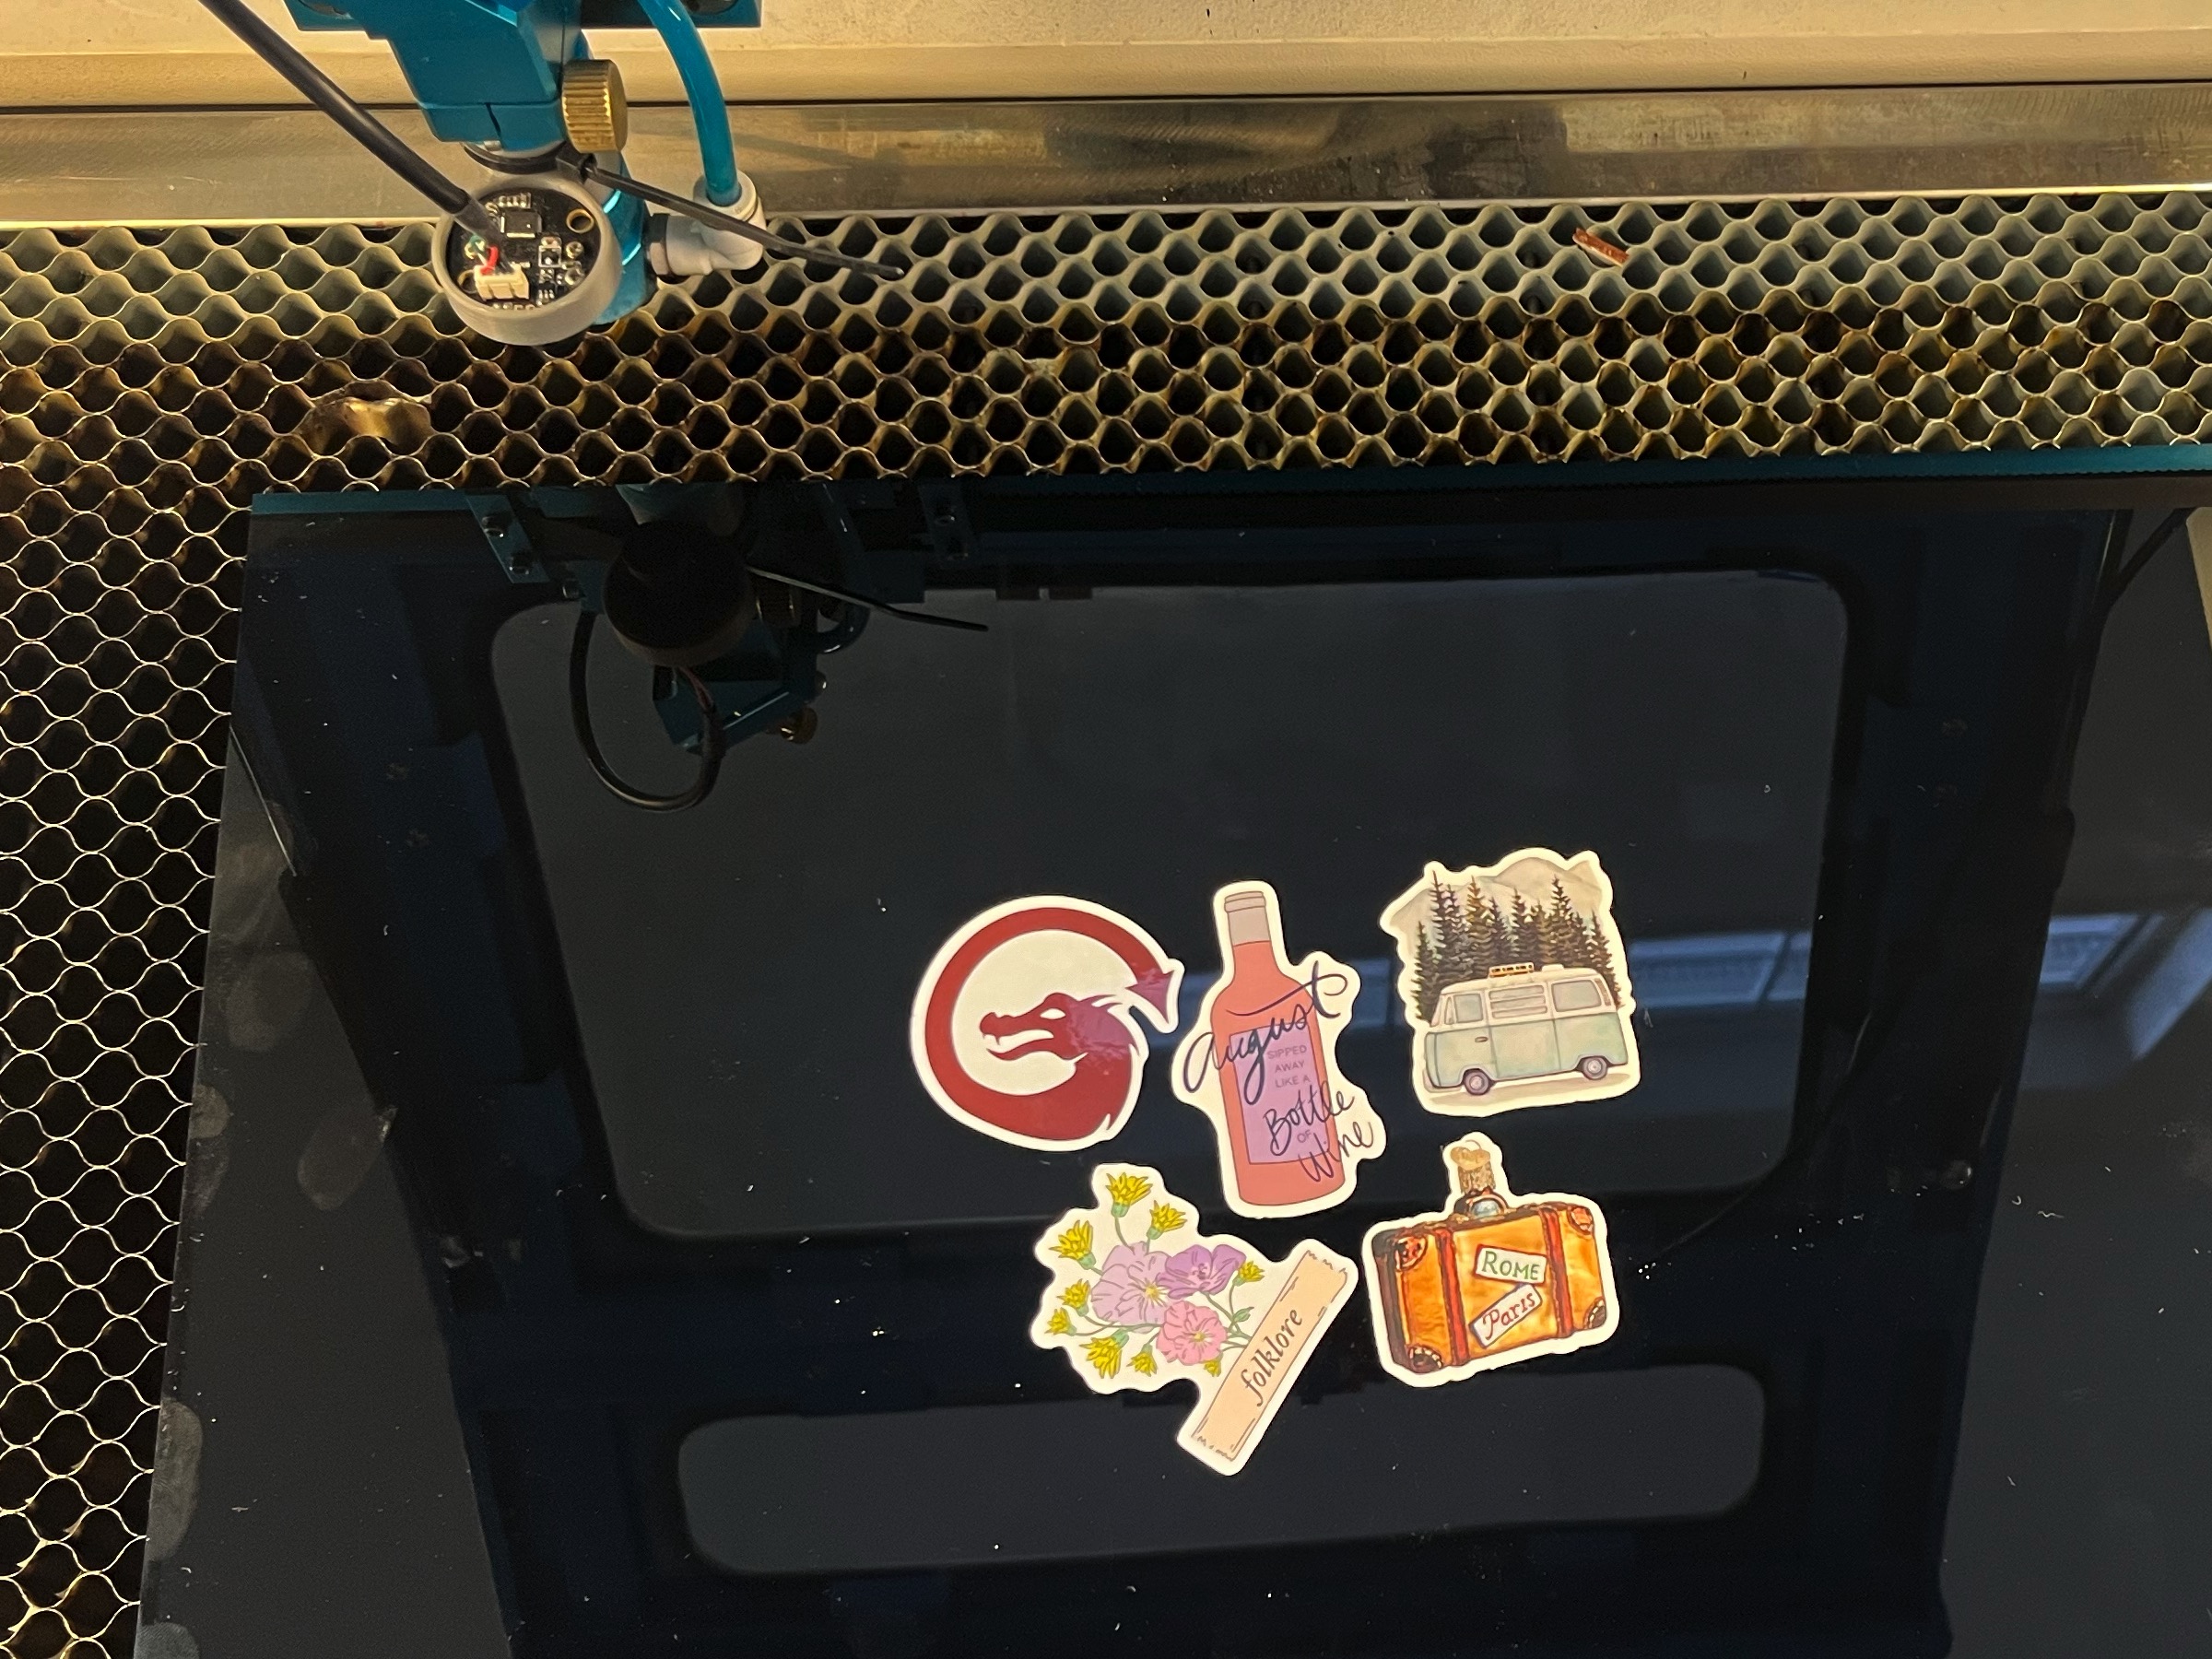
Stick your stickers to your sheet of black acrylic.
-
Place the acrylic in your workspace.
-
Position the acrylic so that the stickers are as close to the center of your workspace as possible - the accuracy of the alignment will be better toward the center in most cases, and can drift a bit toward the edges.
3. Trace Image
Next, we'll use Image Tracing to make outlines around the stickers.
-
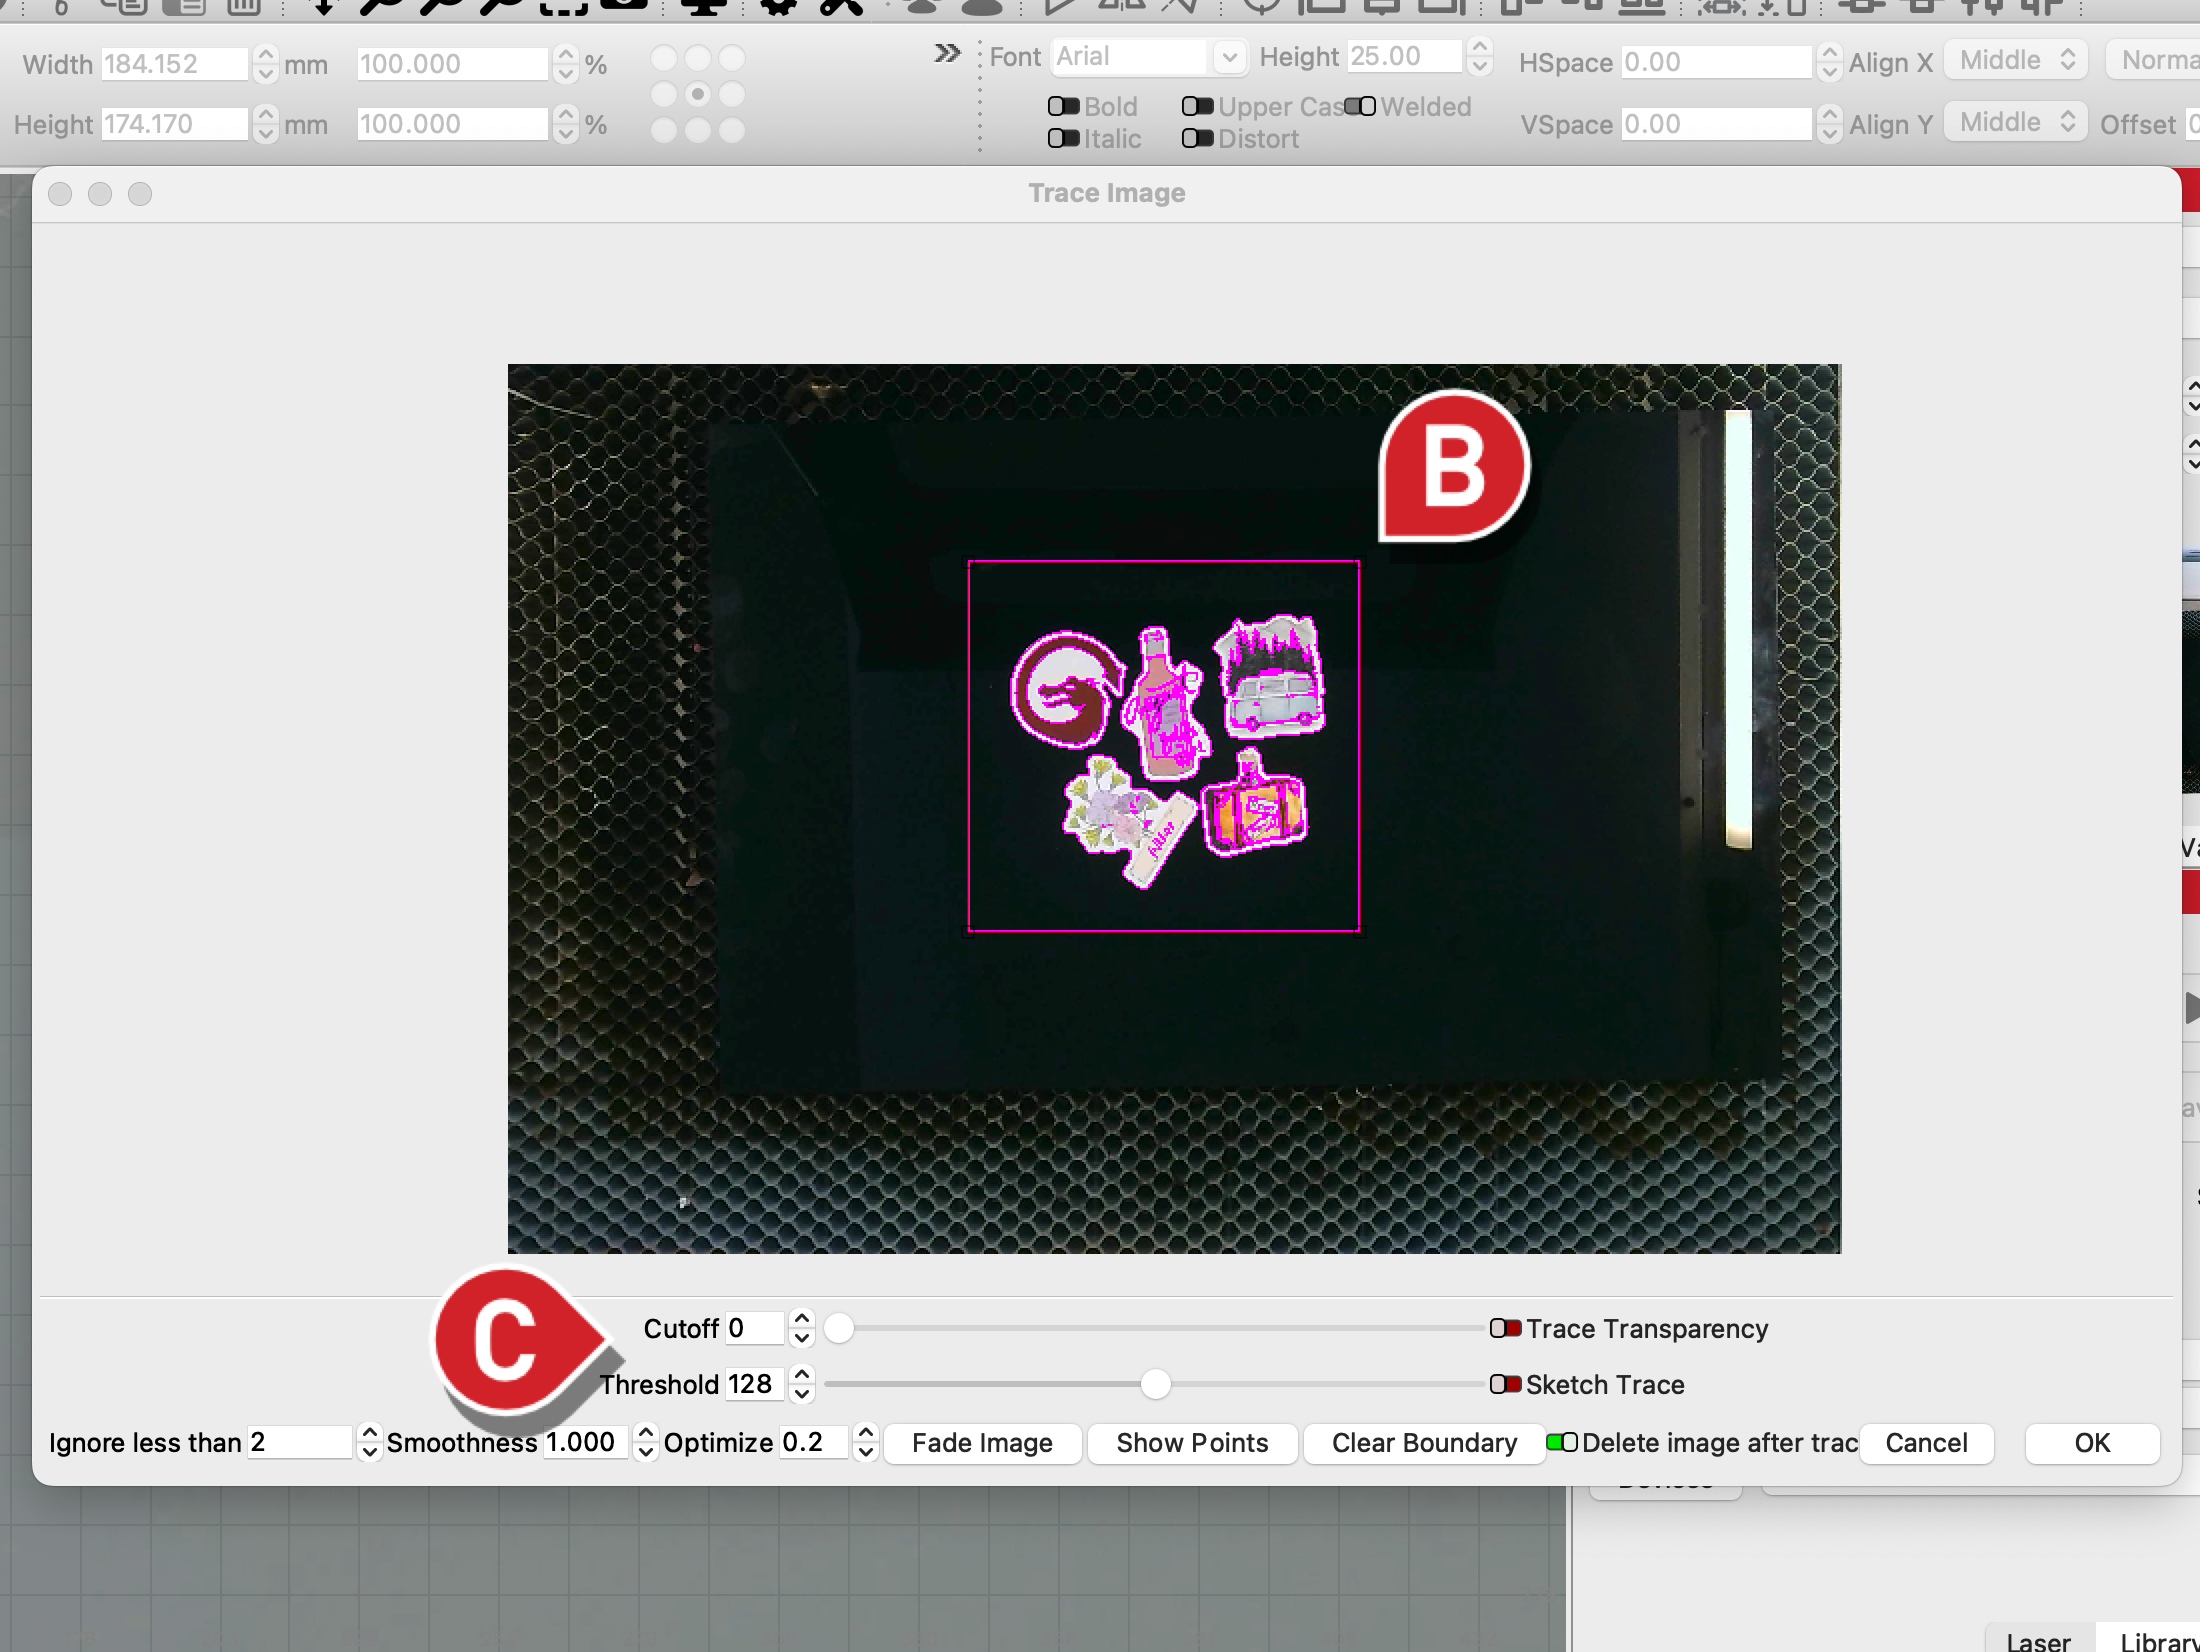
Click Trace in the Camera Control window
-
In the Trace window, box-select only the portion of the capture where your stickers are.
-
With the black background, you should have no trouble getting outlines of each of the stickers, but, if necessary, you can adjust the Cutoff and Threshold sliders until you get complete outlines for each sticker.
-
The Cutoff slider controls the lower end of the range of brightness values that LightBurn will outline with vectors, and the Threshold slider sets the upper end.
4. Edit Vectors
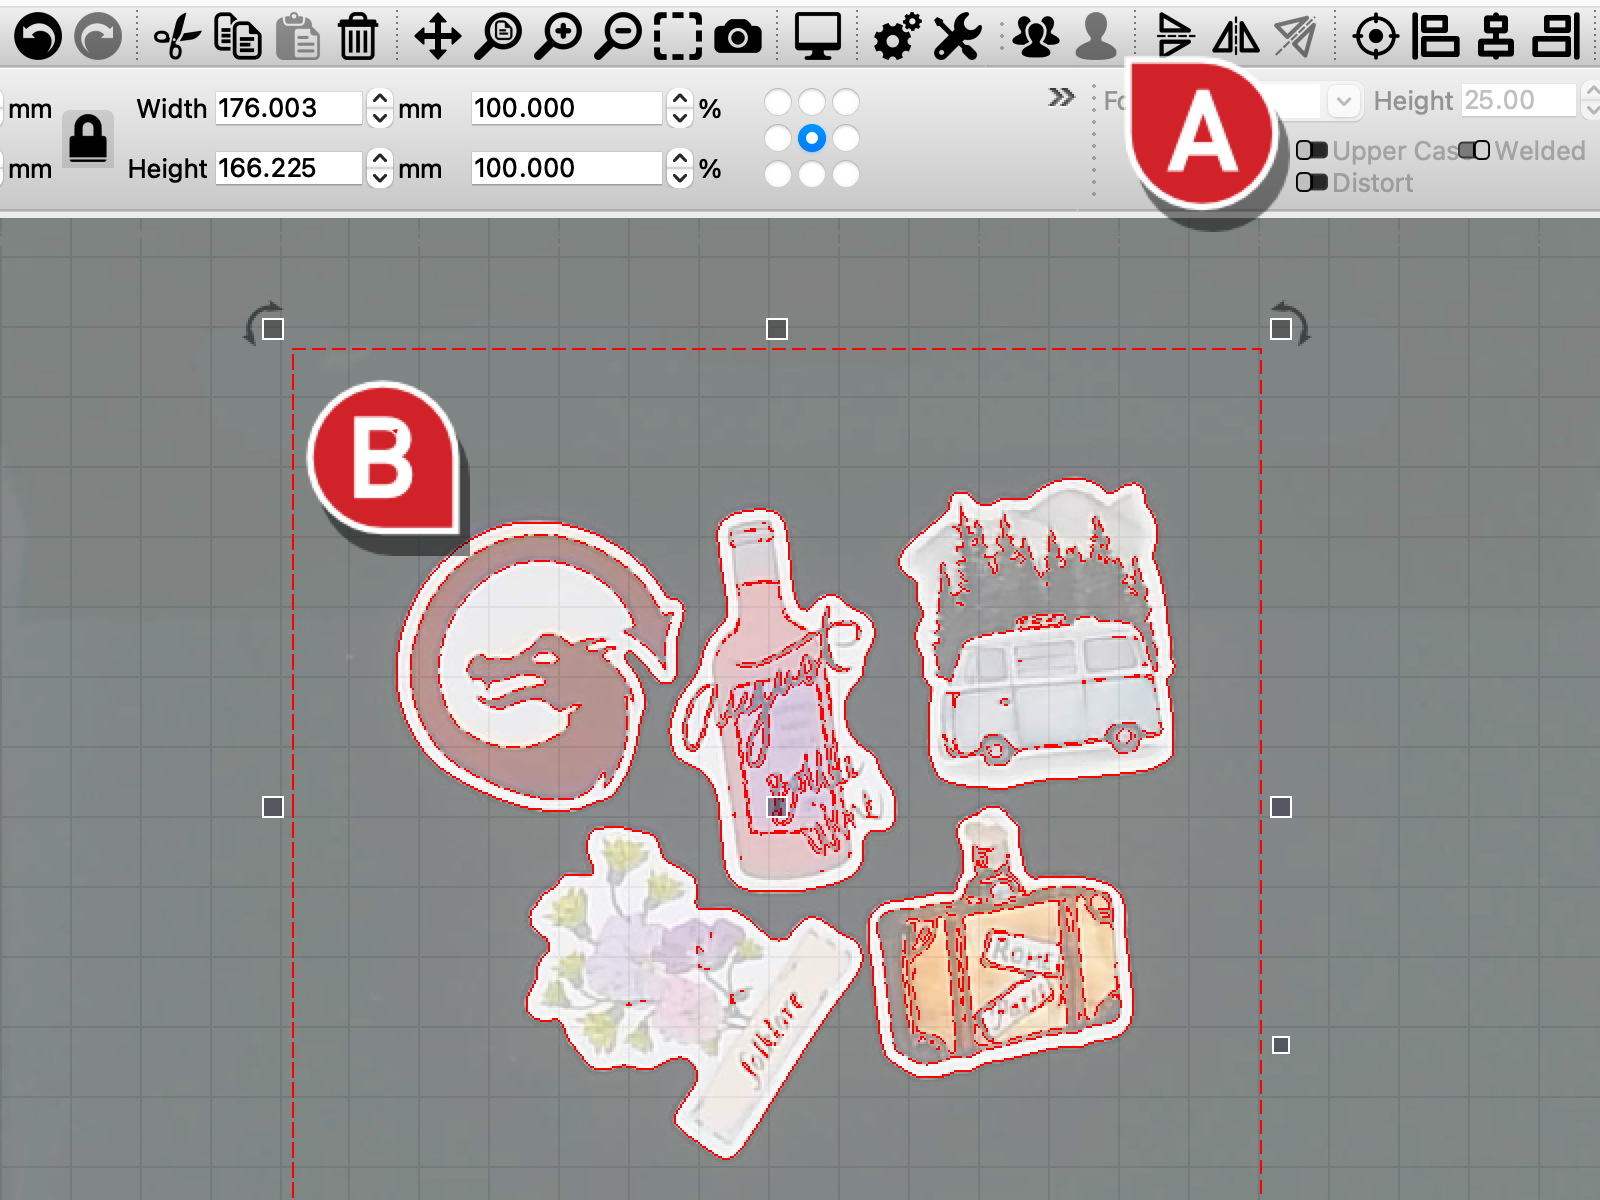
The resulting vectors will automatically be selected and grouped. In addition to the outlines, they'll likely include some additional graphics you don't want.
-
Ungroup ( Ctrl+U / Cmd+U ) the vectors, but keep all of them selected.
-
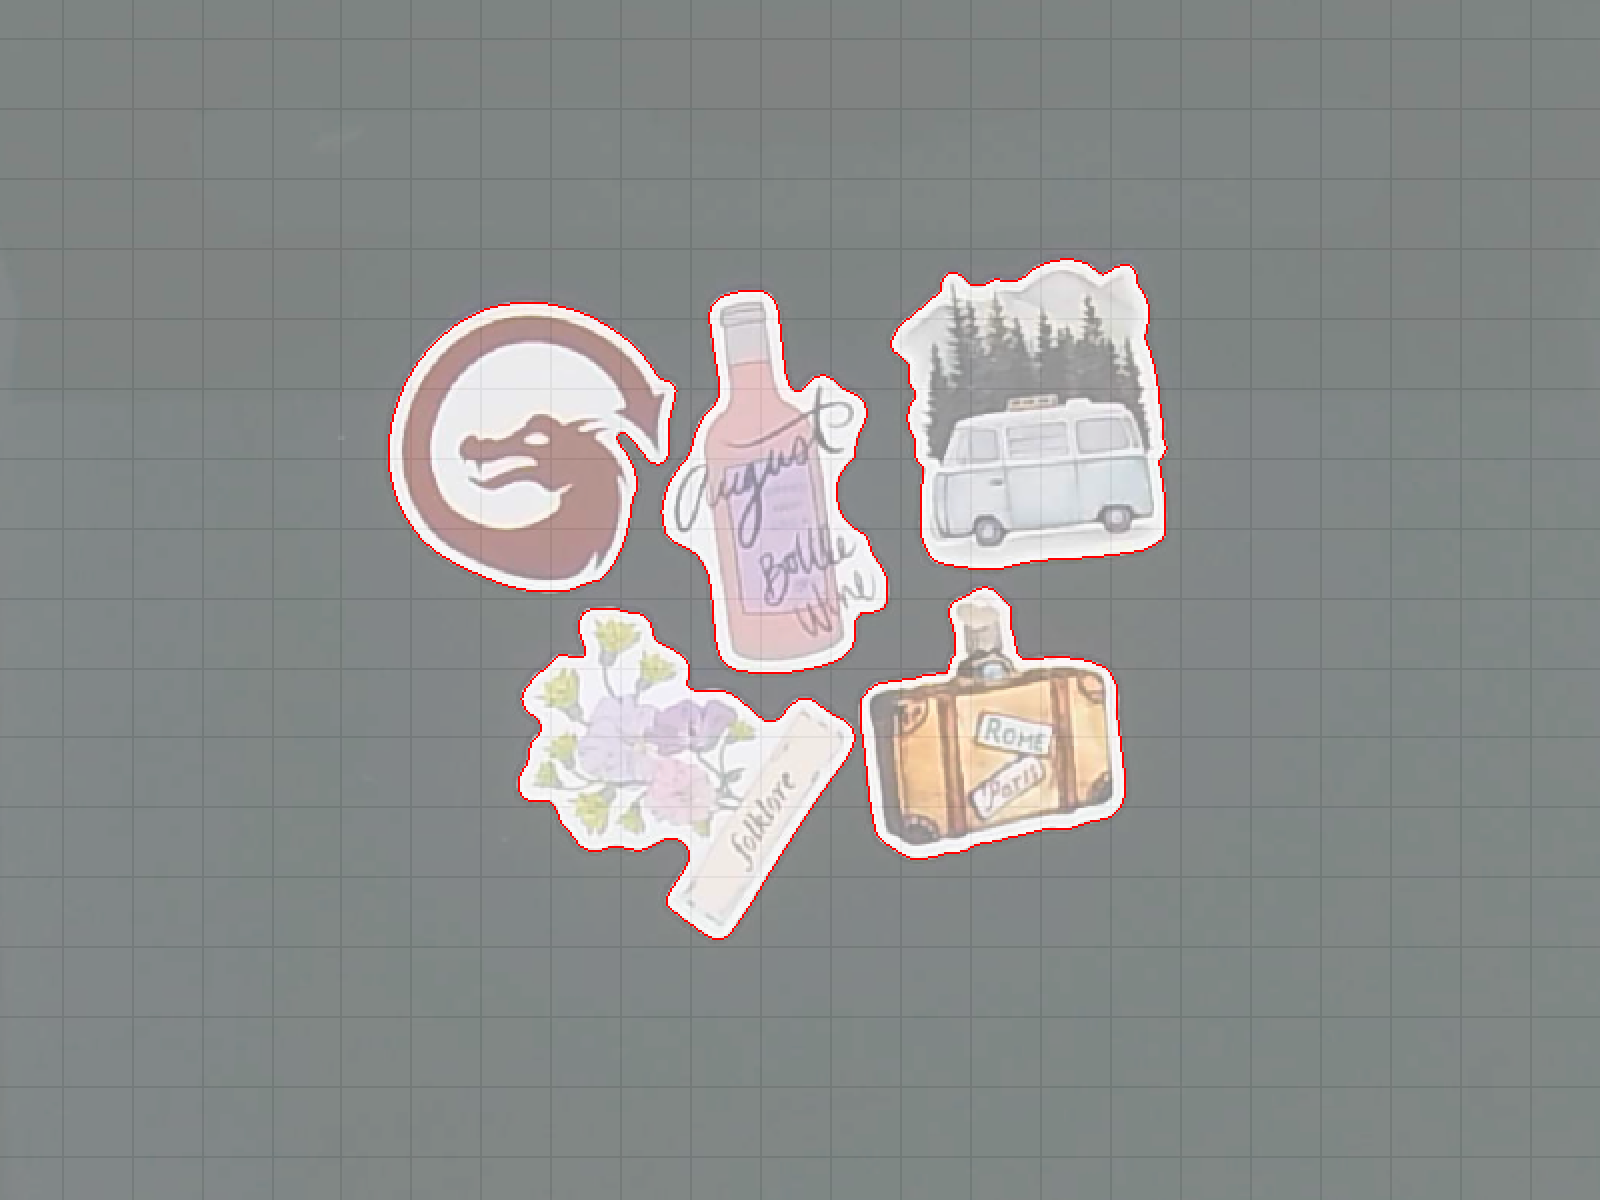
Then, Hold Ctrl or Cmd while clicking on each of the outlines of the stickers to Deselect them.
-
When all of the outlines are deselected, Delete the remaining selection.
5. Cut Around the Stickers
This is the big moment, it's time to cut out the stickers. Reminder: make sure you're confident in the accuracy of your overlay alignment before running the job. If you're not, head back to Step 1.
-
Assign the outlines to a layer set to Line mode. Apply appropriate settings for your laser to cut through 1/16" acrylic. If you're unsure on settings, run a Material Test.
-
When you updated the overlay earlier, Absolute Coords was automatically selected as the Start From mode. Verify that it is still selected, and then run the job.
-
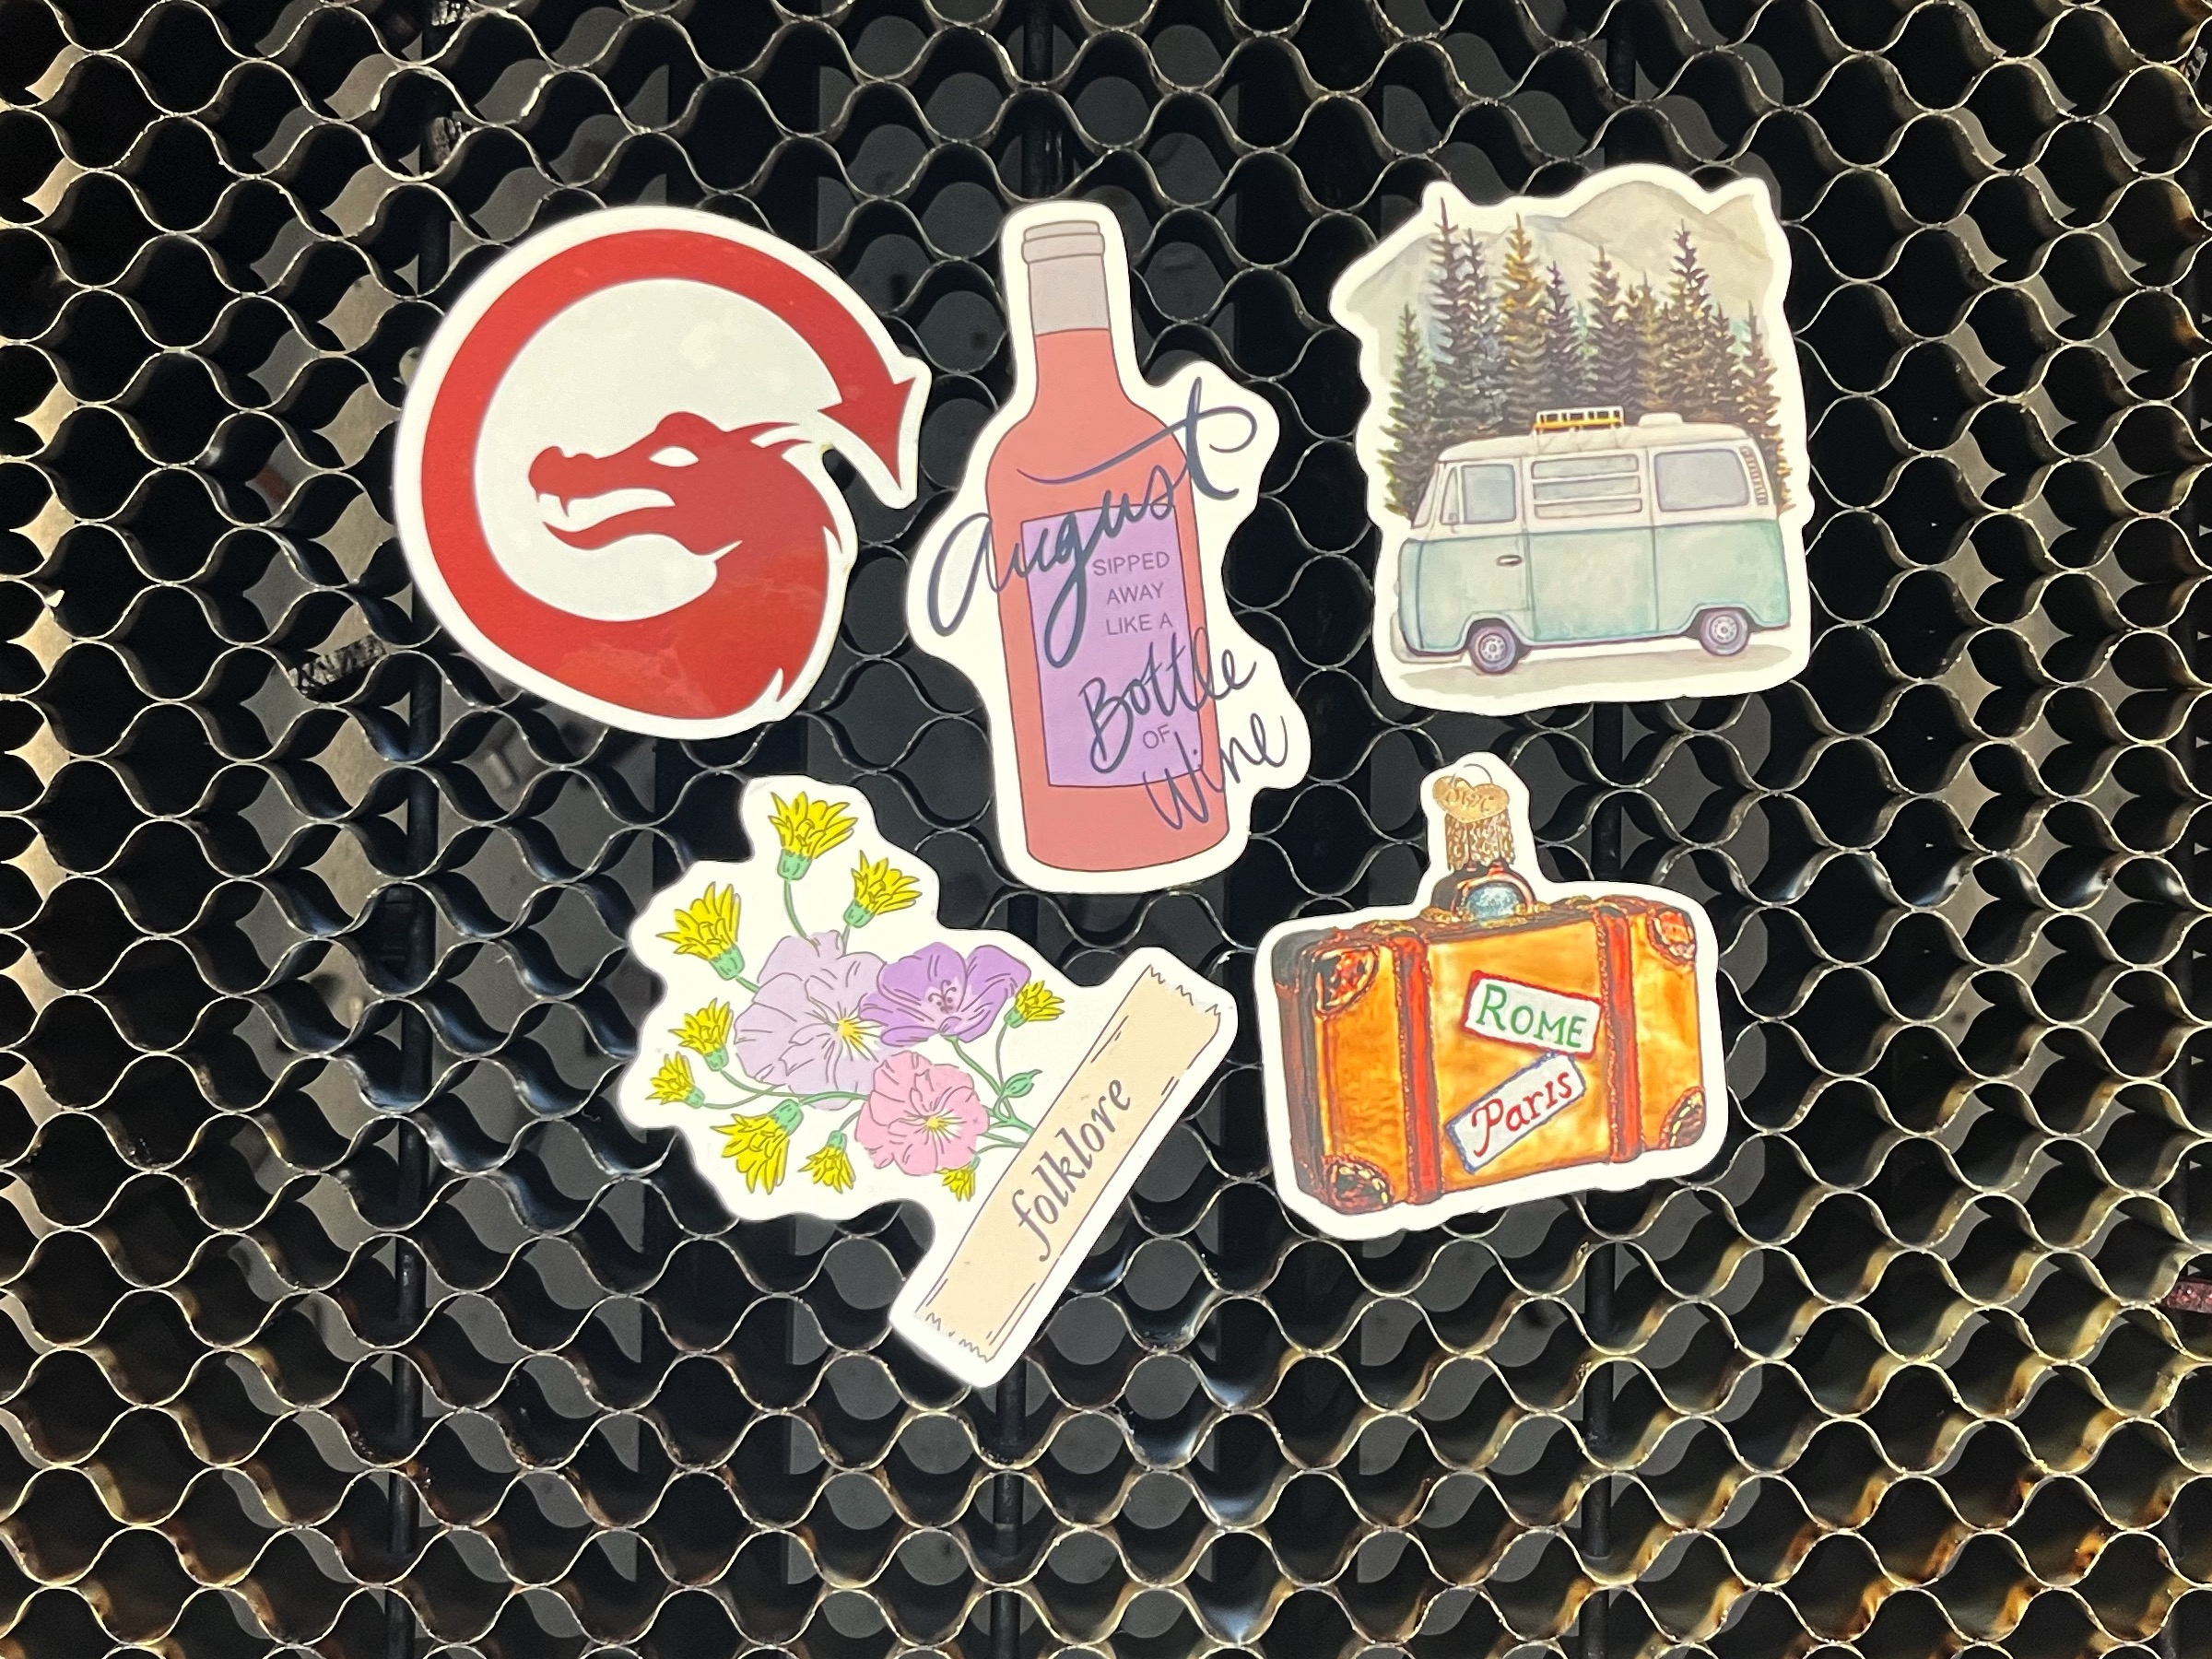
Remove the sheet of acrylic from your workspace, leaving only the acrylic-backed stickers.
-
After pausing briefly to admire your handiwork, remove those too.
Method Two — Cut & Stick
This method doesn't put your stickers in any danger of being accidentally lasered, but the stickers may not end up as perfectly placed on the backing pieces as they are in the method one, and it requires a bit of math.
1. Take a Photo
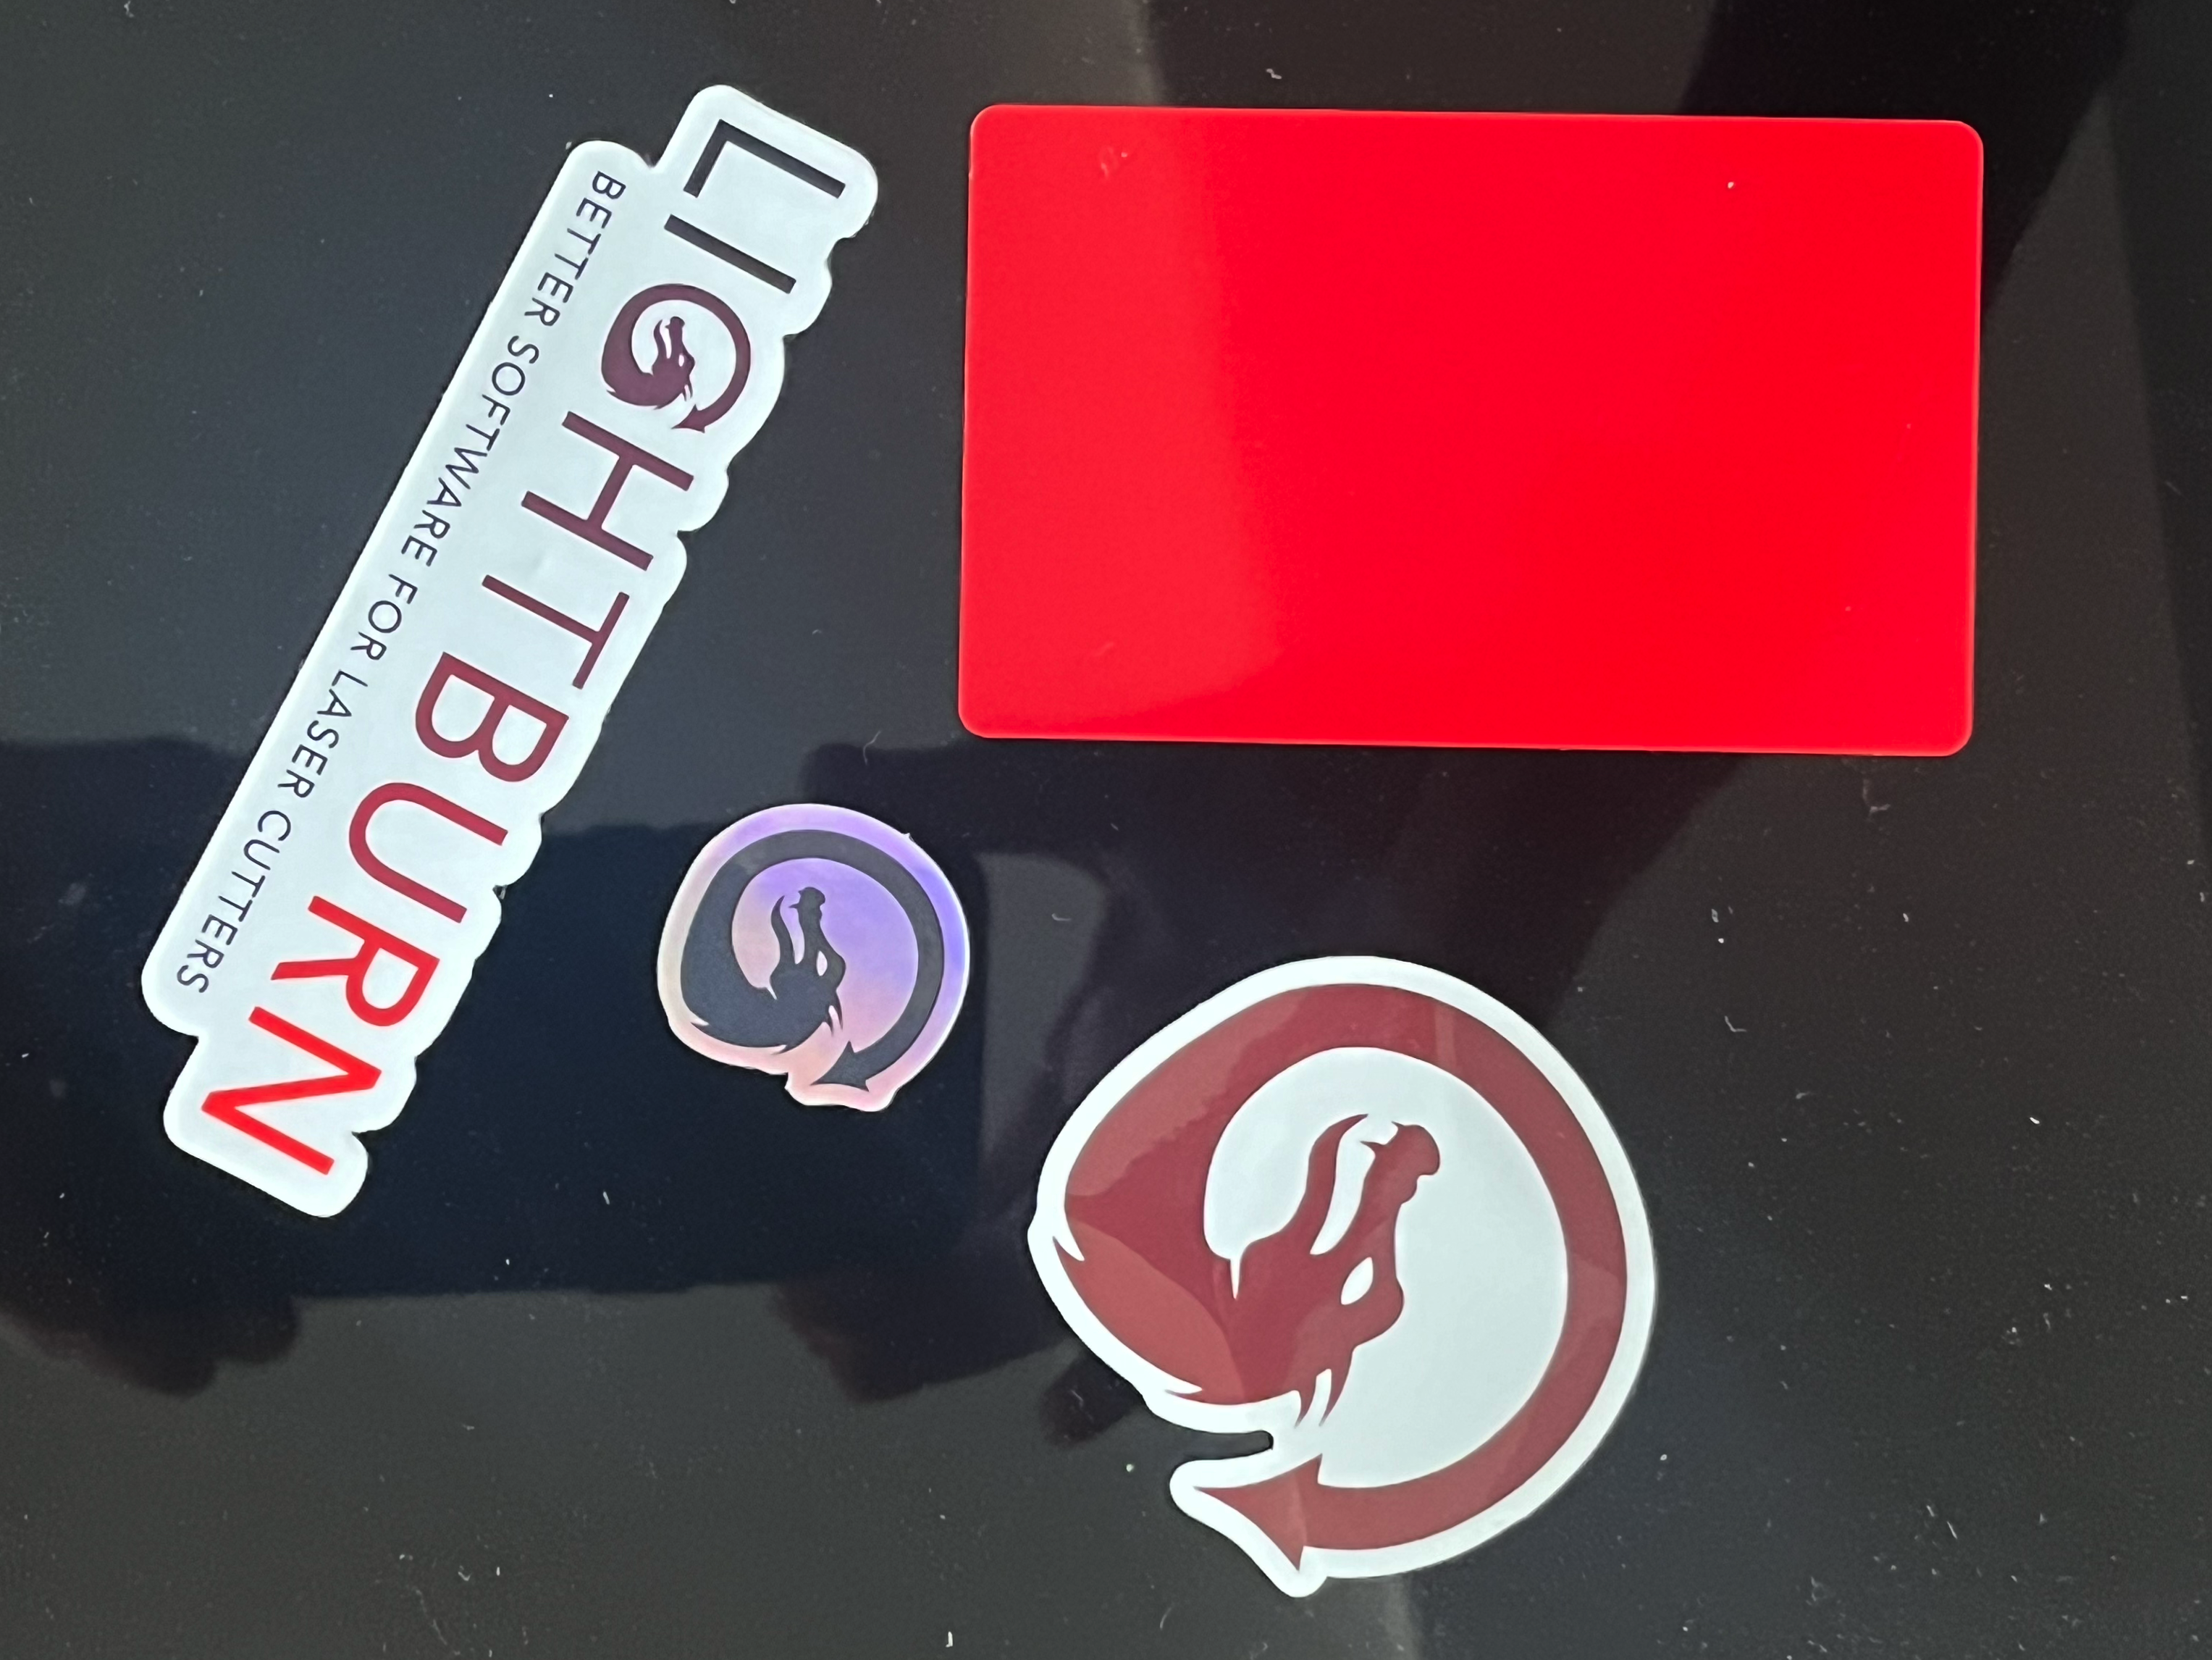
Using a digital camera or smartphone, we'll start by taking a photo of our stickers and a reference object, laid out on black acrylic.
-
Place your stickers and a flat rectangular or square reference object (we used an aluminum business card blank) on a sheet of black acrylic.
-
Take a photo of the stickers and the object. Try to keep the reference object roughly horizontal/vertical in the camera’s field off view. To avoid perspective distortions, keep the stickers centered and the camera angle as top down as possible.
-
Send the photo to your computer by SD card, Airdrop, email, or a cloud storage service.
2. Import and Trace
Next we'll Import the photo into LightBurn and Trace it.
-
Import ( Ctrl+I / Cmd+I ) the photo into LightBurn.
-
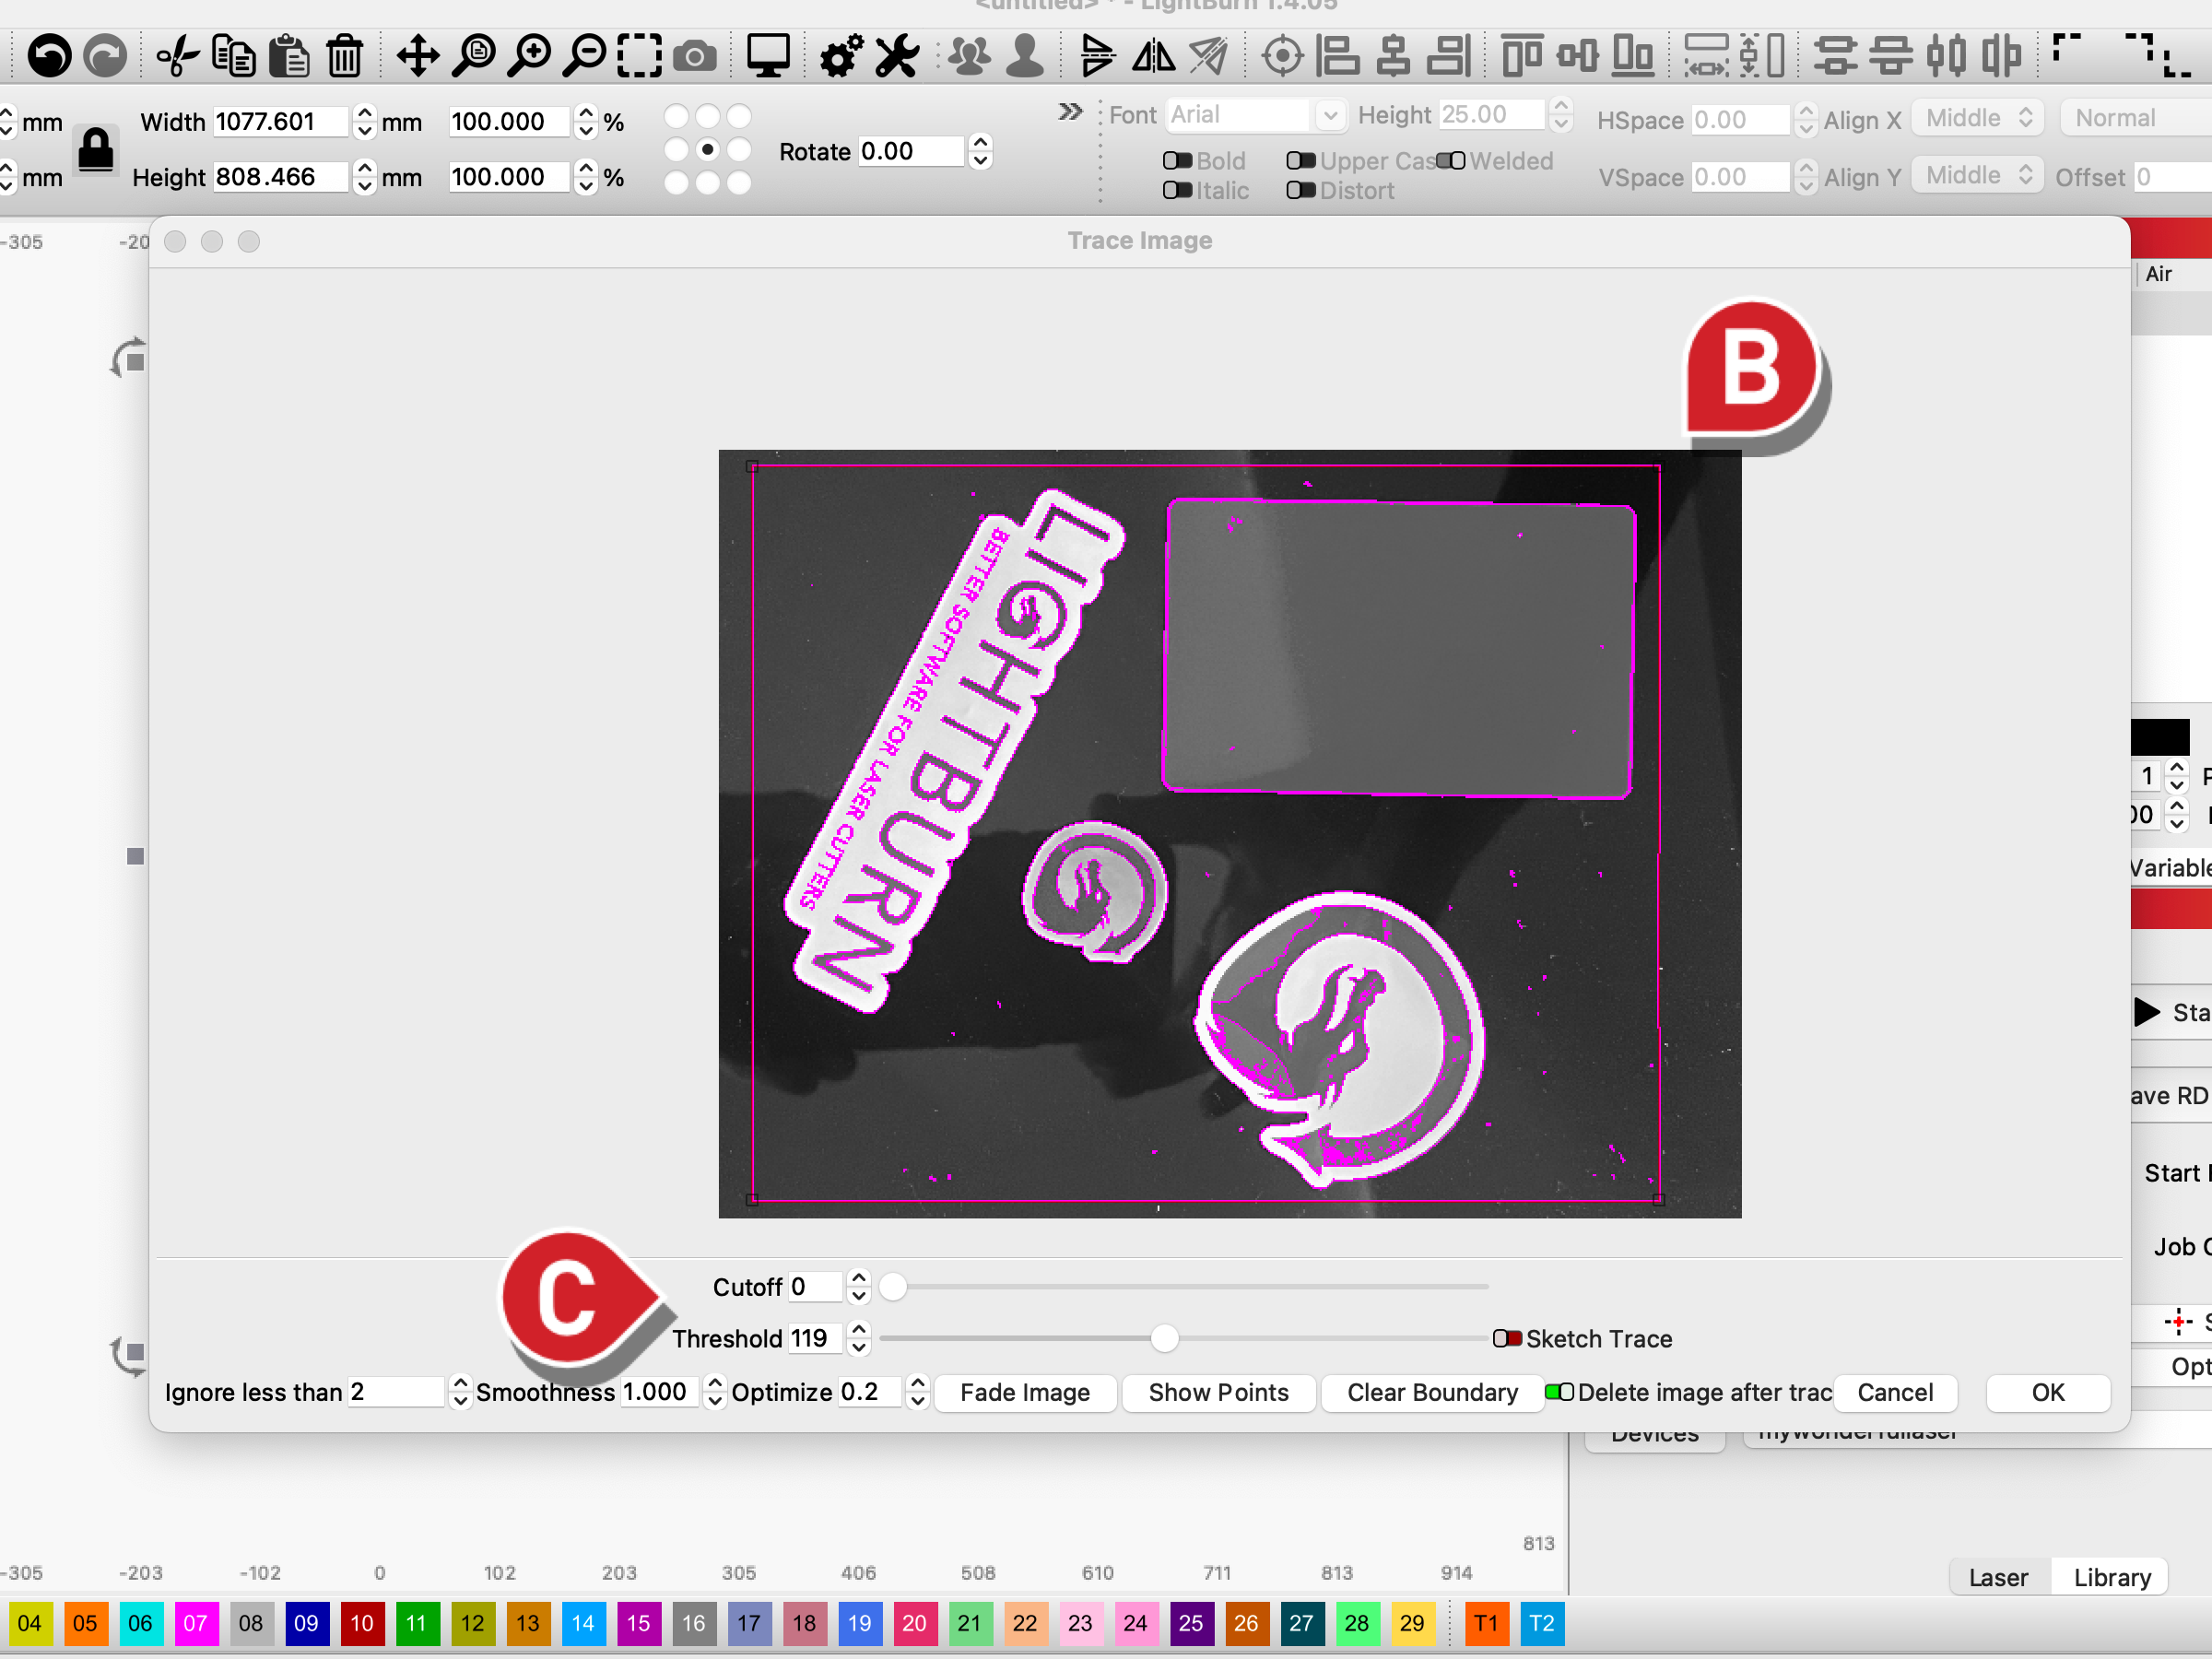
Right-click the image and select Trace Image. In the Trace window, box-select only the portion of the capture where your stickers and object are.
-
With the black background, you should have no trouble getting outlines of each of the stickers and object, but, if necessary, you can adjust the Cutoff and Threshold sliders.
-
The Cutoff slider controls the lower end of the range of brightness values that LightBurn will outline with vectors, and the Threshold slider sets the upper end.
3. Edit Vectors
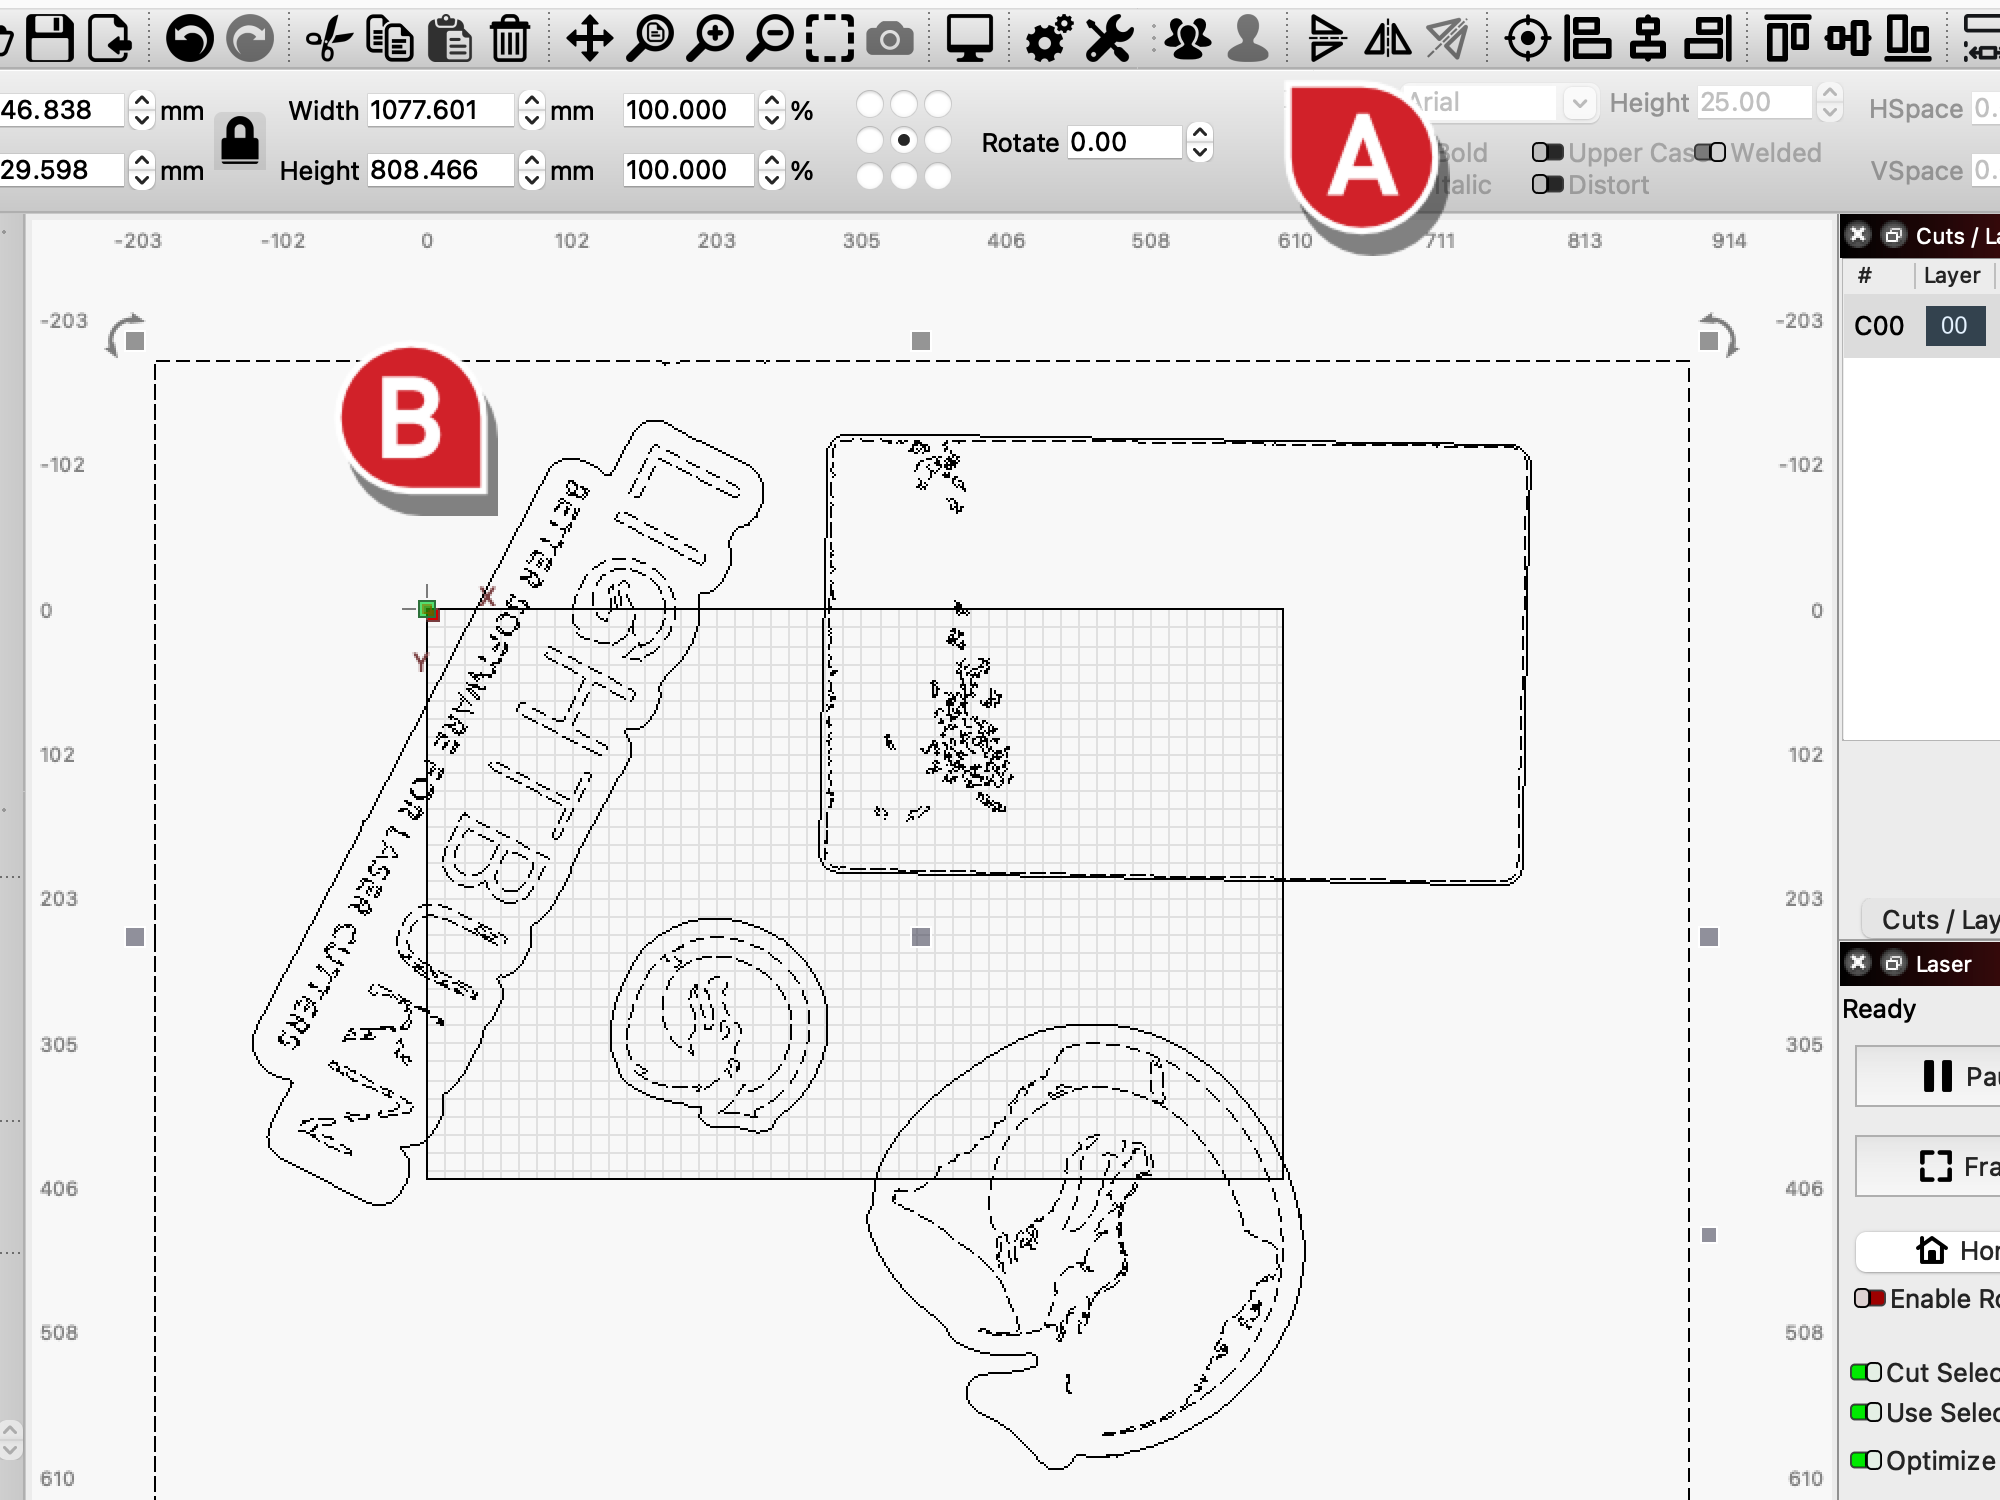
The resulting vectors will automatically be selected and grouped. In addition to the outlines, they'll likely include some additional graphics you don't want.
-
Ungroup ( Ctrl+U / Cmd+U ) the vectors, but keep all of them selected.
-
Then, Hold Ctrl or Cmd while clicking on each of the outlines of the stickers to Deselect them.
-
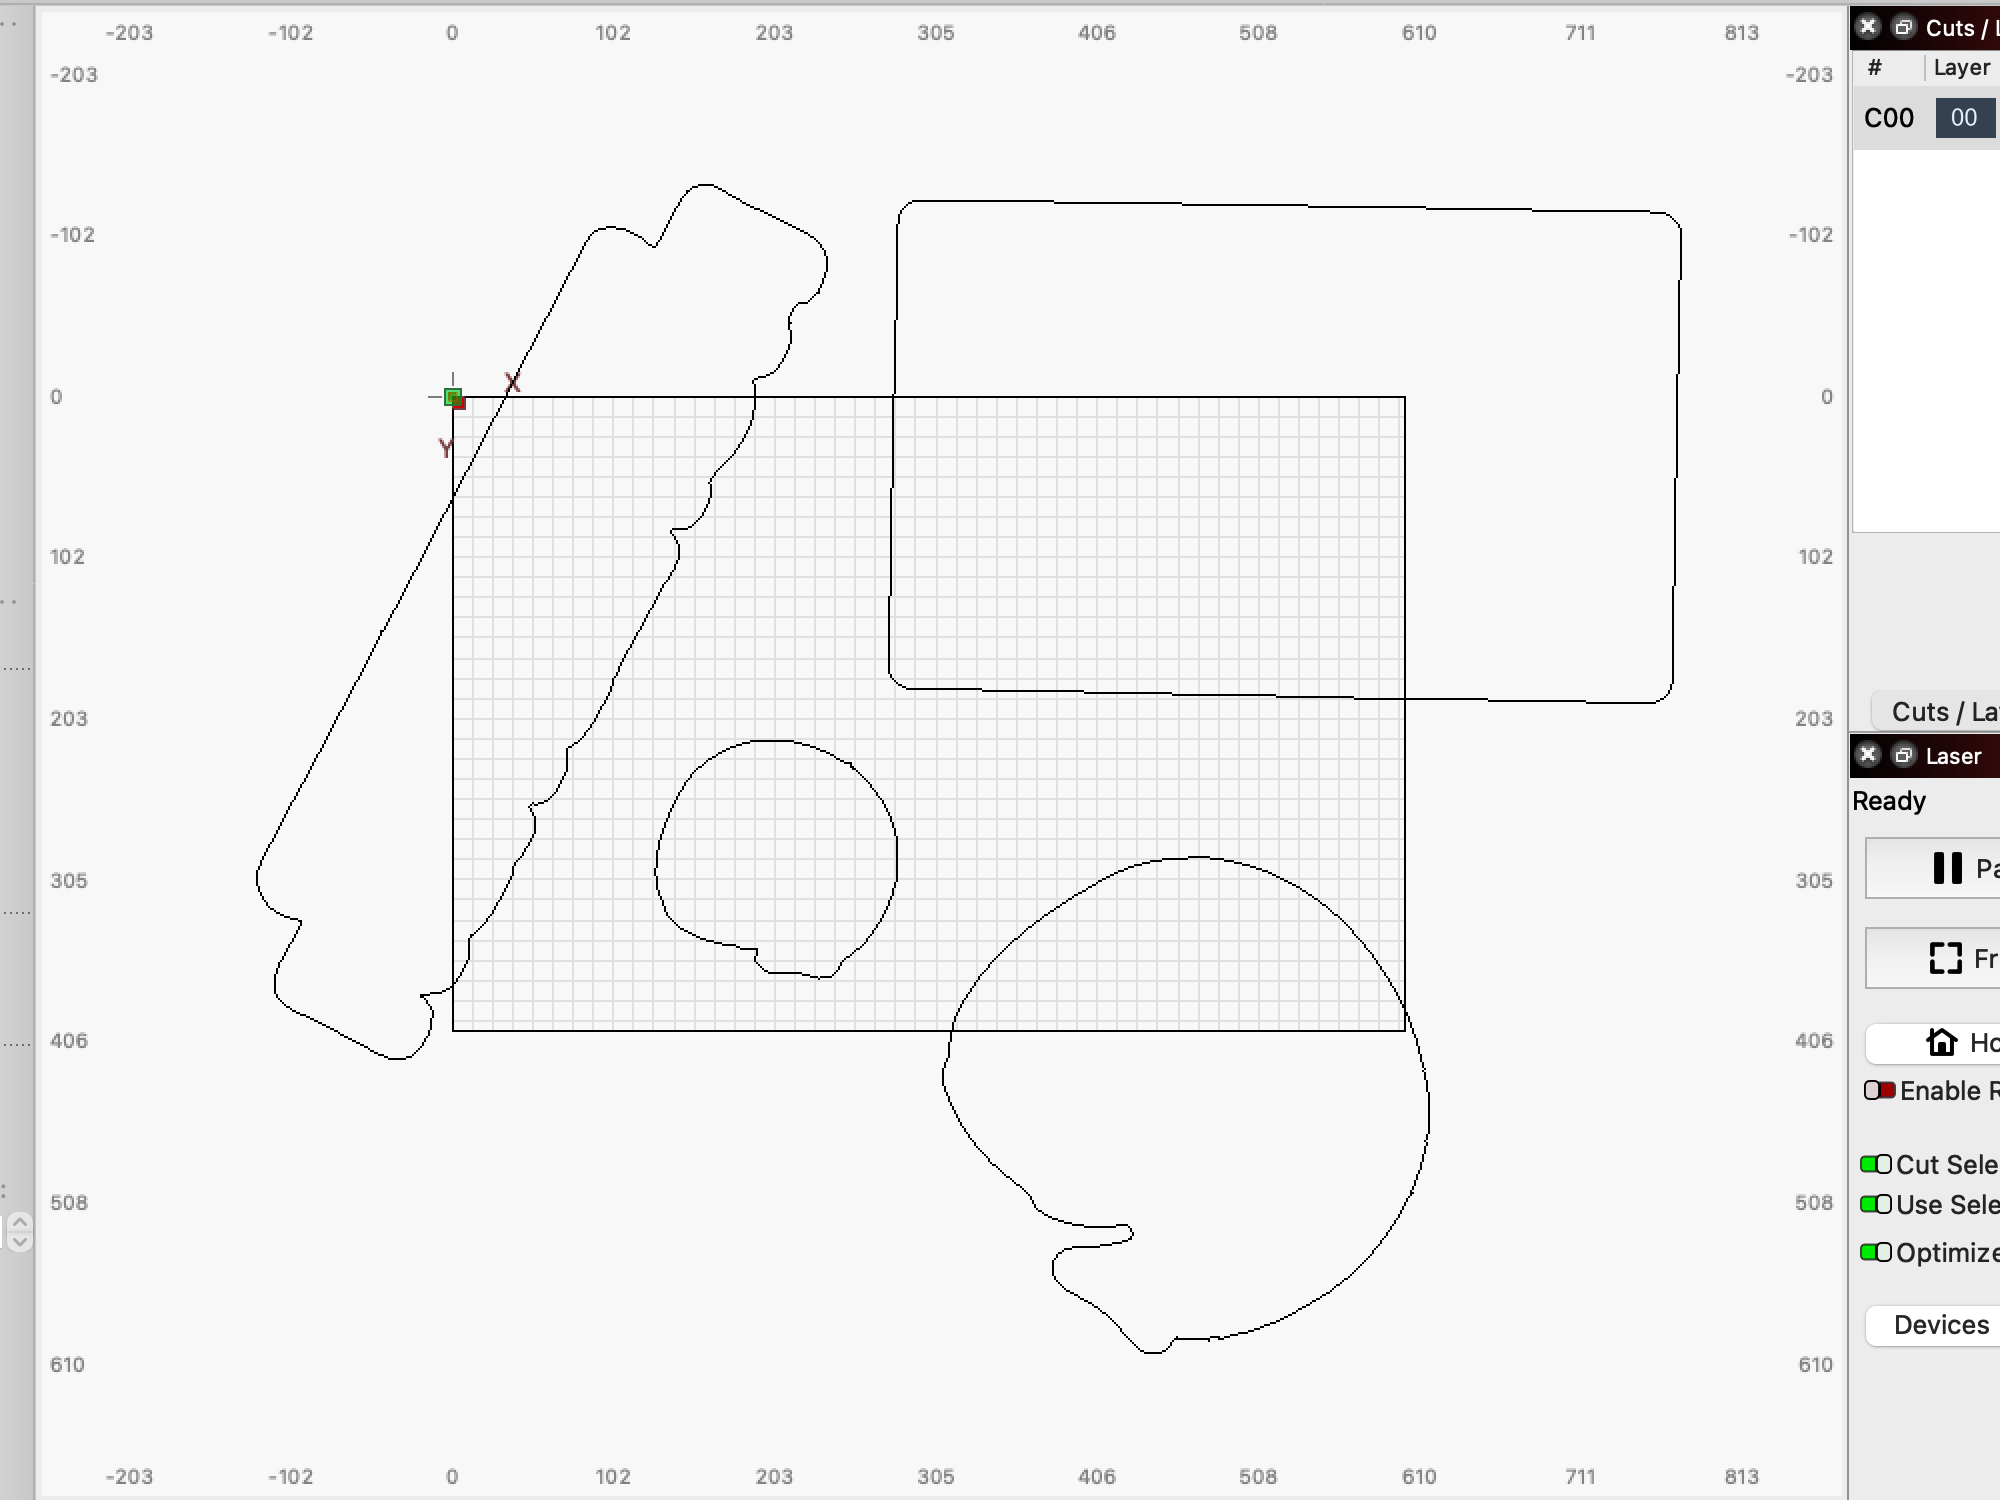
When all of the outlines are deselected, Delete the remaining selection.
4. Rescale Outlines
Here comes the math part — don't worry, it's simple and will be over quickly.
-
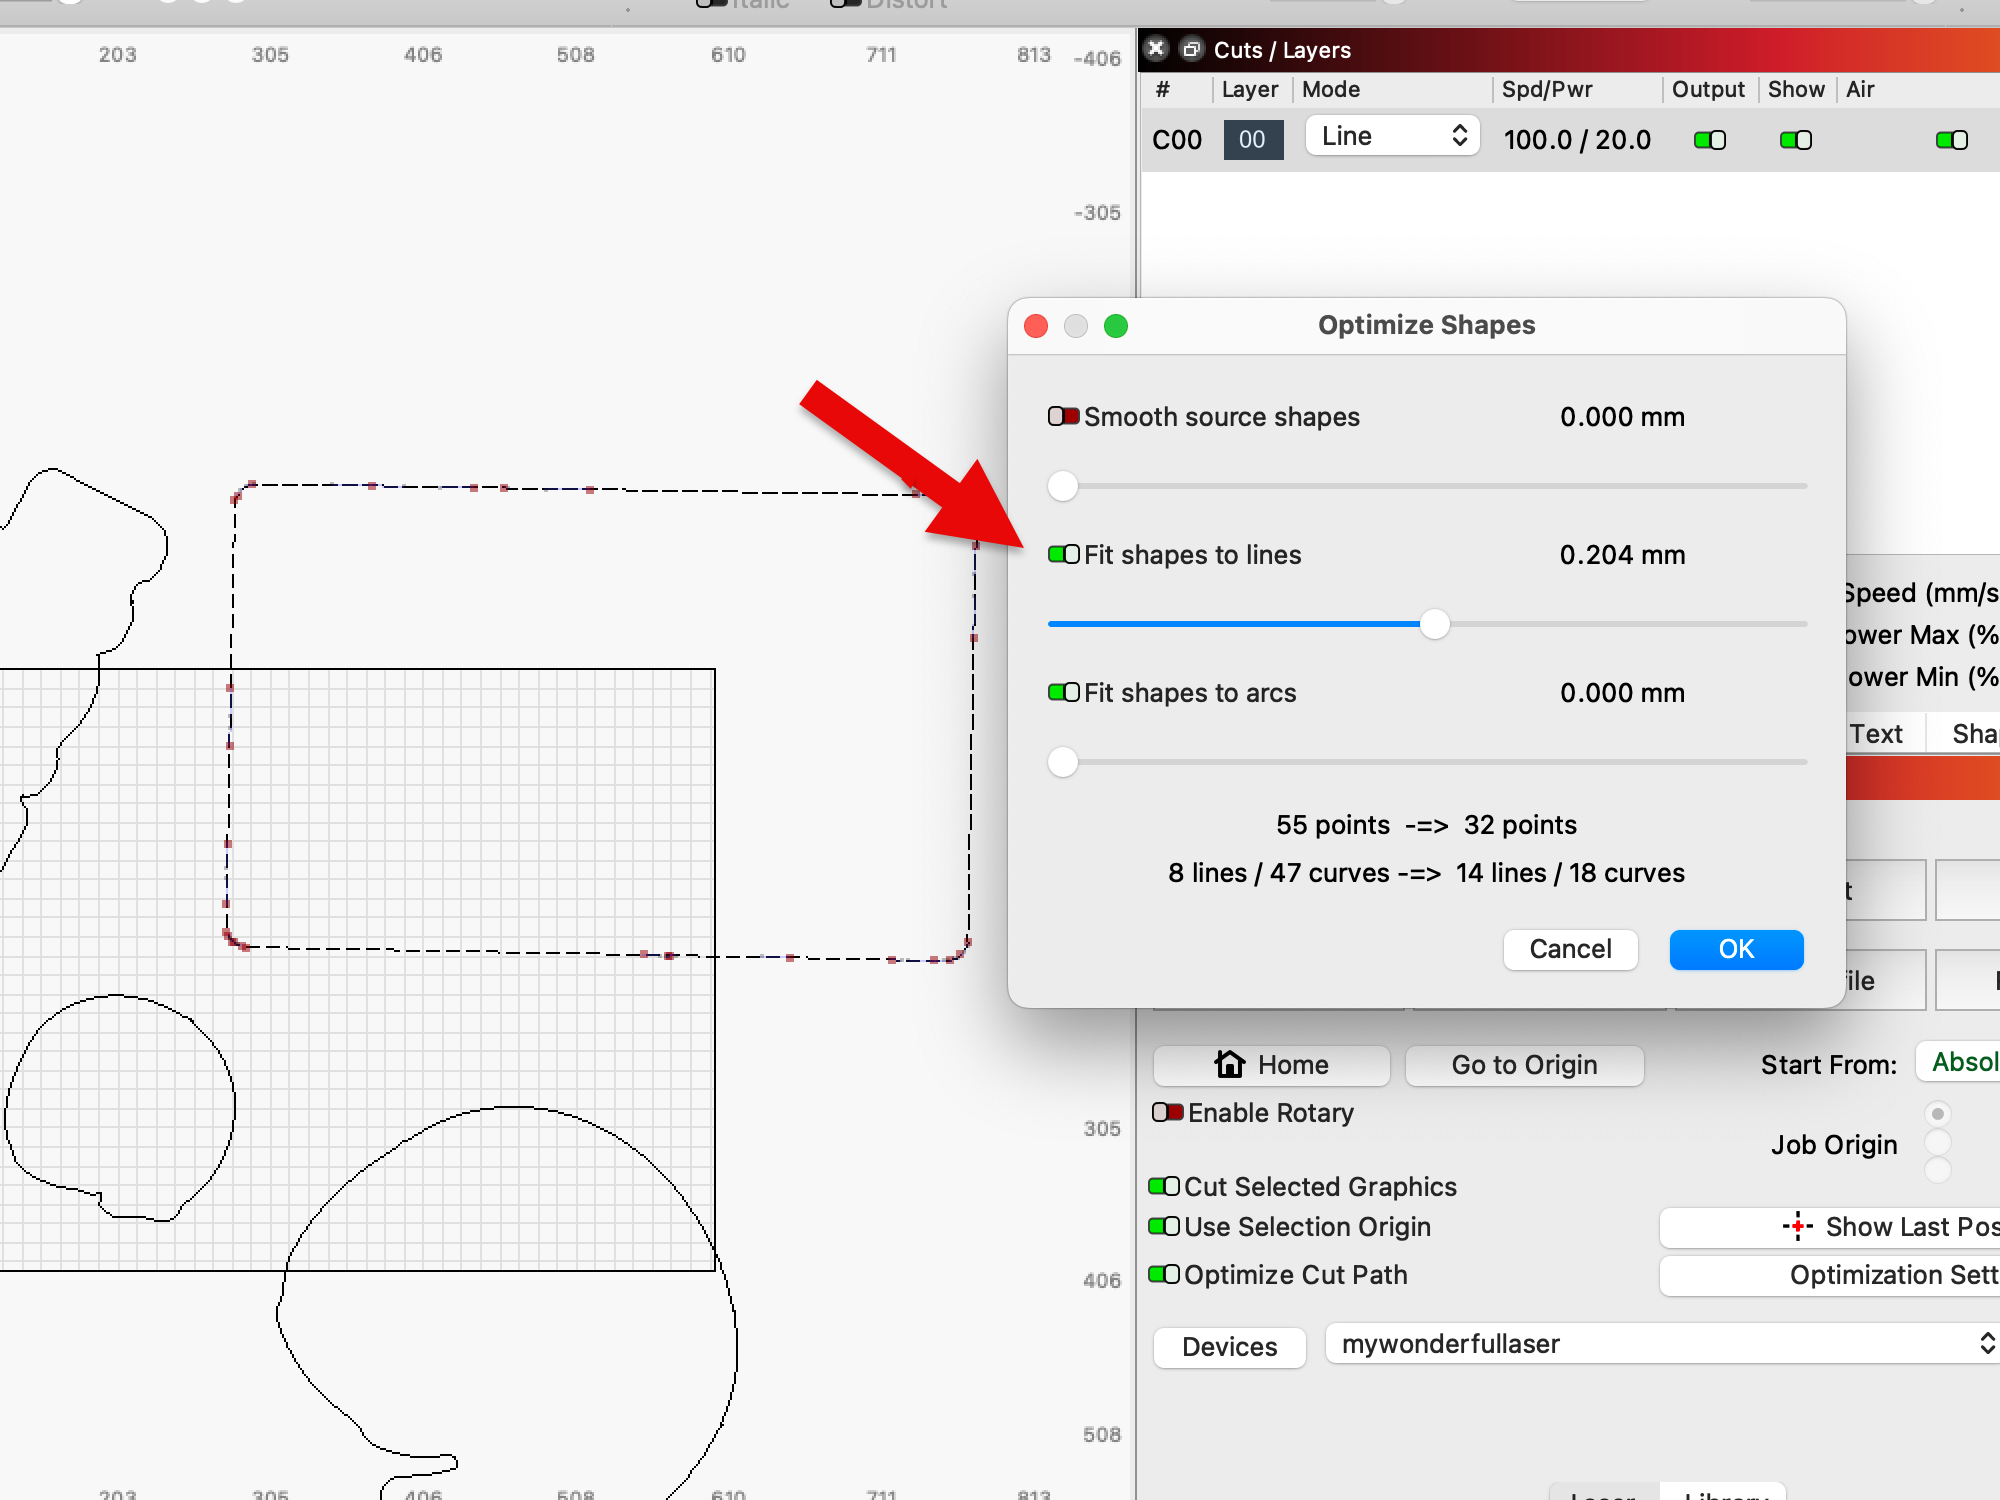
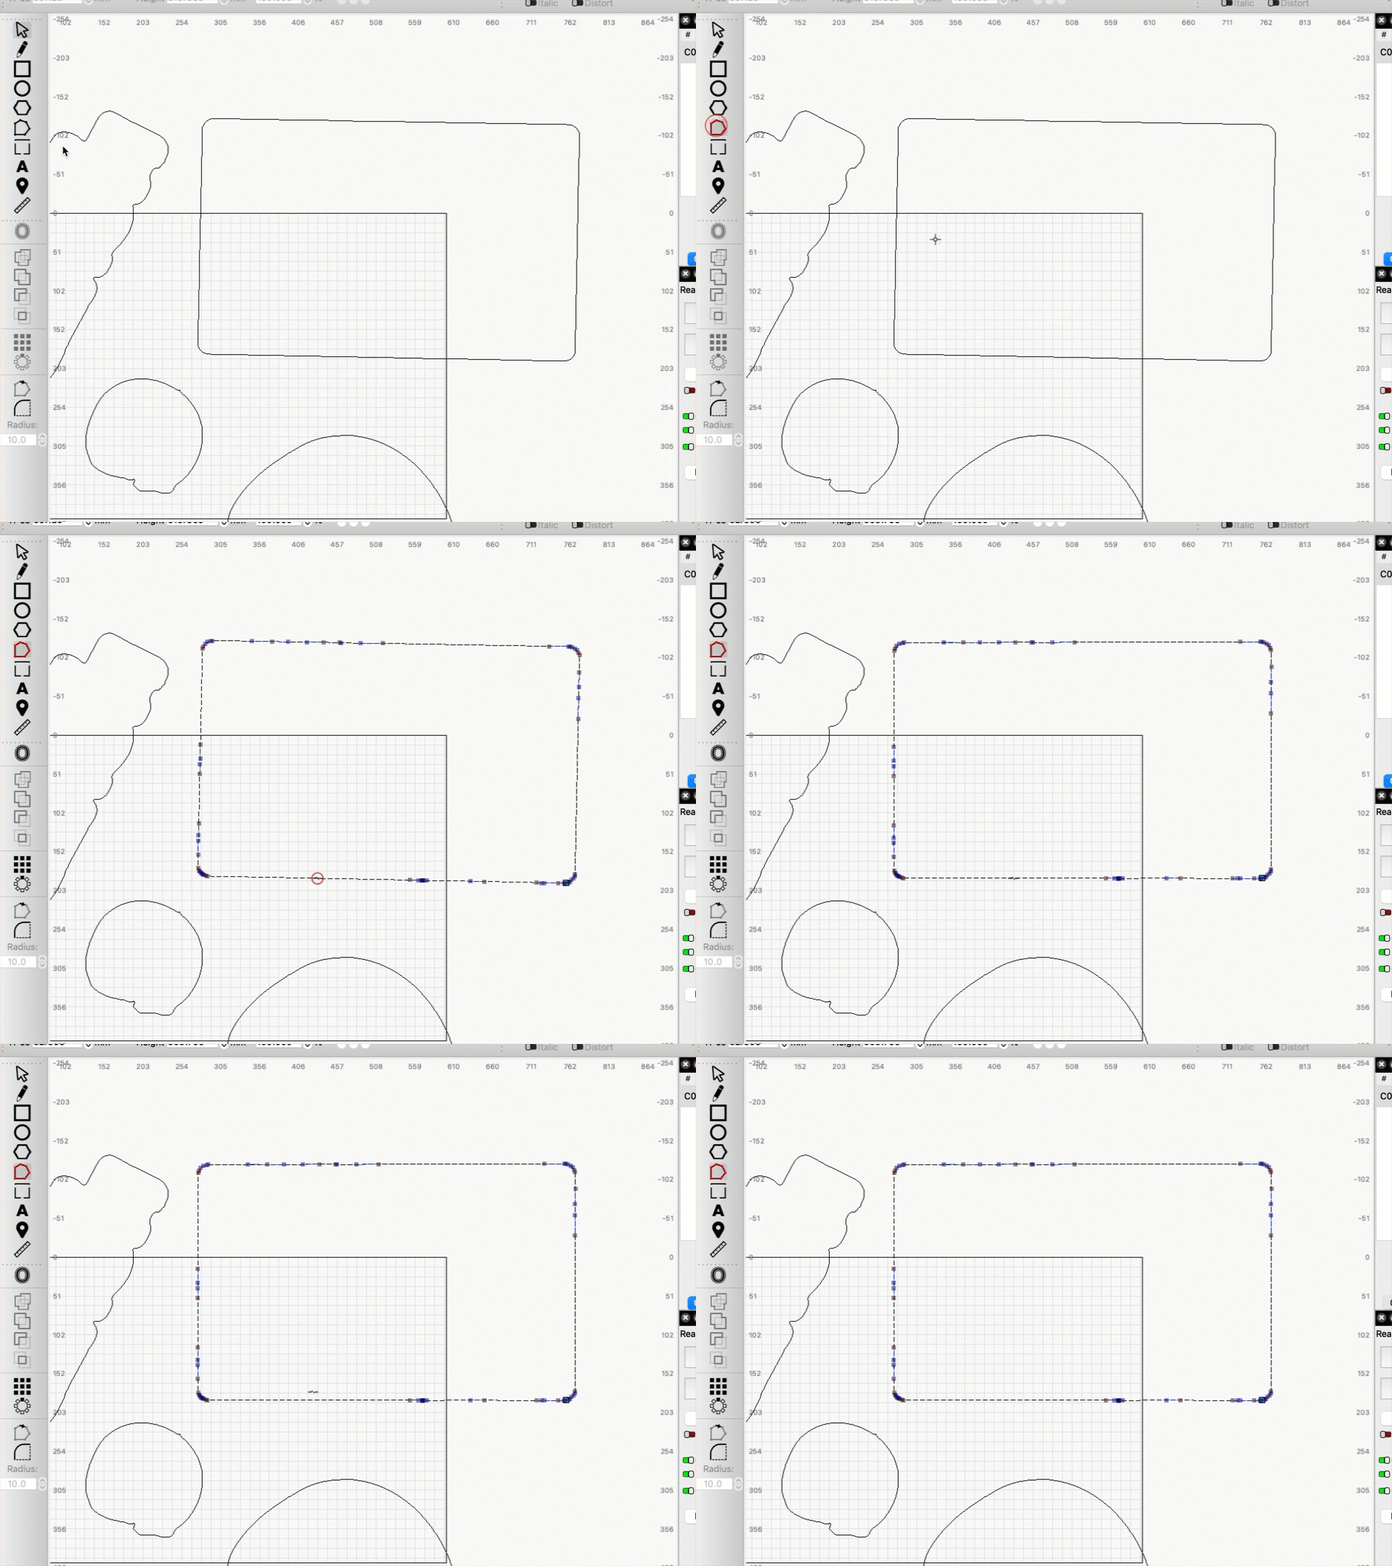
To get the outline of the reference object perfectly vertical or horizontal, first Select it and go to Edit → Optimize Selected Shapes and use the Fit shapes to lines slider to fit it to lines. About halfway along the slider will do.
-
Then, select the Edit Nodes tool, hover over one if its edges, and press A to align it to the nearest vertical or horizontal angle.
-
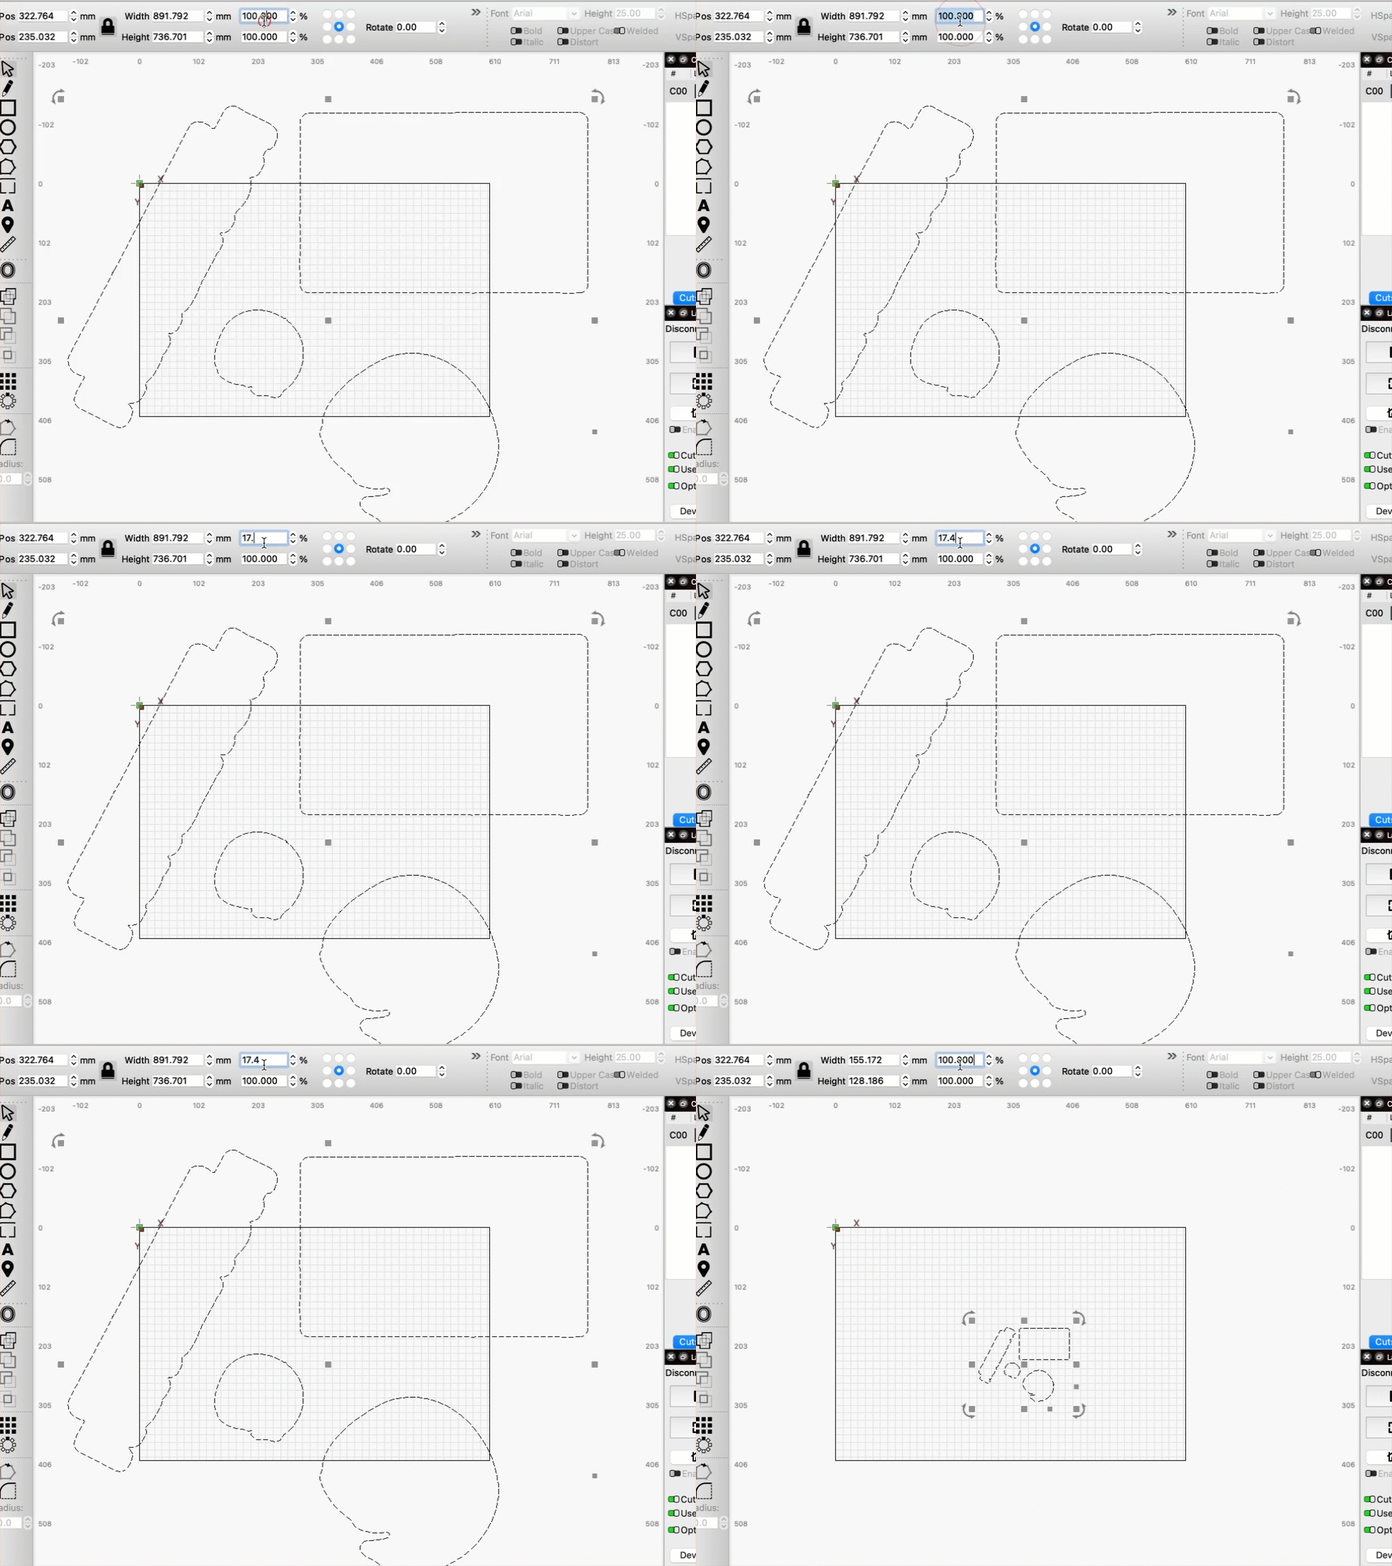
Select the outline of the reference object you traced, and read its Width or Height measurement in the Numeric Edits toolbar.
-
Divide the known Width or Height of the actual object by the Width or Height of the outline you read in the Numeric Edits toolbar. In our case, the known Width of our cards was 86 mm, and the Width in LightBurn was 494.115 mm, for a result of ~0.174. We'll use that value to rescale our graphics.
-
Select all the rest of the graphics and enter the value, expressed as a percentage, in the Numeric Edits toolbar. For our result of .174, that meant entering 17.4% in the Numeric Edits toolbar. All of the outlines will now be scaled to the actual size of your stickers.
-
Select and Delete the outline of the reference object.
Note: it can be hard to get the stickers lined up perfectly to these backing pieces, so you can elect to rescale the outlines to be just a touch larger than real size, or add an Offset after rescaling them, to provide a bit of an extra border.
5. Cut the Sticker Backing Pieces
-
Set the outlines to a Line layer. Apply appropriate settings for your laser to cut through 1/16" acrylic. If you're unsure of what settings to use, run a Material Test.
-
Use your preferred Start From mode to position your job and cut the outlines.
-
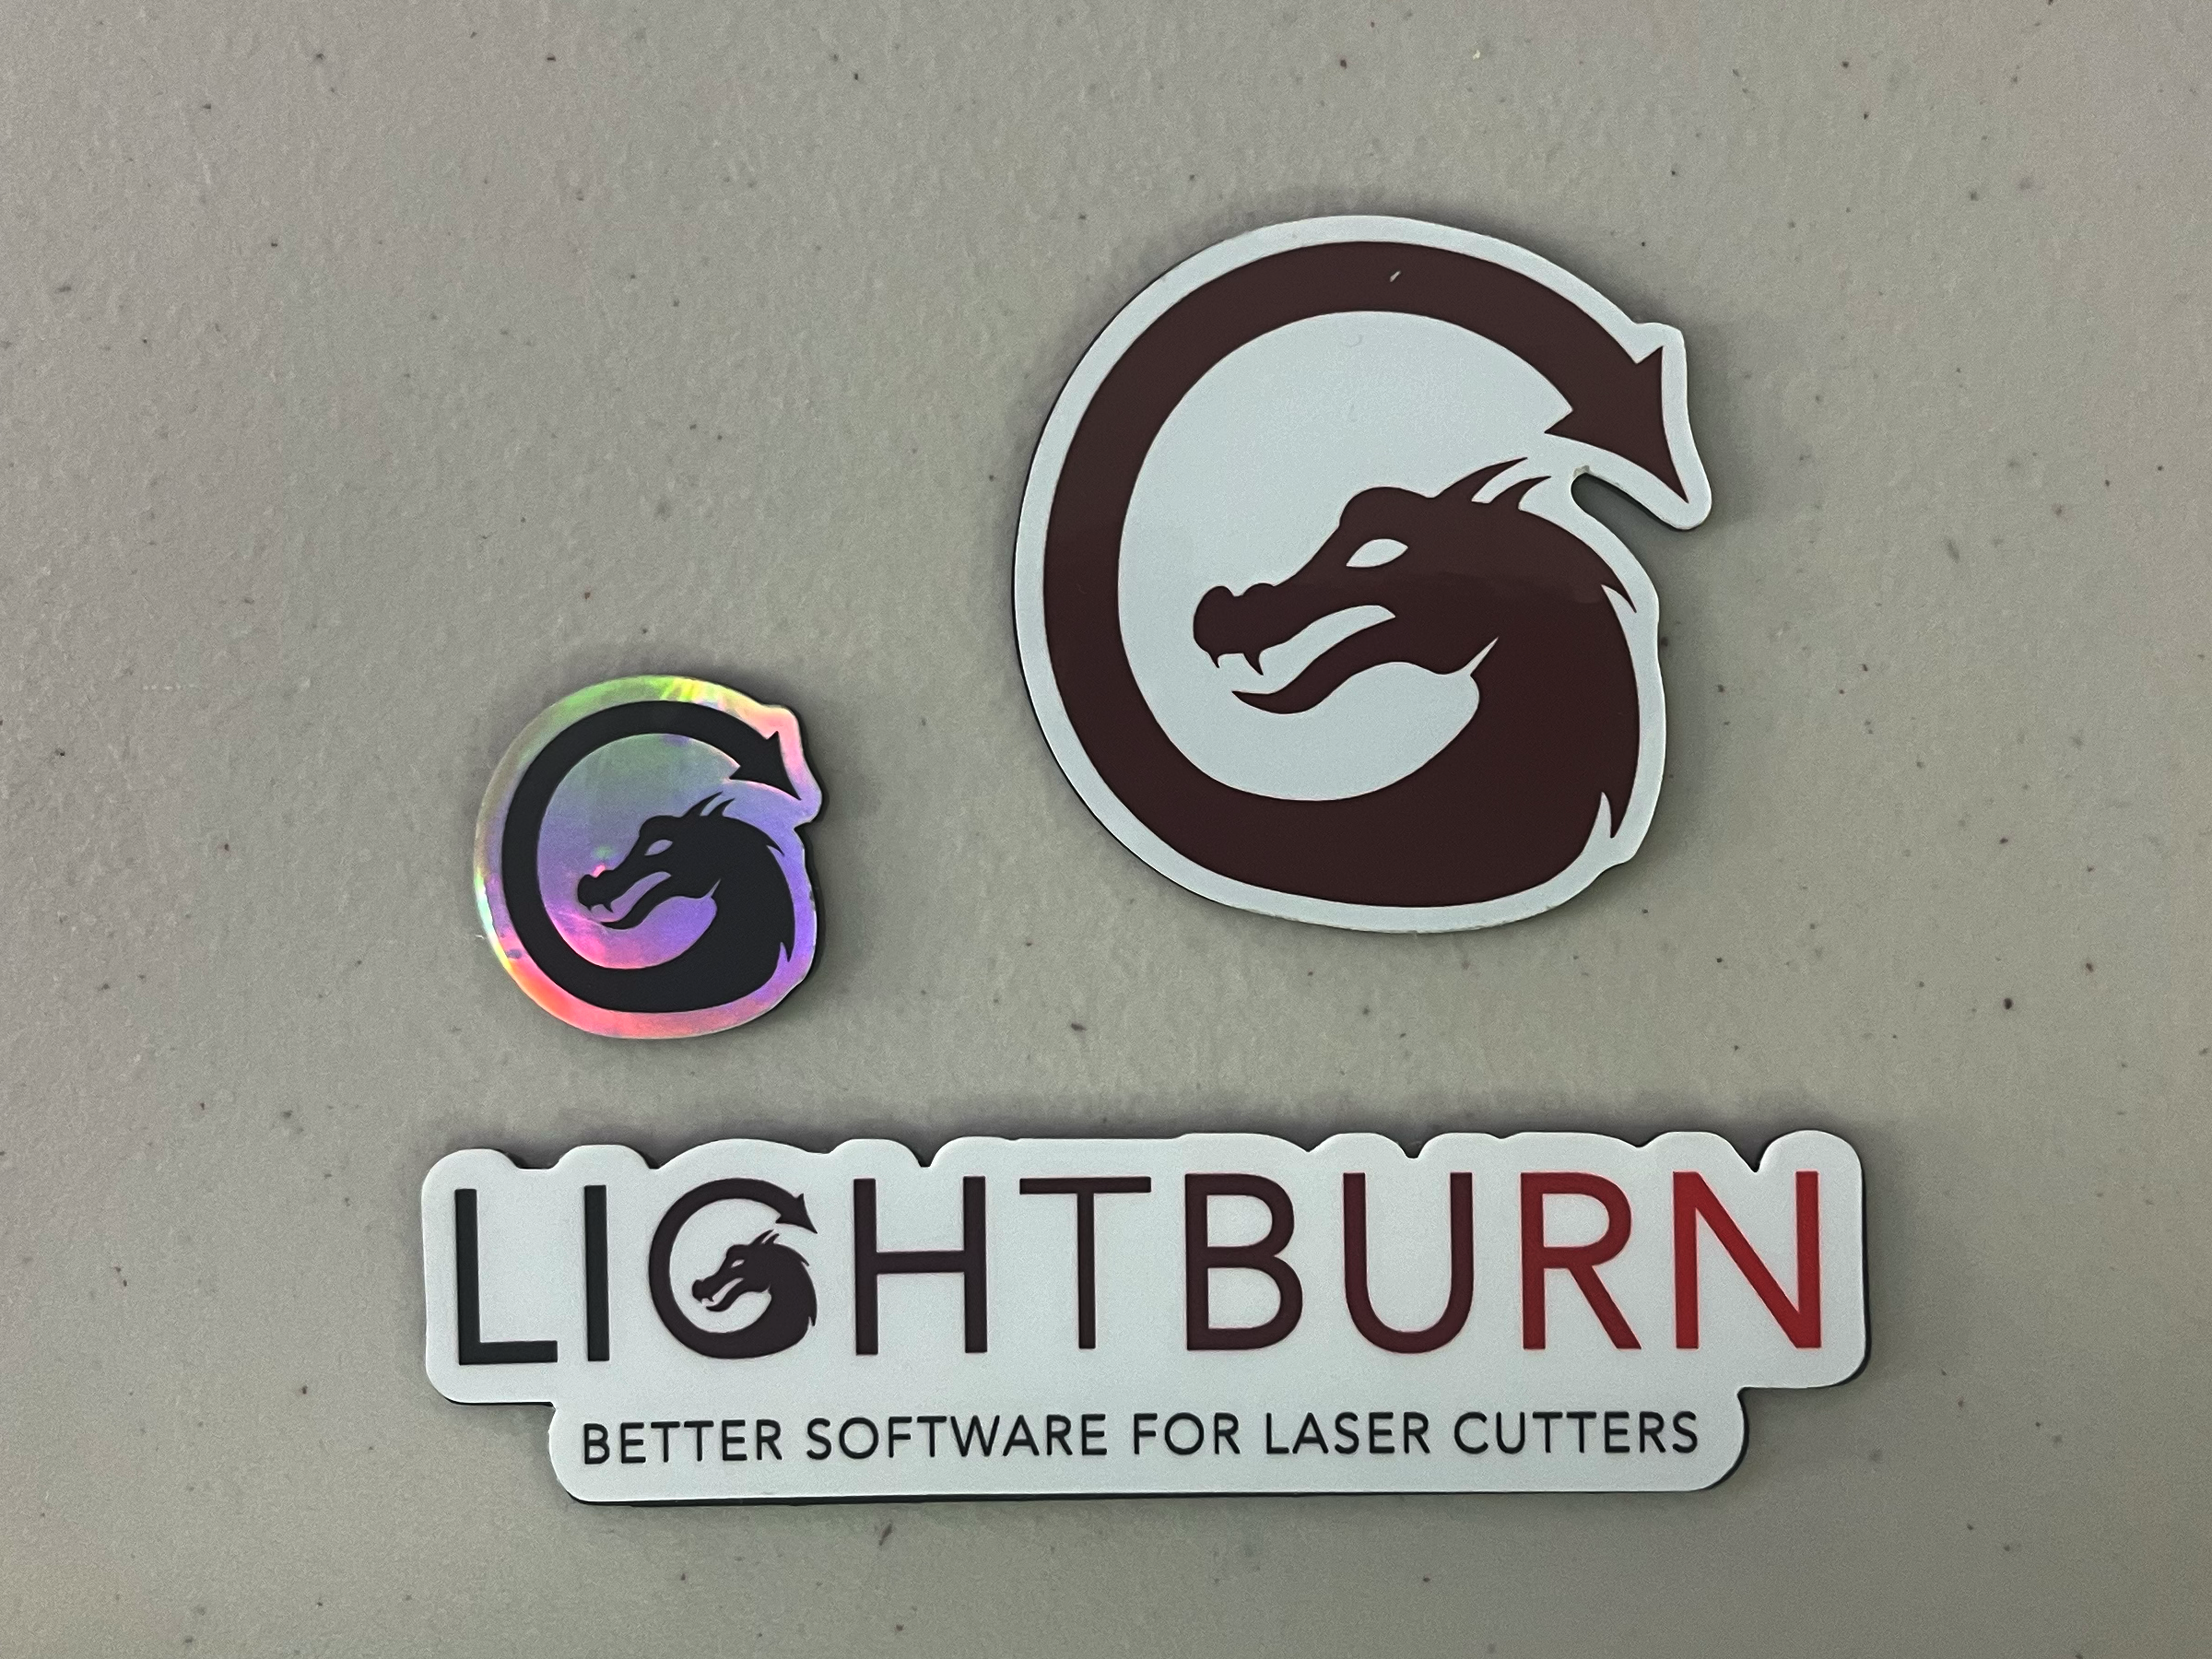
Remove the backing pieces from the laser and very carefully stick the stickers onto them — it can be tricky to get them lined up perfectly this way, so go very slowly.
Both Methods
Stick on the Magnets
We're almost done, this part is easy!
-
Peel one side of the adhesive and apply it to a magnet.
-
Then peel the other side of the adhesive and attach the magnet to an acrylic backing. Repeat for all magnets and backings.
-
If your stickers are relatively large, you may want to strategically place a few magnets around the edges.
-
Put your new fridge magnets on your fridge!
