Trace Image
Use the Trace Image tool to convert imported images into vector graphics.
This is useful if you want to edit an image that has high contrast or well-defined edges, including logos, silhouettes, cartoons, sketches, and handwriting. You can trace photographs as well, but results will vary based on the composition of the photograph.
Trace Image Window
After selecting an image in your Workspace, select Tools → Trace Image, right-click the image and select Trace Image from the context menu, or press Alt/Option+T to open the Trace Image window.
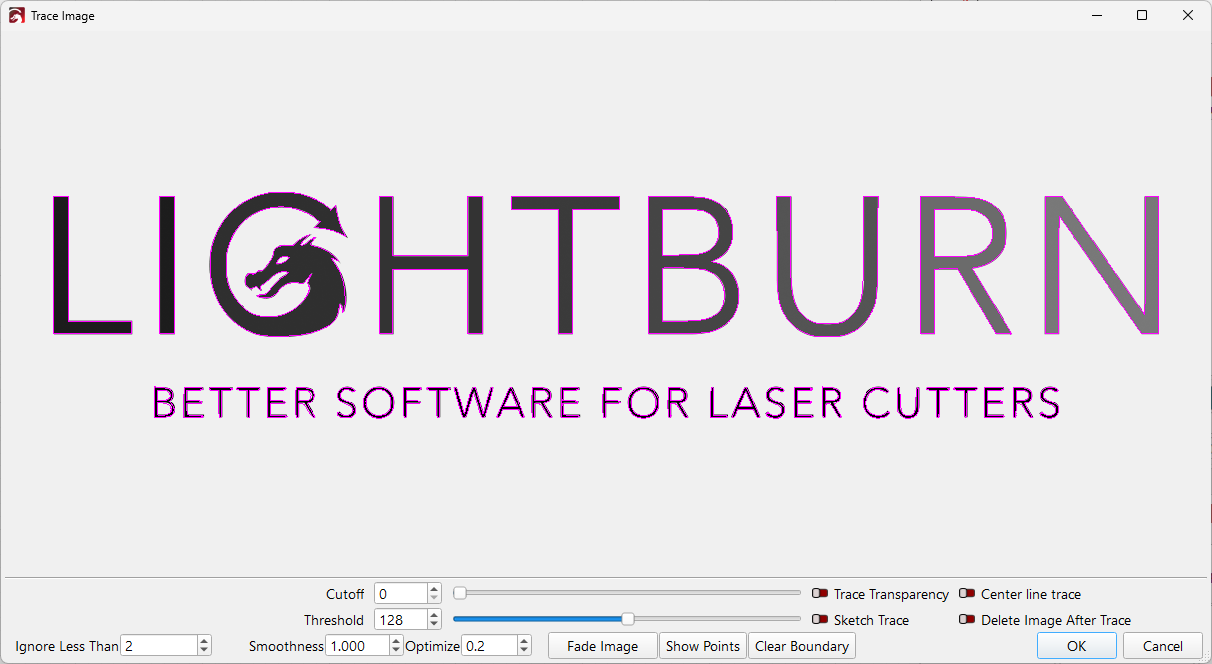
In the image above, the purple lines are the vectors that LightBurn has produced from the image being traced. As you adjust settings in the Trace Image window, the purple lines will change to reflect the new vectors that will result from the updated settings.
Navigation and View Options
You can Zoom and Pan the preview using the same controls as in the Workspace, and double-click the middle mouse button to reset the view.
Fade Image
Click Fade Image to dim the image, increasing the visibility of the vectors (purple lines) in the preview.
Show Points
Click Show Points to toggle visibility of the nodes in the preview of the resulting vectors.
Clear Boundary
Click and drag in the preview to specify a portion of the image to trace. Click Clear Boundary to reset it.
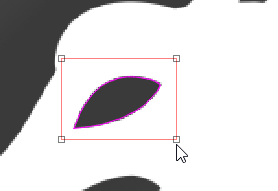
Trace Options
Cutoff and Threshold
Cutoff and Threshold control the range of brightness values that LightBurn will include in what's traced. The Cutoff slider controls the lower (darker) end of the range of brightness values that LightBurn will include in the trace. The Threshold slider sets the upper (lighter) end.
Increase the Threshold value to include lighter/brighter shades of gray in what's traced. Increase the Cutoff value to remove darker shades of gray.
The values range from 0 to 255, and by default LightBurn will include values from 0 (black) to 128 (medium gray).
Trace Transparency
If the image you're tracing has a transparent background, you can trace the outline of the image quickly and easily by turning on Trace Transparency. When this is enabled, LightBurn will trace the border between transparent and non-transparent. Colors and internal details are ignored.
You can see an example of using Trace Transparency in the video here.
Center Line Trace
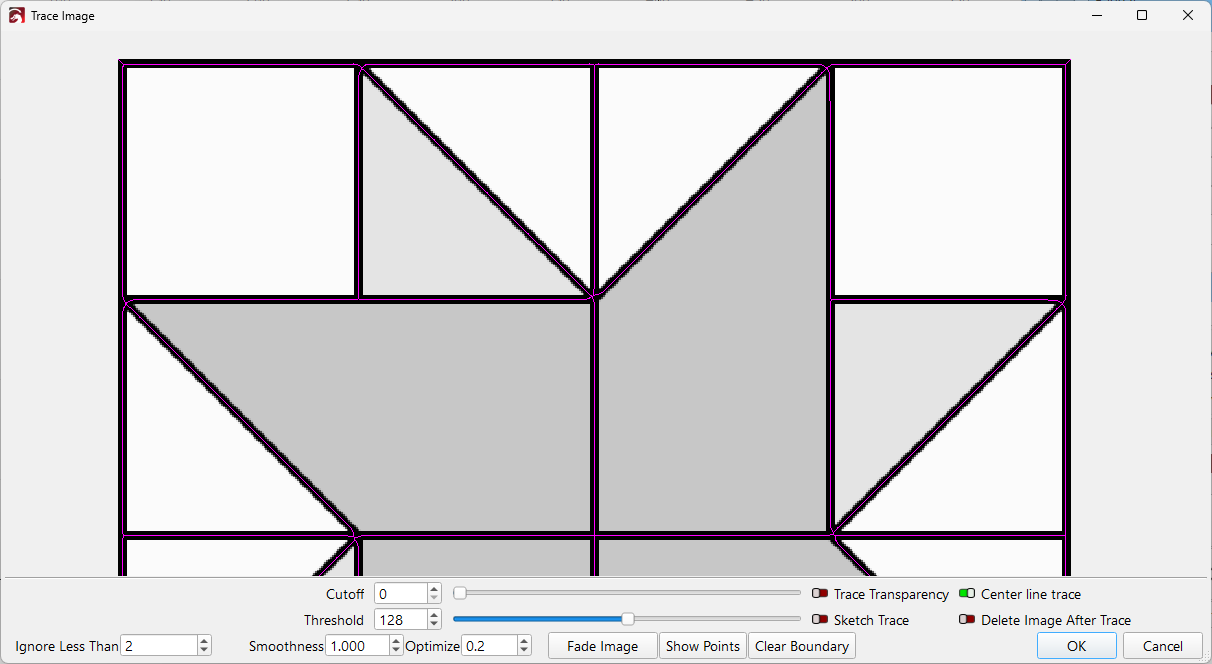
Use Center Line Trace to trace along the center of a line rather than around the edges. You can use Center Line Trace to turn line art like the quilt block below into vector paths to cut out.
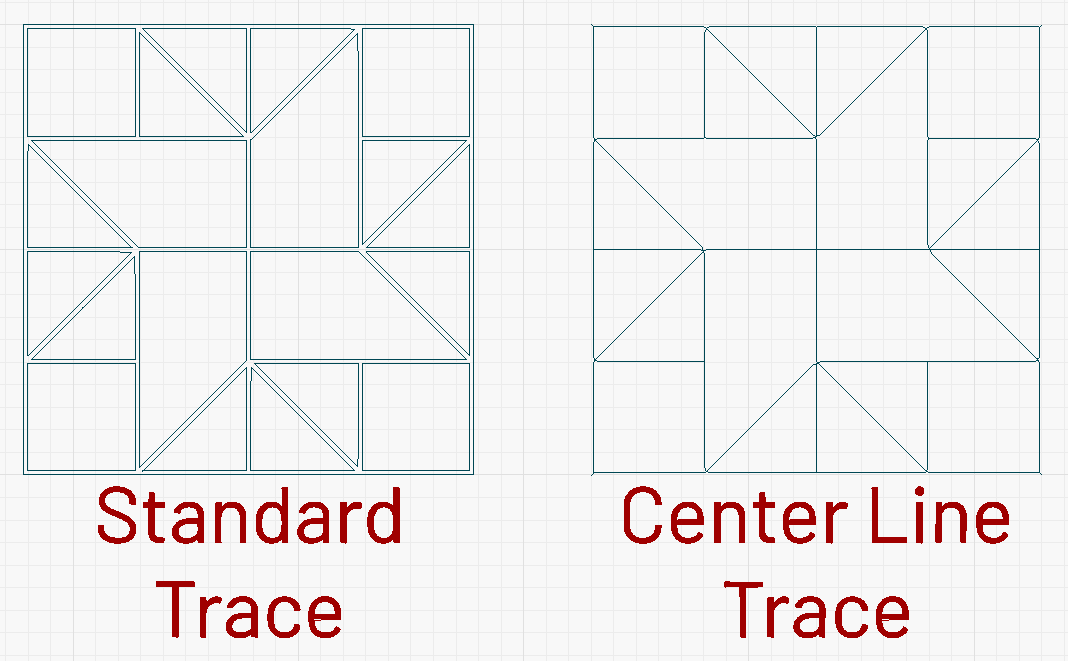
The comparison image below shows a standard trace result next to Center Line Trace for the same image.
Sketch Trace
Turn on Sketch Trace for photographs of pages with uneven lighting — for example handwriting, sketches, and documents. LightBurn will look for edges in the image with this setting enabled, based on local differences in contrast, rather than relying on the brightness or darkness of the whole image.
Delete Image After trace
Turn on Delete Image After trace to automatically remove the image from your project upon hitting OK.
Ignore Less Than
Instructs LightBurn not to trace areas where the number of pixels in the valid brightness range is lower than this number. Increase the number of pixels in the Ignore Less Than field to clean up noisy images by removing small areas from the result.
This setting is useful for ignoring small details that may not be useful in the tracing.
Smoothness
Increase Smoothness to turn more line segments of the resulting vector into curves. Set it to 0.0 to create only lines (left), and 1.33 to create only curves (right).
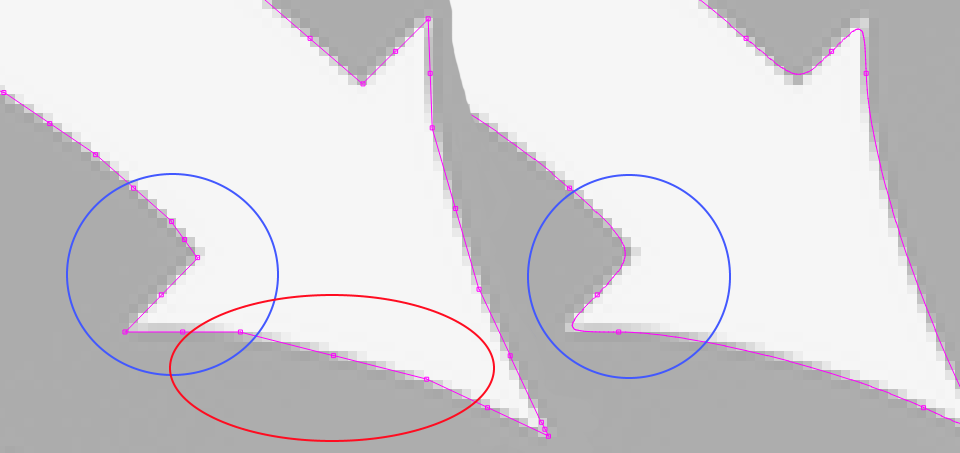
Optimize
Increase the value in the Optimize field to reduce the number of nodes in the resulting vectors, similar to Optimize Selected Shapes.
A value of 0 leads to no optimization, while excessively high values can reduce accuracy. The default of 0.2 usually provides a good balance between accuracy of the result and node count.
Editing the Trace
After hitting OK, you will be presented with a Group containing the resulting vectors. To edit the shapes individually, you must first Ungroup them.
After they are Ungrouped, you can edit them as you would any other shape.
Hidden Vector
If you can't see the vector, it may be hidden by the original image, click and drag the image out of the way to reveal it, or Push the image to the back of the draw order.
Troubleshooting
Tracing works by automatically creating an approximation of the pixel-based image in vector format, and while LightBurn's trace function is extremely robust, it remains limited by both the computationally-difficult nature of this task, and the quality of the image it is presented with. In some instances fine details — for example sharp corners and small text — may not be converted well during this process. If changing the Trace options doesn't overcome this issue, exit the Trace Image window and try using Threshold Image Mode to engrave the original image instead of tracing it.