Camera Lens Calibration
Significant Changes in LightBurn 2.1
LightBurn 2.1 introduced a new camera system, with new features, a new interface, and new calibration and alignment processes. Information from earlier versions of LightBurn may not apply in LightBurn 2.1, and information for working with cameras in LightBurn 2.1 may not apply to earlier versions.
Before you can use your camera, you'll need to calibrate it to compensate for the distortion present in all camera lenses using the Camera Calibration Wizard. The wizard will walk you through the process of capturing a series of images of a printed target so LightBurn can calculate and correct for the distortion of the camera lens.
Camera Lens Calibration only needs to be done once per camera - moving the camera doesn't require a new calibration.
What if I use more than one camera?
If you have two or more overhead cameras in your laser to better cover a large bed, calibrate each camera separately.
Did you already go through the Camera Lens Calibration process and export a LightBurn Camera File? If so, you can import the file and reuse that calibration.
Jump to importing a Lens Calibration
Open The Camera Calibration Wizard
There are a few ways to open the Camera Lens Calibration Wizard outside of creating a new camera:
- Click the Calibration button for the camera you want to align in the Cameras Window.
- Click the Calibrate Lens button in the Edit Camera window.
Before You Begin
-
Make sure you have the AprilTag calibration pattern ready. You can download and print it, engrave it onto a flat, rigid sheet of material, or load it in full screen on a tablet (set the screen to always on).
Calibration Pattern Details
In order to work properly, the calibration pattern must be:
- Undistorted
- Perfectly flat
- Clear with good contrast
If you print the pattern, mount it to something stiff and flat, such as cardboard, foam board, wood, or a clipboard.
The size of the pattern is not critical, as long as the AprilTags are big enough to be recognized by the camera. If you have trouble calibrating the corners, you may want to try either printing the pattern smaller or holding it further from the camera.
-
Make sure the bed of your laser has good, consistent lighting and the camera is in focus. If you're using an official LightBurn camera, most can be manually focused by gently twisting their lenses.
- Select the correct camera in the Cameras window.
-
Make sure your camera is mounted in a way that holds it perfectly still.
Camera Placement
You do not need to have your camera mounted in the machine as long as it's perfectly still. You will need to have it mounted in the correct placement for the Alignment process, though, so it may make sense to make sure it's installed now.
Quick Start
Need more help? Jump ahead to the full directions.
Camera Lens Calibration Walkthrough
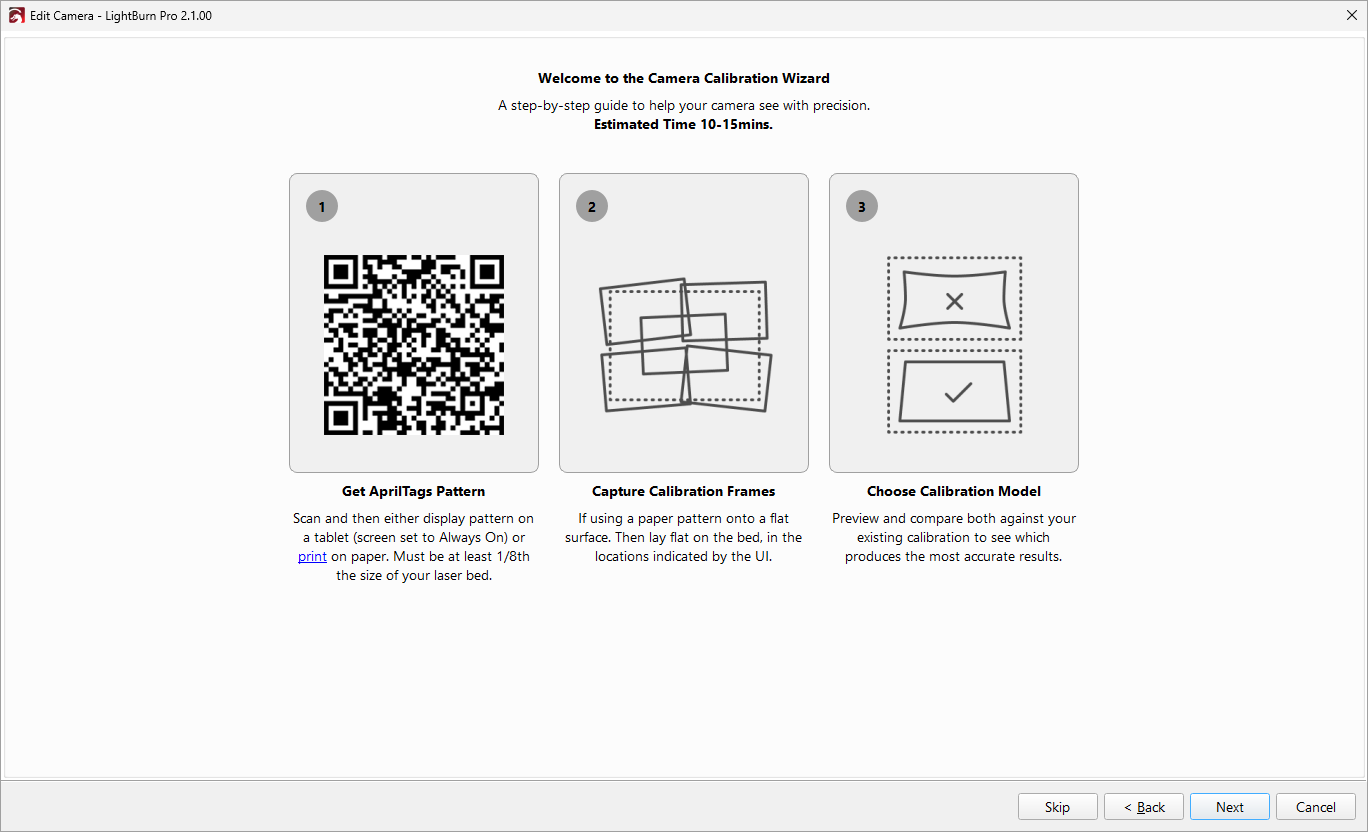
The Camera Calibration Wizard has on-screen directions to walk you through the process. Here's a quick overview if you want to just jump in and get started.
- Prepare the calibration pattern as described above.
- Open the Camera Lens Calibration Wizard and click Next to continue.
- Capture 5 images of the calibration pattern in the locations highlighted by the wizard - the four corners and the center of the workspace. You can use the jogging controls to move your laser out of the way. Click Next to continue.
- Select your Calibration Model. You can preview the results of each model by selecting it. You want straight lines to appear straight, and should pay attention to what the corners of the bed look like.
- If you're happy with the results, you can start on Camera Workspace Alignment.
Walkthrough
If you want more detailed help with Camera Lens Calibration, you're in the right place.
1. Prepare the Calibration Pattern
As described above, make sure you have the AprilTag pattern printed or loaded up on a tablet screen. LightBurn can detect the tags and use their location, size, and distortion to calculate the distortion of the camera lens, so it can correct for that distortion.
2. Open the Camera Lens Calibration Wizard
There are a few ways to open the Camera Lens Calibration Wizard outside of creating a new camera:
- Click the Calibration button for the camera you want to align in the Cameras Window.
- Click the Calibrate Lens button in the Edit Camera window.
3. Capture Calibration Frames
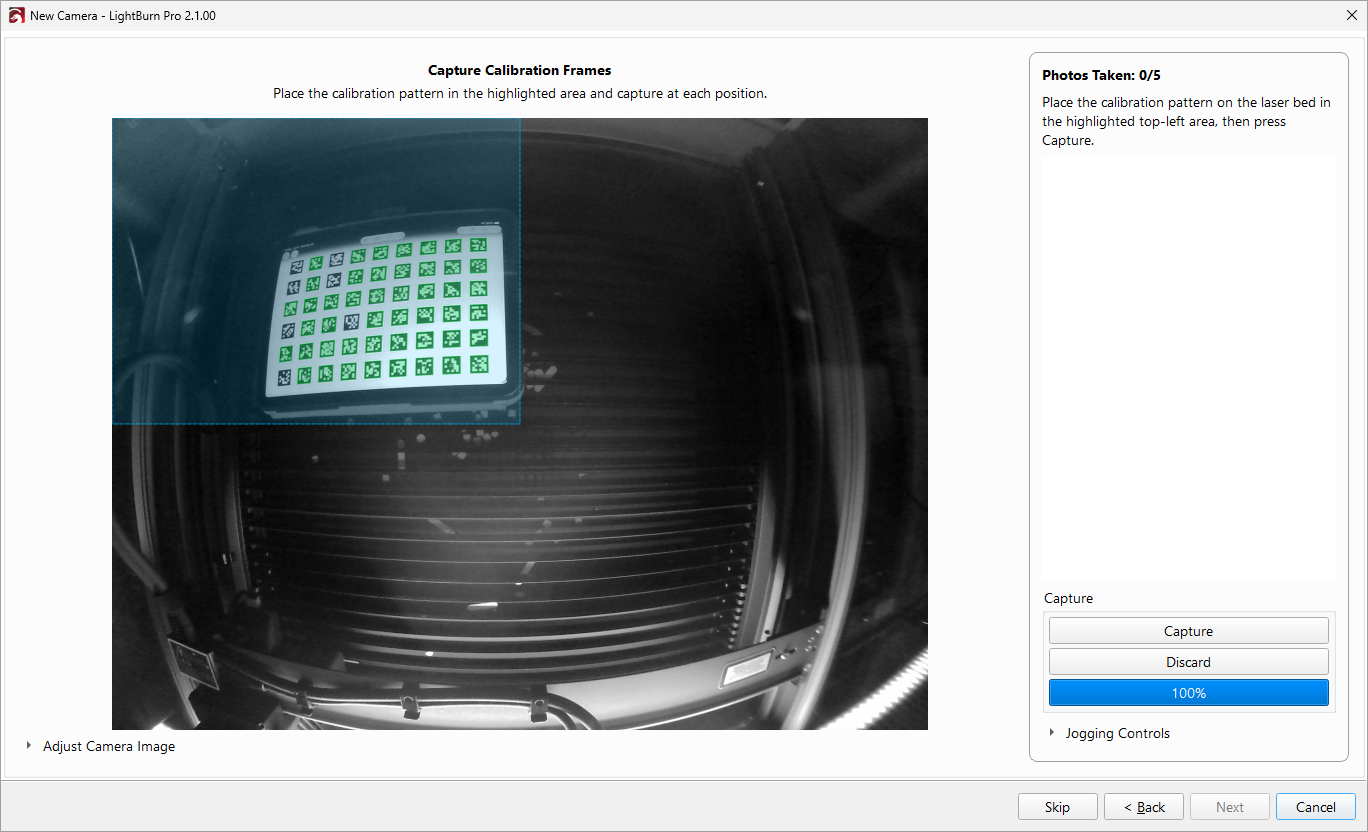
The next screen will walk you through capturing Calibration Frames, which are images showing the calibration pattern in each corner of your laser's bed as well as the center.
- Place your calibration pattern on the bed of the laser and adjust it to be in the highlighted box (the blue overlay shown in the top left in the screenshot above). Detected tags will be highlighted in green. You can use the Jogging Controls in the bottom right to move the laser head out of your way.
- Click the Capture button to capture a frame. If you're unhappy with the frame you captured, you can discard it with the Discard button.
- Move the calibration pattern to fit in the next box and repeat the process.
After you've captured the 5 required frames, you should see something like the screenshot below.
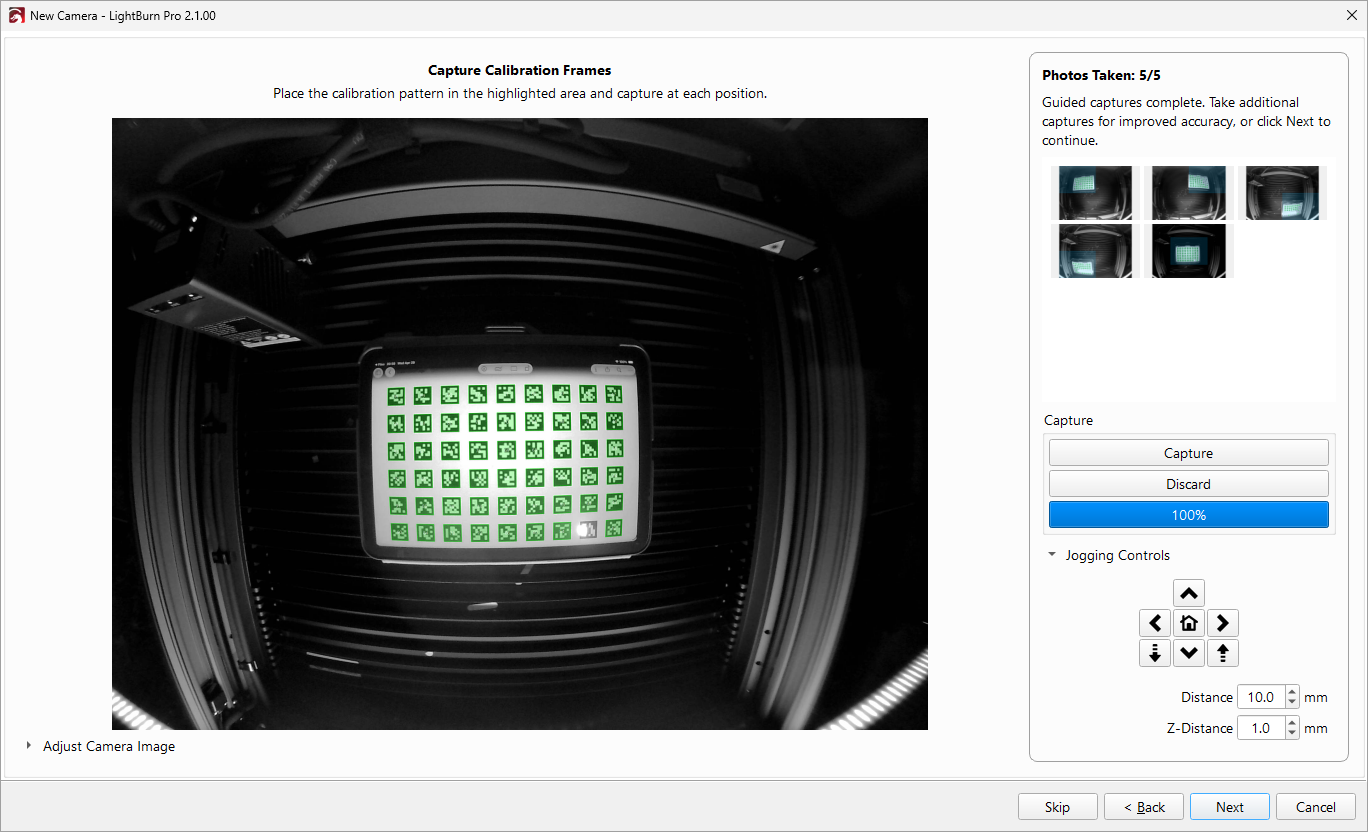
At this point, the view of the calibration tags should be more accurate than at the beginning, but will likely not look entirely correct. You can keep going to take more calibration frames, or click Next to continue to the next step.
4. Choose Calibration Model
There are 4 different mathematical models LightBurn can apply for the corrections.
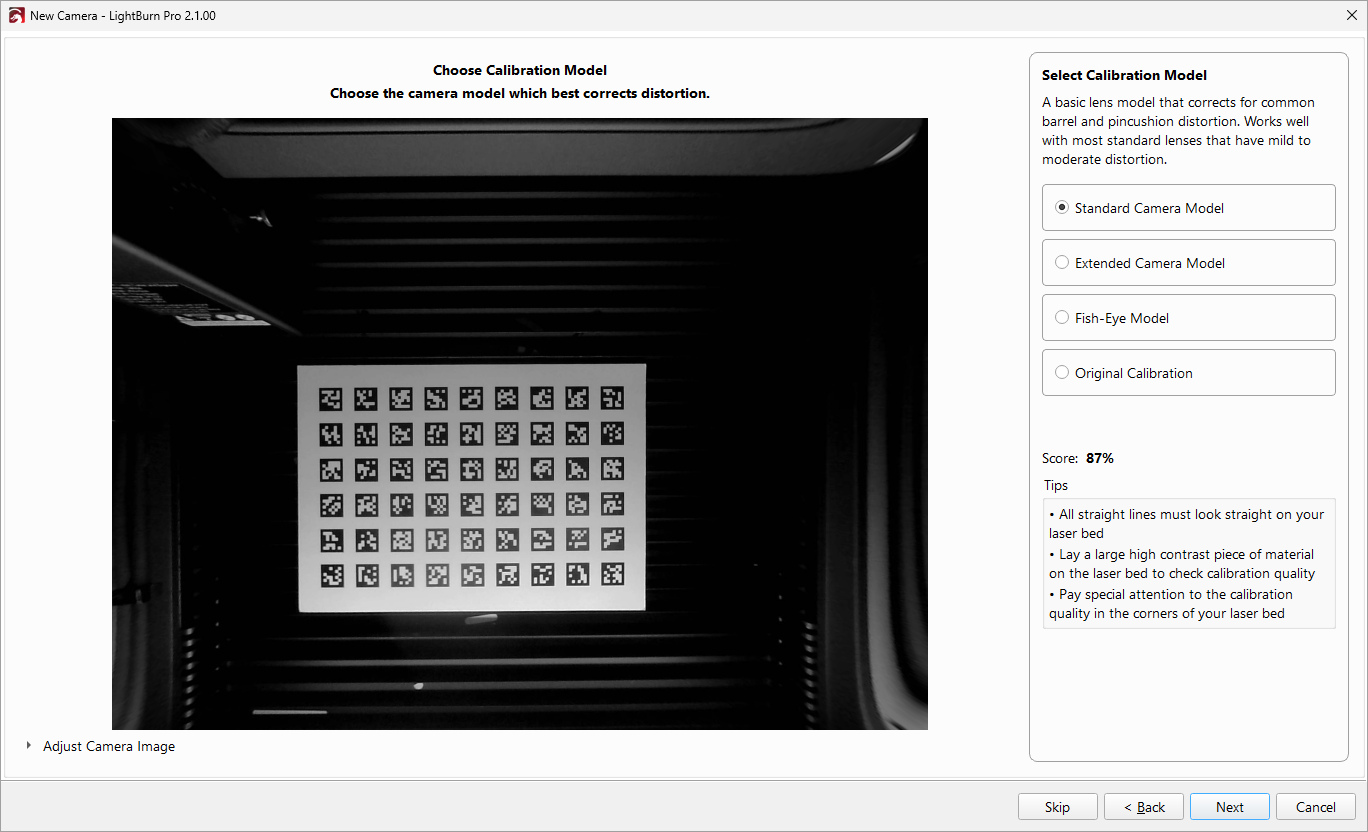
Click the model options on the right to preview what the camera image looks like under each. A large, high contrast pattern (for instance, the calibration pattern) can be helpful for checking the accuracy of the calibration. Select the model that looks the most accurate and click the Next button to continue.
If none of the models look accurate, click Back to capture additional samples or restart the process.
Tip
Look for lines you know are straight in the real world. If they're wavy or curved in the capture, that means there's distortion in the selected model.
Each model includes a description with more information.
Calibration Scores
The percentage score shown for each calibration model can be a helpful indicator, but a higher score doesn't guarantee a better calibration. Pick the model that looks most correct, even if it doesn't have the highest score. The Extended Model often produces the best results for cameras with very distorted lenses. The Fisheye Model is designed for fisheye lenses, which are a very specific style of lens, not just any camera with a very wide field of view.
Why isn't a high score always better?
The score comes from the average error between where LightBurn expects the calibration tags to be according to the calibration model and where they actually are. A calibration that only covers the center of the image tends to score higher because the center only has a little bit of distortion. Once you include the edges in the calibration, the model has to account for more real-world imperfection, so the score tends to drop, even though the calibration itself can be more accurate.
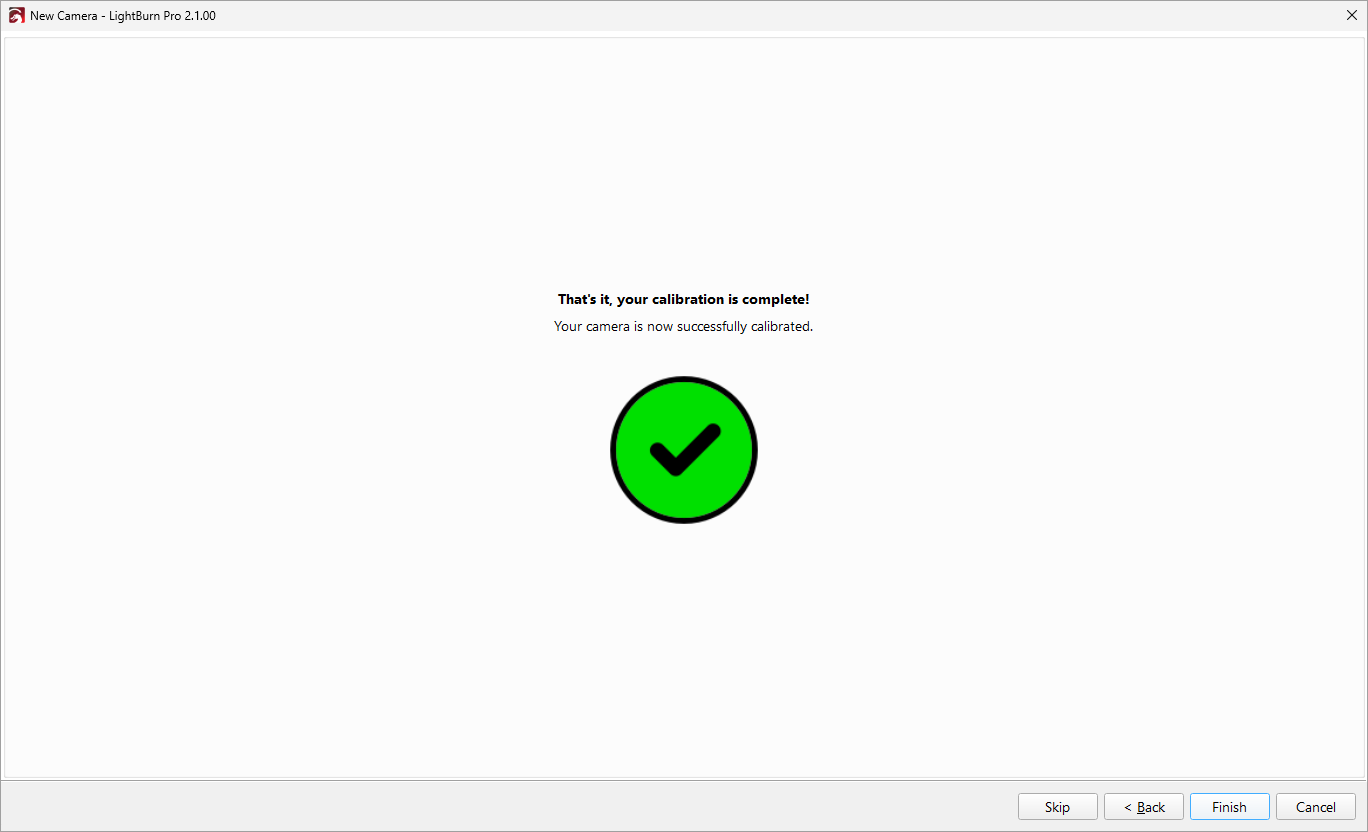
5. Success!
On the final screen, click Finish to close the process and save your changes. Next, you'll need to do Camera Alignment to align your camera to your workspace.
Import Existing Calibration
If you've already calibrated your camera and exported a LightBurn Camera File, you can import and reuse that calibration. Camera Lens Calibration only depends on the camera, not the mounting within the device, so even if you've moved the camera, you can still reuse the lens calibration.
- Open the Edit Camera window in one of the following ways:
- In the Laser Tools menu, select Manage Cameras, then select the camera you want to edit and click the Edit button.
- In the Cameras Window, right-click on the camera you want to edit to open the context menu and select Edit.
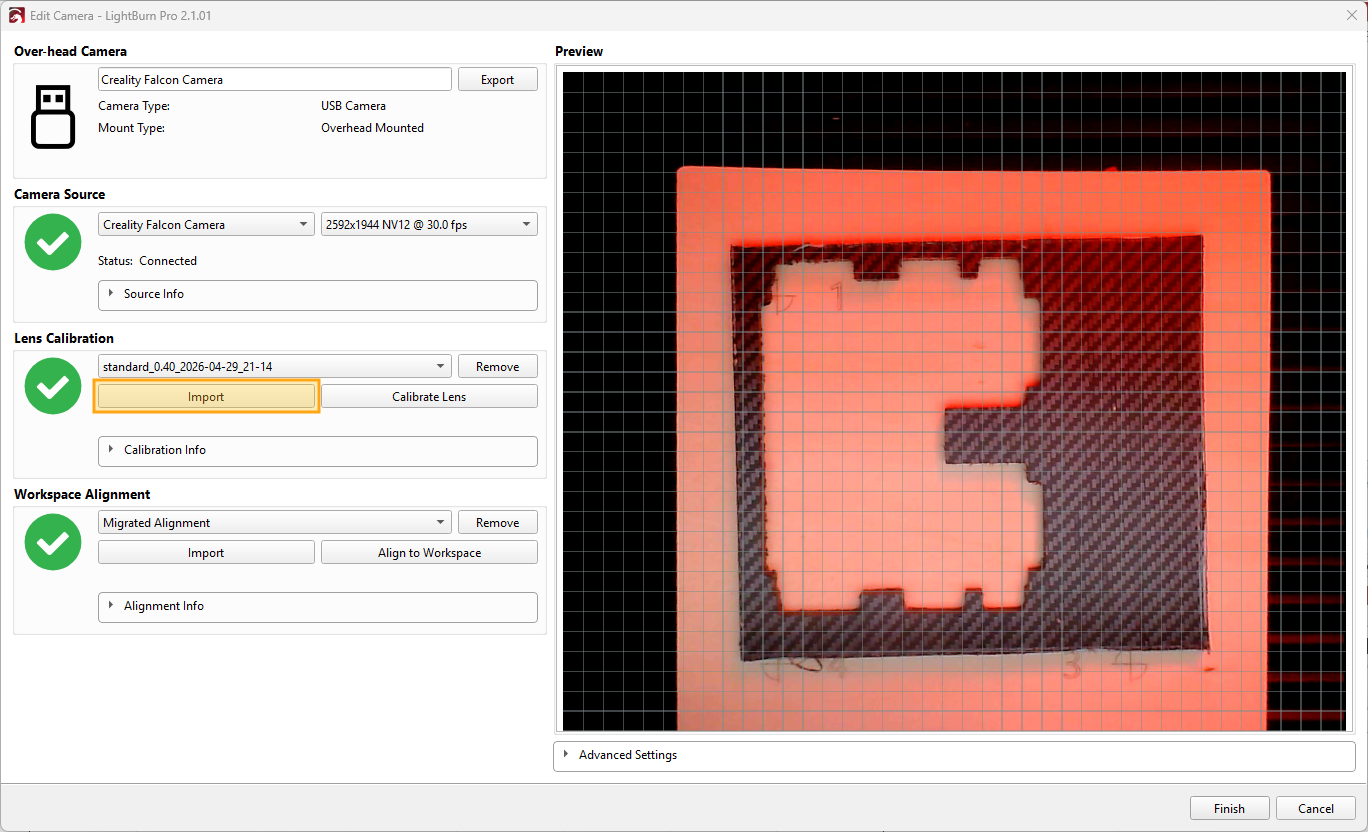
- Select the Import button in the Lens Calibration section. See the screenshot below for the location.
- Select your
.lbcmfile and click OK.
What's Happening
Feel free to skip this section if you're not interested.
All cameras distort the image they capture at least a little, and the larger the area they can capture, the more serious that warping is. Wide-angle or fisheye lenses that can capture large workspaces from relatively close will be particularly badly distorted.
The Camera Lens Calibration process is required so that LightBurn can figure out the distortion pattern of your particular camera and correct for it in the software. The AprilTag calibration pattern you use for this process is important for the improved process, and allows for a simplified calibration process compared to the older dot pattern.