Print and Cut with LightBurn
"Print and Cut" normally refers to the ability to print a design on a printer, then have it automatically cut it out with a blade or laser cutting machine by using registration marks on the print to align the cut to it.
Print and Cut in LightBurn is used to align your current project to something you've previously output. The most common use for this is, as above, printing a file with a design on it and then using the laser to cut out the design, but it can also be used to align multiple jobs on your laser.
You can use it to register two halves of a large job with each other, for example, to cut something larger than your machine. We have a tutorial that shows how to do this here: Cutting a single project larger than your laser
You can also use it to register multiple passes over the same job - For example, you could use your laser to lightly engrave an outline, remove it from the machine to paint it, then put it back in the machine, align it using Print & Cut, then engrave a different area in the same project.
Note: In order for the output to be positioned correctly on your laser, you must use Absolute Coords as the positioning mode, otherwise the output will not match the position of the print.
Registering a printed file with a laser cut job:
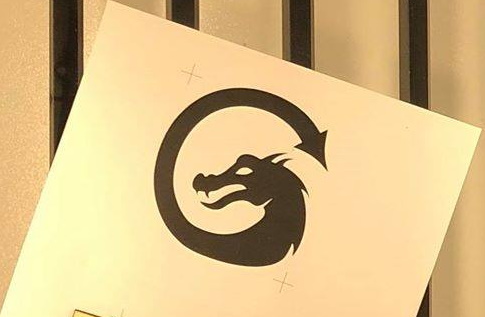
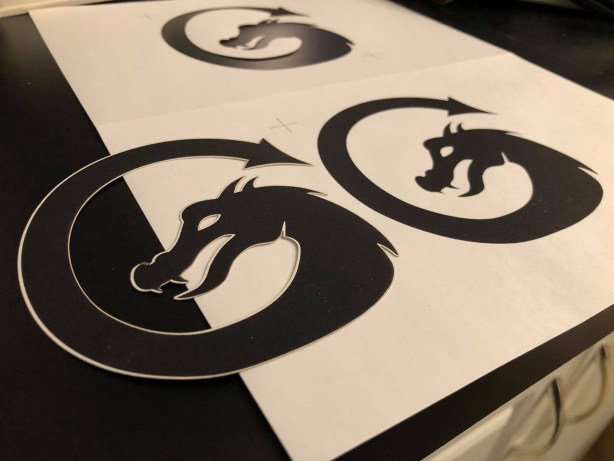
As an example, take this design, printed on sticker paper:
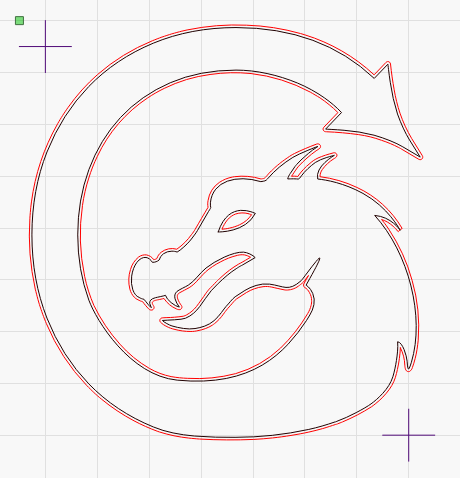
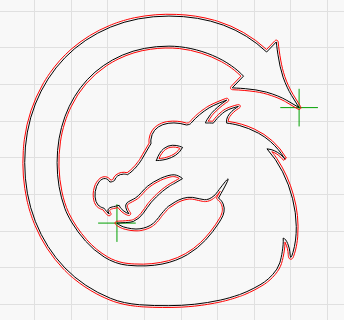
I've imported the same design into LightBurn, with the cross-hair markers, and added an outline to the dragon using the offset tool:
The important part in this file is the two cross-hair marks - these are the target marks that you will use to align the cutting path with the printed sticker. They don't have to be cross-hairs, but these are simplest to align with, as the center of the selected object is what is used for alignment when recording positions. Each target marker must be a single object that can be selected - If you draw two lines to make a crosshair, group them.
After placing the printed version of the file in the laser, follow these steps to align the laser output with the print.
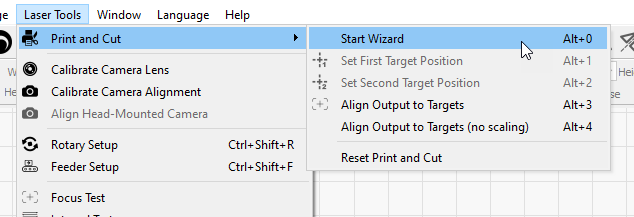
Note: There is now a wizard for Print and Cut that will guide you through the steps below. You can start the wizard by clicking Laser Tools > Print and Cut > Start Wizard, shown here:
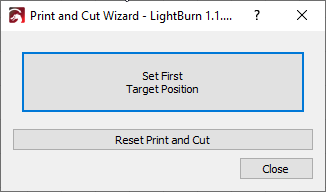
You'll be presented with the Print and Cut wizard, shown here:
Or, you can do the steps using the menu items instead.
Using the red-dot pointer of your laser, jog the laser head to align with the center point of one of the two cross-hair marks. You cannot move the laser head by hand for this - you have to jog the laser either with the buttons on the laser control panel, or in the Move window in LightBurn.
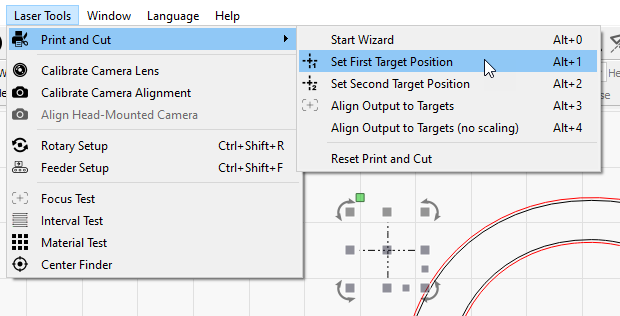
In LightBurn, select the same cross-hair mark, then go to Laser Tools > Print and Cut > Set First Target Location, like this:
Now, jog the laser to align the red dot pointer to the center of the second marker.
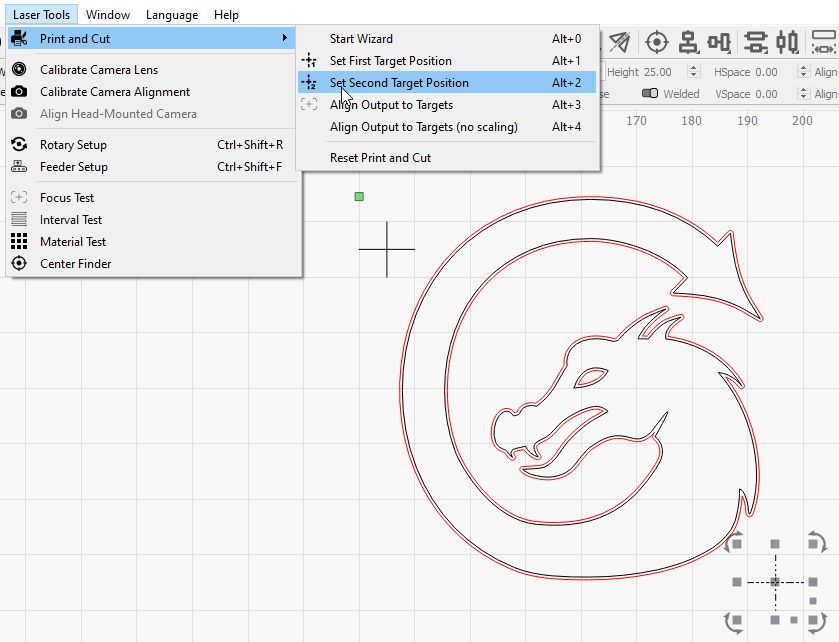
In LightBurn, select that second cross-hair mark, and again choose Tools > Print and Cut > Set Second Target Location:
You will notice that in the above image, the menu option for 'Set First Target Position' has the icon highlighted as well - this means that the First Target Position is set and active.
After setting both targets, the menu will automatically enable the 'Align Output to Targets' option for you, like this:
Print and Cut Scaling
After setting targets, you will have the option to Align Output to Targets (no scaling) or Align Output to Targets.
If your design in LightBurn is the same size as the physical design you are using Print and Cut with, you should choose the Align Output to Targets (no scaling) option. This will generally be the case if you are resuming a job or performing a multi-step engraving process on your laser.
However, you may sometimes need to scale your design. As an example, you might need to cut out a design on sticker paper that was scaled up or down as part of the printing process. In this case, you should use Align Output to Targets. When you select your targets, LightBurn will automatically scale the design to match the real-world size indicated by your targets.
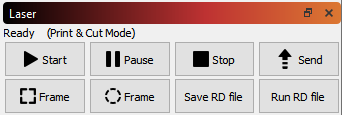
You will also see the "(Print & Cut mode)" message in the status window, like this:
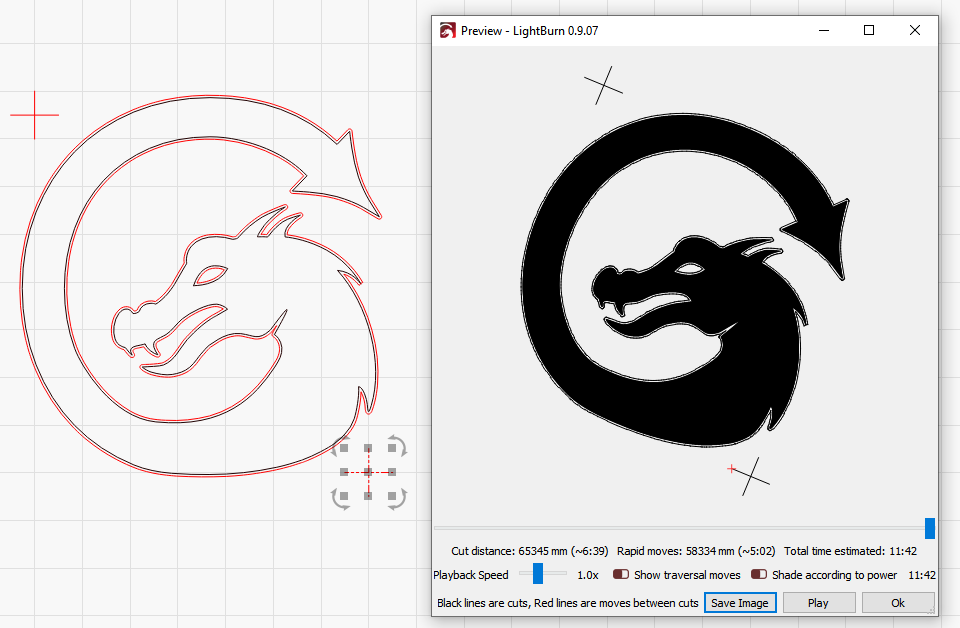
If you preview at this point, the orientation of the preview should match that of the print on your laser:
In the above image, you can see the preview image is rotated slightly clockwise, matching the orientation of the printed image in the laser.
Note: In order for the output to be positioned correctly on your laser, you must use Absolute Coords as the positioning mode, otherwise the output will not match the position of the print. The accuracy of the result will be affected by the accuracy of your red-dot pointer, so using one that is either a cross-hair beam pointer or a red-dot marker that is in the same beam path as your laser is ideal.
After running the job on the laser, this is the result:
When finished, you can turn Print & Cut off by un-highlighting the 'Align Output to Targets' option:
That will turn off the Print & Cut mode.
Using sharp corners in your file instead of targets
The Print & Cut feature measures the difference in position, orientation, and scale between the two positions you mark with your laser and the corresponding positions you select in the software. You do not actually need to output the markers in LightBurn, they simply need to exist so they can be selected.
The sticker image shown above has a very sharp corner at the tip of the tail, and one on the lower jaw - These would be acceptable locations to use as alignment targets as well, which would allow you to register to a job even without visible registration marks:
By putting the markers on the green layer, then setting that not to output, they're available in LightBurn to select, but wouldn't be part of the actual cutting job sent to the laser. When aligning to the first target, you'd point the red dot at the tip of the tail, and in LightBurn select that marker. Then repeat the process by pointing your red dot at the tip of the lower jaw, and select the marker in that location in LightBurn.
