LightBurn 1.7 supports more lasers
As of LightBurn 1.7, BSLFiber lasers are supported in addition to JCZFiber. Setup is the same, except the device type is BSLFiber, and the settings come from a SEACad configuration, typically named BslCAD.cfg or LmcPar.cfg.
Adding & Setting Up Your Galvo
To set up and configure your galvo laser, you'll need to create a new device, and import or manually enter settings provided by your laser manufacturer.
It's also a good idea to set up a new device profile for each lens you have for your galvo, because changing lenses will affect many parameters. You can duplicate a device after setting it up by right clicking on it in the 'Devices' window and choosing 'Duplicate'. This is the easiest way to add a new profile while keeping the settings, so you only have to update parameters that change with the lens.
To add a new device LightBurn, click the 'Devices' button. From here you have two options: the importer or manual entry.
Importer
Click 'Find my Laser' and LightBurn should detect the JCZ controller and add it for you. You will need to specify your field size (the size of your workspace), but this can be changed later too.
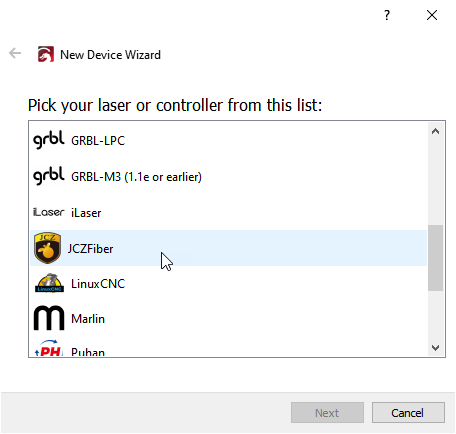
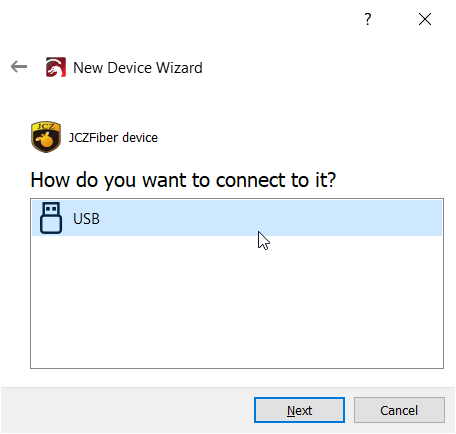
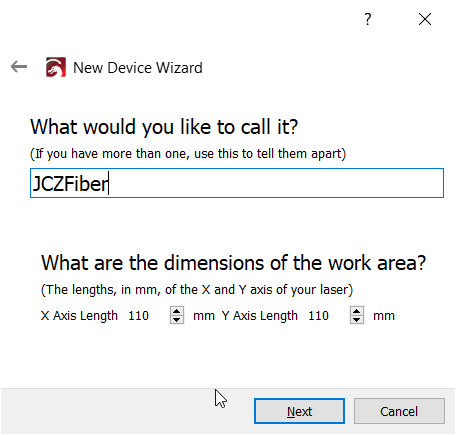
Select JCZFiber, click Next, and choose 'USB'. It's the only supported connection type for now.
As with any other laser device, you'll need to enter your window size. (110 mm x 110 mm is common).

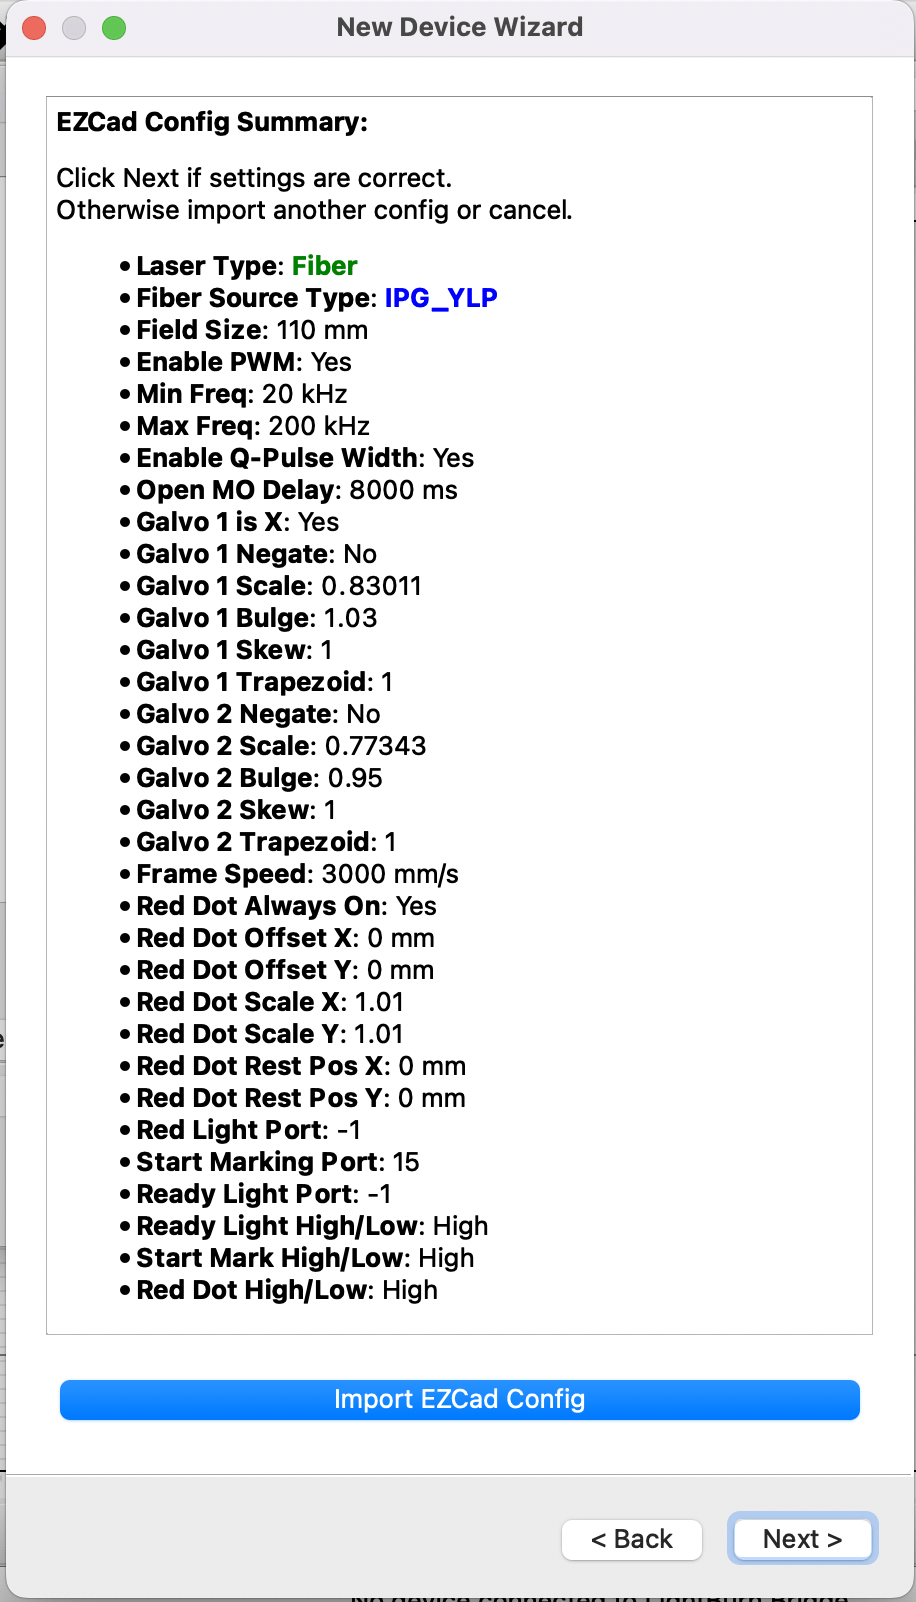
Select your configuration file from your EZCAD setup (or if you received a card, email, etc. with that information in it, please click "Next" anyways) It's likely to be on the USB drive you recieved from the manufacturer. Ours was in the "PLUG" folder of the "Ezcad2" install folder.
Info
If your markcfg7 file includes information about Lens Correction, LightBurn will attempt to automatically import this for you. If your configuration doesn't, you'll need to manually enter it in Device Settings after finishing the New Setup Wizard.
You'll need to enter the specific work area dimensions as selected by your manufacturer. While 110 mm by 110 mm is very common, the different models offered & their respective dimensions are usually listed on the manufacturer's website.
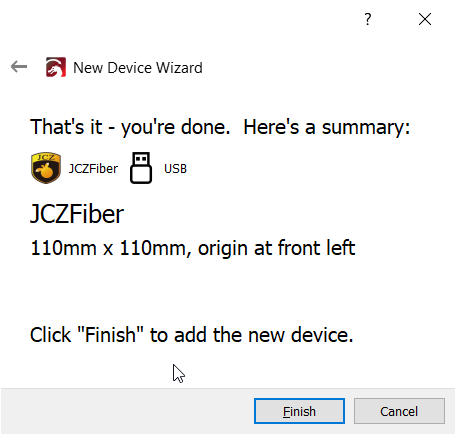
Just like that, you're all finished, and ready to start calibrating!
Manual Entry
If your laser did not come with the settings on a USB drive or if you don't have the USB drive available, you may need to contact the manufacturer for settings. Galvo settings can't be found through trial and error, due to the complexity and variety of machine configuration. Settings that work on one laser may destroy another.
If your settings were provided on a card, in an email, or in any other way that doesn't work with the automatic importer, clicking "Next" when asked to Import EZCAD Config will allow you to skip this step.
When in the main window, please open the "Edit" menu item, and select "Device Settings".
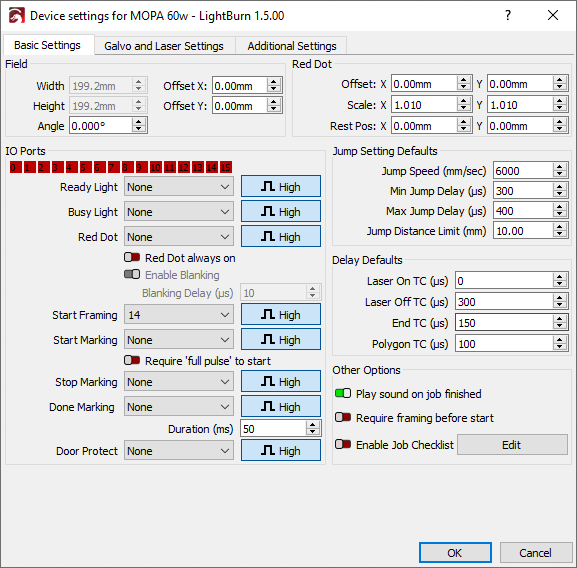
The settings can now be manually entered to match what was provided by the manufacturer.
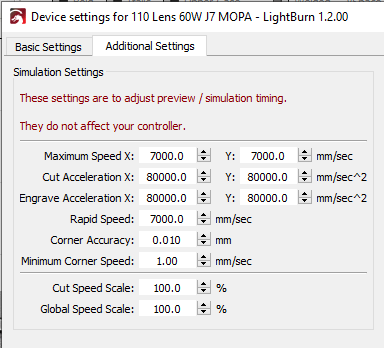
Please note that when entering these settings manually, the Additional Settings tab needs to be updated with the correct information for the simulation in Preview to function correctly.