Installing Drivers (Windows only)
If you haven't already installed LightBurn, start by installing it on your computer.
Installing The Driver
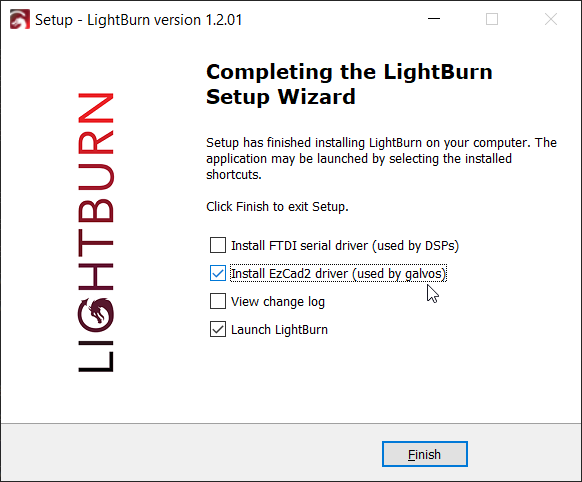
When installing LightBurn, the last screen of the installer has a set of tickboxes to install additional drivers needed for certain types of machines. You'll need to select Install EZCad2 driver in order for LightBurn to see the Galvo you're trying to set up.
If during initial installation you didn't tick this box, you can run the installer again, and select the box to ensure the driver is installed. Windows will prompt you for permissions escalation to install it, and quickly replace the driver provided by default with one LightBurn can use to communicate with your galvo-based laser.
Alternately, the installer for the driver is in the LightBurn files at "C:\Program Files\LightBurn\EzCad2Driver\" and can be run again via the "dpinst-x64.exe" file directly.
Info
This installed driver may not work correctly with Windows 7. Please see the Zadig method below.
Verifying Installation
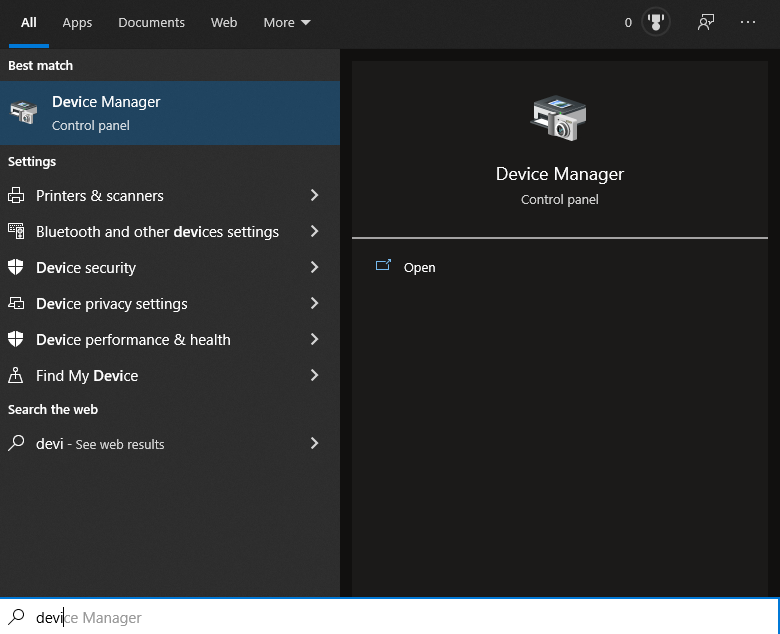
Your laser will appear differently in the Windows Device Manager before and after the driver has been successfully installed. To open the Device Manager, type "device manager" in the search box on the taskbar, then select Device Manager from the menu.
Before installation, the laser will appear as a BJJCZ Device.
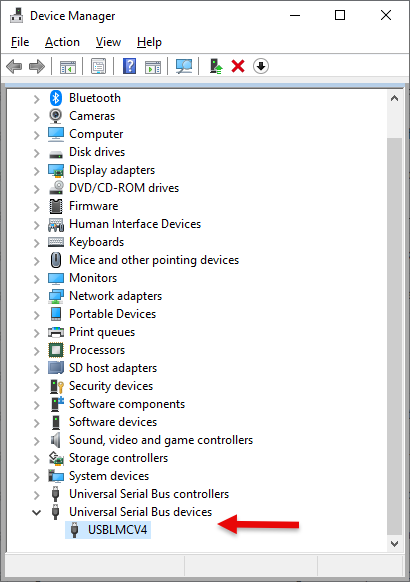
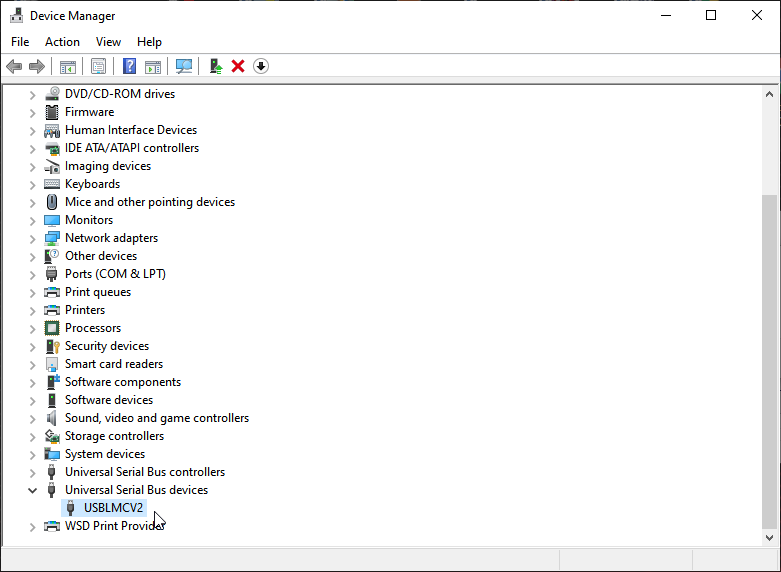
After installation, it will appear under Universal Serial Bus devices as USBLMCV2, USBLMCV4, or very similar.

Restoring the Driver
In the event you want to use EZCAD, it's a simple task to revert to the original driver.
Open your Windows Device Manager — you can do this by clicking Start and typing Device and letting it auto-complete.
Next, find the USBLMC device in the list - it should be near the bottom, under Universal Serial Bus devices, shown below:
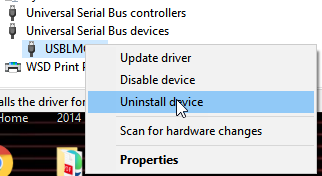
Right-click the device and choose Uninstall Device from the pop-up menu.
In the next window, check the box to delete the driver. This doesn't actually delete anything from your system, it just completely disassociates the driver from this device.
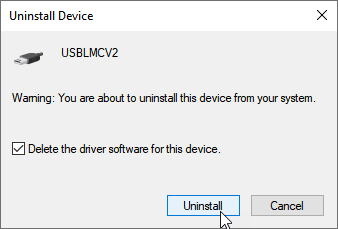
Click the 'Uninstall' button. The process should finish quickly.
If you power off the laser and power it back on, Windows will reconnect, realize that it already has a driver for this device (the old LMC driver) and it'll appear in the Devices list again, near the top, as a BJJCZ Device. That's it — You can use EZCAD again.
Zadig-based Driver Swap
In the event the driver swap performed by running the installer isn't working, try using Zadig (a driver tool) to replace the manufacturer's with a generic driver so LightBurn can communicate with it. Below are those steps.
Legacy Zadig-based Driver Swap
Download Zadig, the driver replacement tool from https://zadig.akeo.ie/ and run it. (it doesn't require installation)
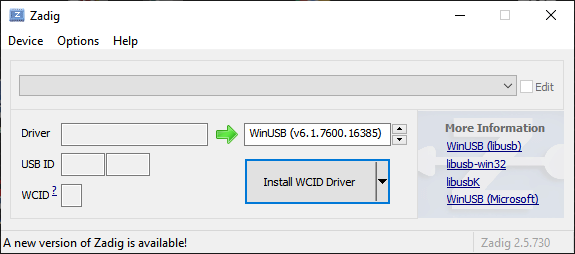
You'll see a window that looks like this:
Open the Options menu and enable List All Devices

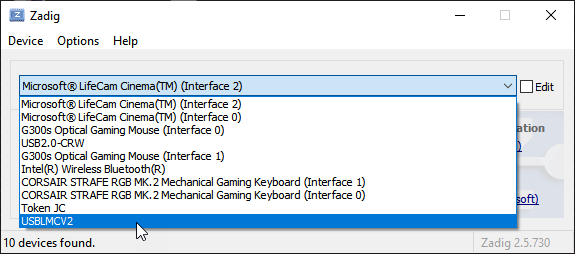
If your EZCAD laser is powered up and connected with the USB cable, you should see USBLMCV2 (or very similar) in the device list, like this:
Select that device, and choose WinUSB as the target driver, like this:
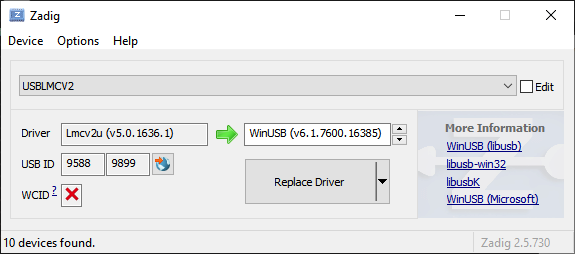
Double check that it says LMCV2U in the Driver box, and that the USB ID under it matches what you see above. If you haven't used the laser with this computer before, the 'Driver' box may be empty instead.
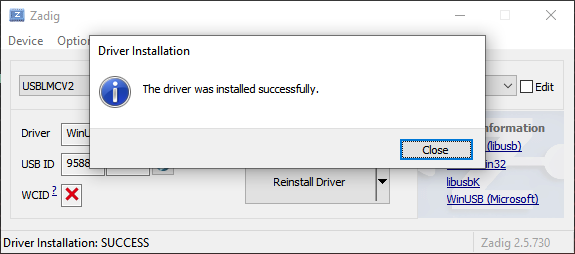
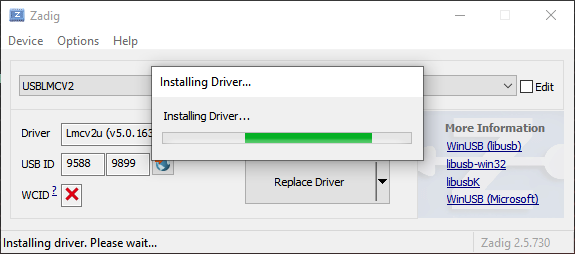
Click Replace Driver and wait for the process to complete. Make sure that you are not running EZCAD when you do this — if anything is actually using the hardware, the driver swap will likely not complete, and time-out after five minutes. If everything goes as expected, it takes about a minute, often less.
You'll see some different messages cycle through while it does the install. When it's done, it might ask you to reboot, but that's rarely required.
On the rare occasion that Zadig fails, try it again — it almost always works, and sometimes reports a failed installation erroneously, when it actually succeeded. You should see this: