LightBurn Fill & EZCAD Hatch Quick Translation
If you're coming from EZCAD and having trouble finding hatch settings you're used to, please see below for a guide to matching your usual hatch settings to LightBurn's fill settings.
If you're not sure how to adjust cut & engraving settings, please see the Cut Settings Editor page.
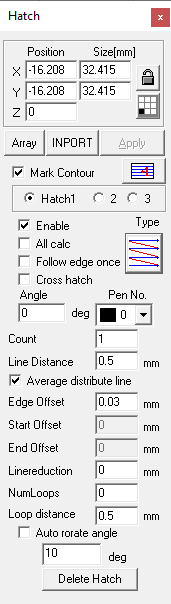
Mark Contour
EZCAD2's "Mark Contour" option can be replicated with LightBurn's sub-layers. By creating a line sub-layer and a fill sub-layer, you can achieve the same effect. To cut the contour first, have the line sub-layer as the first sub-layer. To fill first, have the fill sub-layer as the first sub-layer.
Hatch 1, Hatch 2, Hatch 3
EZCAD2 allows for three different hatches on the same geometry. This is equivalent to LightBurn's sub-layers. Please see the relevant page for help.
Cross-Hatch
This functionality is the same between the two programs, and is a checkbox in both.
Hatch Patterns
Unidirectional hatch & Bidirectional hatch

 EZCAD2's bidirectional hatch and unidirectional hatch are the same as the default hatch in LightBurn, with the bi-directional fill toggle either on or off.
Ring-like hatch / Pyramid Hatch
 EZCAD2's ring-like hatch is equivalent to LightBurn's Offset Fill.
Snake Hatch
Snake hatch is equivalent to a regular fill in LightBurn with Flood Fill enabled.
Auto Rotate Hatch Angle
In LightBurn, the EZCAD2 feature of "auto rotate hatch angle" is labeled as "Angle Increment" in your layer / sub-layer settings. While not a fill mode, it's still relevant to replicating EZCAD2 fill styles.