Fonts and Text
To create text, click the Create Text tool ( ) on the Creation toolbar, click somewhere on the page to get a cursor, and type.
When you select the Create Text tool, the Text Options toolbar will activate as well.
With the Text tool in LightBurn you can:
- Create text on the screen, or edit existing text by clicking within it.
- Change font and size, alignment, and spacing
- Enable / disable automatic welding
- Create Variable Text objects
You may also find our short video on Text Box Edits useful in working with text.
Font Settings
There are a number of global font settings that can be found in Settings window. These settings can be found in the Editor Settings tab, or in the File Settings tab for LightBurn 1.6 and earlier.

- Default Font - Default selected font for new documents
- Default Height - Default font height for new documents
- Set SHX Font Path - Click to set directory containing SHX font files. Shift+Click to clear. See SHX Fonts section below for more.
- Enable Right-to-Left text support - This will automatically be enabled on first run if a Right-to-Left language is the current system input language. But it can be forced on here later if needed. It will allow you to turn on Right-to-Left font rendering for any text.
- Selection double-click shows Text Edit dialog - By default, double-clicking on text with the selection tool switches to the text tool. Enable this option to instead open the Text Edit dialog.
Text Options Toolbar
The Text Toolbar, located on the upper toolbar in LightBurn by default, is where you set properties on text shapes, like which font to use, as well as size, spacing, and more.
The Text Toolbar looks like this:

The list of fonts in LightBurn is taken from your computer system. If you want to use a new font in LightBurn, use the facility provided by your operating system to install the font, then re-start LightBurn.
Favorites and filtering fonts

Right-click the font dropdown for additional options:
- Show System Fonts - Toggle this to hide or show your computer's installed fonts.
- Show SHX Fonts - Toggle this to hide or show the SHX fonts in your SHX Font Directory.
- Show Hidden Fonts - Enable this to show hidden fonts in red, allowing you to see and unhide hidden fonts. Only available on LightBurn 1.7 or higher.
- Add to Favorites - Add the current font to your favorites, so it shows up at the top of the list.
- Hide this Font - Hide the current font. Only available in LightBurn 1.7 or higher.
- Font - Select the font.
-
Height - Sets the overall font height. The Height property of fonts is not exact - It is generally the height of a capital letter X in the font, but every font has an internal size that is scaled by this height, and the dimensions aren't required to be accurate.
-
HSpace - adjusts the horizontal character spacing as a percentage of the font size. Positive numbers space the characters out more, negative numbers move them closer together.
-
VSpace - adjusts the vertical line spacing as a percentage of the font height. Positive numbers increase the distance between lines, negative numbers reduce it.
- Align X - chooses the horizontal anchor position of the text - Left, Right, or Middle
- Align Y - chooses the vertical anchor position of the text - Bottom, Top, or Middle. Top aligns text to the top of capital letters, and Middle aligns to roughly the middle of the capital letters. This is most useful when applying text to a path.

- Bold - Displays the font in bold typeface, if available
- Italic - Displays the font in italics, if available
- Upper Case - Forces all text to be upper case
- Right-to-Left - Force Right-to-Left text rendering. Must be enabled in settings. This will automatically be set if enabled and current input language is Right-to-Left.
- Welded - Enables automatic welding of characters. When characters touch or overlap, as is common with script fonts, enabling this option will automatically weld the overlaps together.
The remaining two options are for Variable Text, like serial numbers, dates, and so on. More information about Variable Text can be found here.
Curved Text
After creating a piece of text, if you return to Selection mode by clicking the Select tool  or pressing Esc, you will see a blue dot near the text you've created, like this:
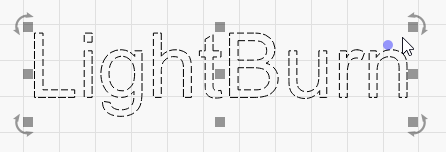
If you hover over the dot, your cursor will change to the bend cursor. 
If you click and drag the dot, your text will bend around an invisible circle, like this:
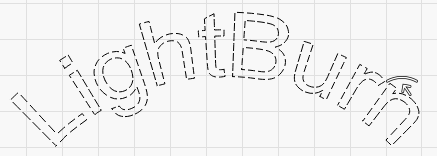
Double-click the dot to clear the bend and restore the text.
New in v1.3
When bending text, you can use the "Distort" toggle to choose whether to distort the text as part of the bend, or leave the individual characters unchanged.

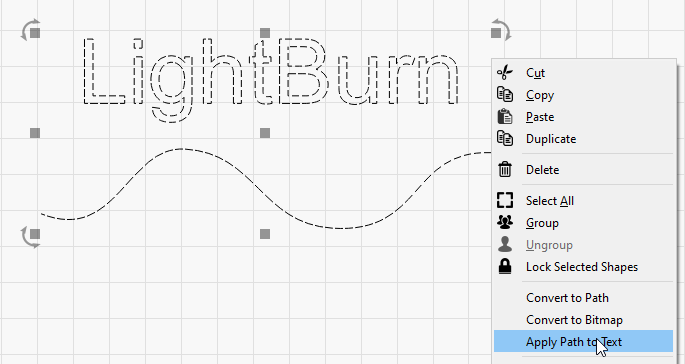
Apply Path to Text
If you want the text to follow a more complicated curve, you can use the 'Apply Path to Text' function in LightBurn to attach text to any shape in LightBurn. Draw your shape and your text, then select both and go to Tools > Apply Path to Text, or right-click and choose it from the pop-up menu:
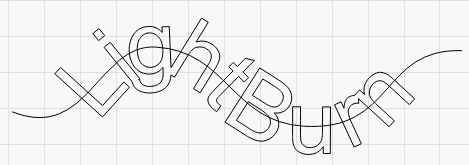
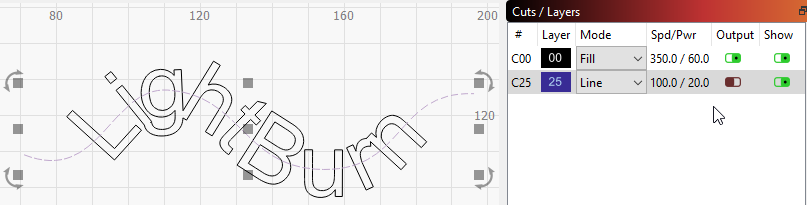
Note that for text to remain editable you cannot delete the path, so if it is not something you want engraved along with your design, put the path on its own layer and set that layer not to output, like this:
Curved text and text on a path will still automatically weld, and can be used with the Variable Text feature as well.
SHX Fonts
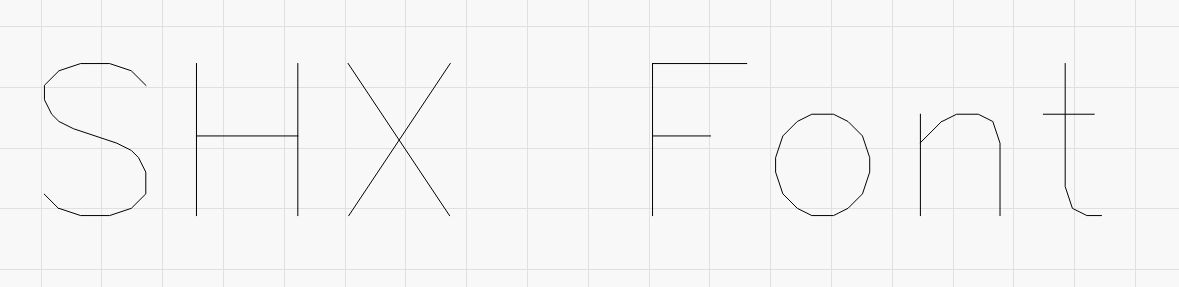
LightBurn also supports the use of SHX font files which are an old AutoDesk font format, mainly intended for use with CNC machines. Most importantly, SHX fonts lack many of limitations of standard system fonts and have the ability to define "single line" fonts, such as this:
LightBurn does not ship with any included SHX fonts, but there are many to be found online for free with a quick search. Once you have SHX files downloaded, LightBurn must be told where they are. In Font Settings, click on Set SHX Font Path and choose the directory where your SHX files are located. The font files themselves won't be shown in the dialog box, since you're selecting a folder rather than an individual file.
Once LightBurn knows where to load the SHX fonts from they should automatically show up in the Text Options Toolbar font dropdown.
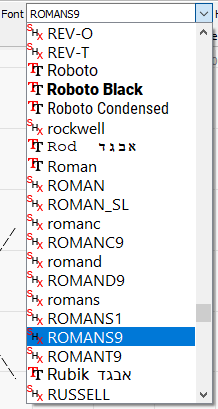
SHX fonts are differentiated from normal fonts by the icon next to each entry:
 denotes an SHX font
 denotes a standard operating system font
Moving LightBurn Files with Fonts
When you save a copy of a file that contains text, LightBurn automatically includes a copy of the text as a path and embeds it into the file. If you open the file on another computer that has the same font, you will be able to edit the text as usual. However, if you open the design on a computer without the font, LightBurn will warn you about the missing font(s) and load the path embedded in the file. This way your file won't break when you move to another computer, although you won't be able to edit the text without the correct font.
If you want to move designs containing text between computers, be sure to install all necessary fonts on all computers you're using.
Importing Other Files with Text
If you are opening files not made in LightBurn that contain text, please make sure that any fonts used in the file are installed on your computer or that the text has been converted to paths using whatever tools are available in the other program. Different programs will use different terms for this process, but terms such as "welding", "convert to outline", and "convert to path" are commonly used.