Cut Settings - Line Mode
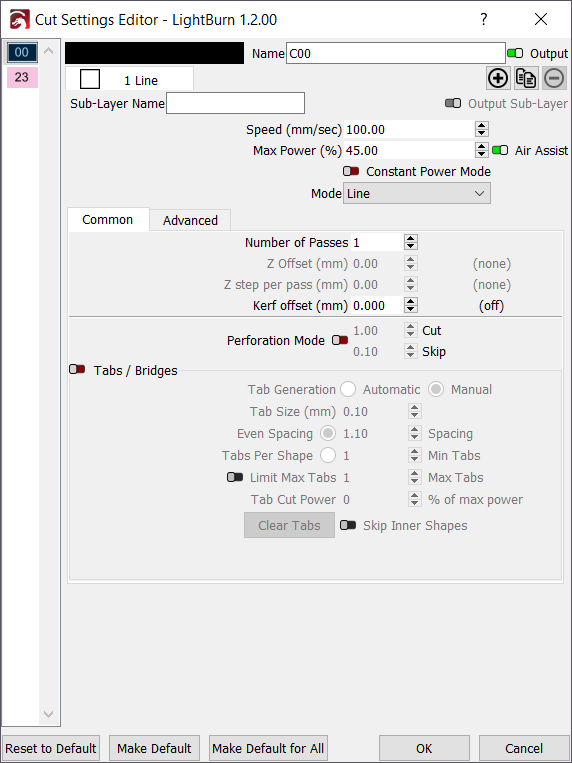
The image above shows the settings for Line mode. In this mode, the laser follows the exact path of your design, tracing the lines with the beam enabled at the power you've chosen. If you move quickly, or with low power, you will likely just etch the surface (sometimes called vector marking). If you move slowly and with high power, especially with a CO2 laser, you will cut deeper, possibly through the material. The only difference between surface marking and cutting is the power and speed.
Number of Passes
How many times the laser will repeat the shapes on this layer. Sometimes, when cutting thick material, trying to engrave very deep, or using a lower power laser, more than one pass may be necessary.
Perforation Mode
If you are trying to cut fold lines in card stock, stitch holes in leather, or just make dashed lines, Perforation Mode allows you to choose the distance to cut, followed by the distance to skip.
This can also help when using delicate materials with a powerful laser. With very low cut and skip values, the beam is rapidly switched on and off, reducing the effective power output. Try starting with cut and skip values of 0.1 mm each, and adjust the ratio between cut and skip to tune it further.
Tabs / Bridges
Adding Tabs / Bridges to your design commands your laser to skip small sections of a cut, so objects do not fall out immediately but can be removed later. For an in-depth walk through on this features, see the Tabs / Bridges page.
Galvo-Specific Settings
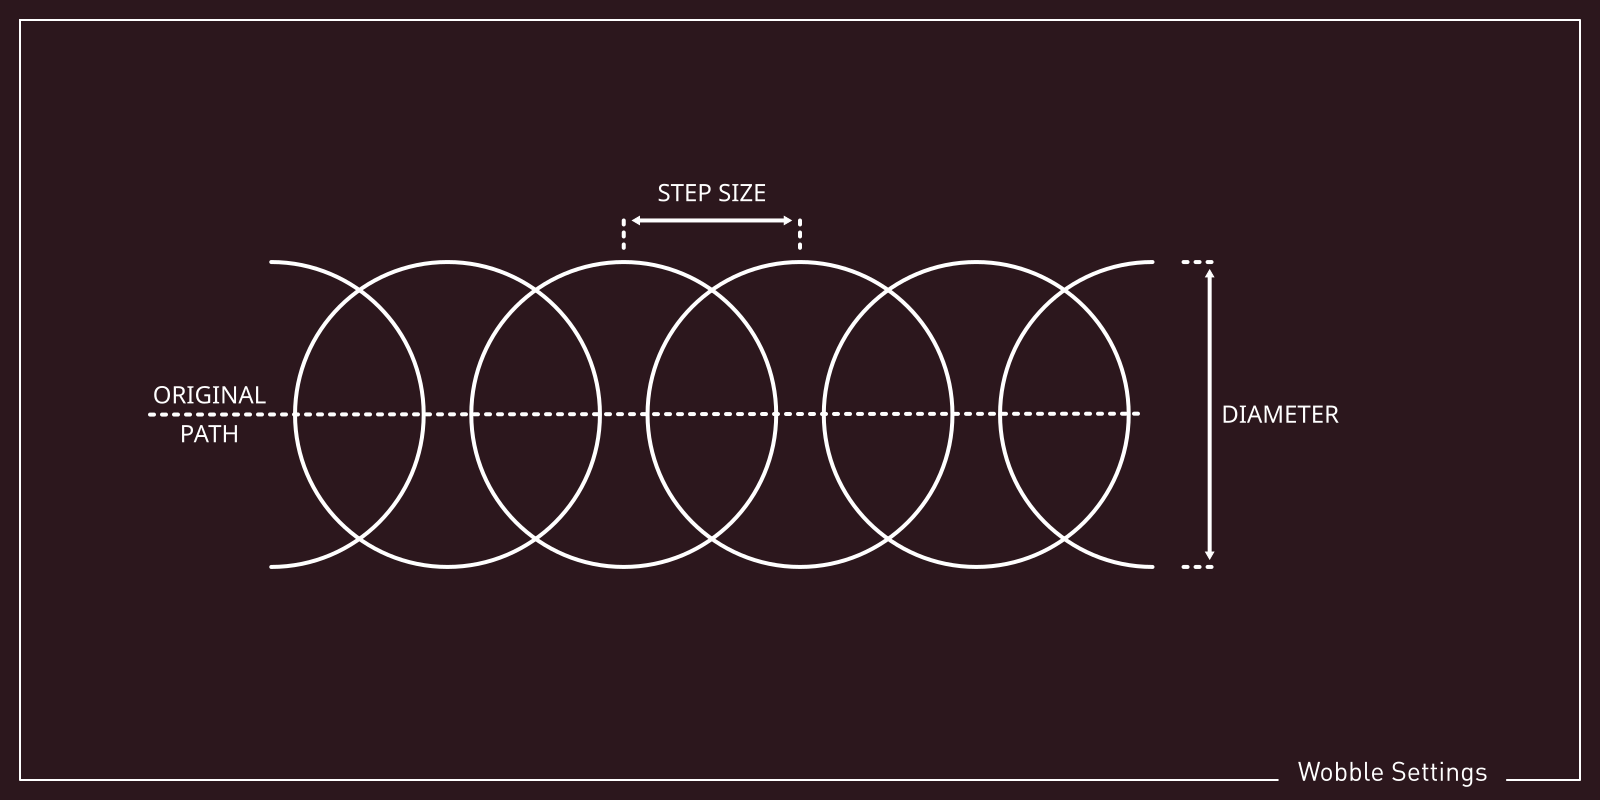
Wobble (Galvo-only)
This option is only available if you are using a galvo laser. Because galvo lasers are not optimized for cutting, it can be hard to apply enoug power to a given area while in Line mode to cut through material. Wobble can be used to trace small circles along the path of the line, creating a thicker line and forcing the galvo to spend longer in each section of the line. The Step value refers to how far apart the circles are, and the Size value refers to the diameter of the circles (in millimeters).
Gantry-Specific Settings
These settings will only be available if you are using a gantry laser.
Z Offset
If you have Z moves enabled, and your controller supports it, the Z Offset setting can be used to move the laser head closer to the material (inward) or farther away from it (outward). Focusing deeper into the material can sometimes help to cut thicker material, and lifting the laser away from the material can produce a thicker line.
Z step per pass
When doing more than a single pass over a shape, the Z step per pass setting allows you to tell LightBurn to raise or lower the laser with each pass by some amount. This is most often used for thick cutting or deep engraving, allowing you to shift the focus point deeper with each pass to help maintain efficient cutting.
Warning for Z moves
If your system uses auto-focus, you may not be able to push the focus point lower, because most systems treat the auto-focus height as the lowest possible height (Z limit) to avoid crashing the laser head. Be careful using Z moves, as they do have the potential to physically damage your laser by crashing the head into the material.
Kerf Offset
Closed Shapes Only
Because LightBurn must determine the inside and outside of a shape in order to apply a Kerf Offset, this setting will only work with closed shapes.
Kerf refers to the thickness or width of a cut made by a cutting tool. The kerf of a laser is much narrower than that of a saw blade, but the extra material removed can interfere with close-fitting parts such as tabbed boxes or inlays.
Kerf Offset compensates for the extra material removed by offsetting the path of the laser to the outside of closed shapes (for positive values) or the inside (for negative values). This doesn't modify the underlying shape, so your design can be used on lasers with different kerfs by adjusting the Kerf Offset value.
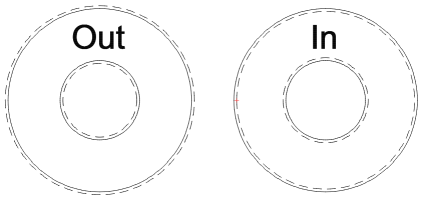
The image below shows how Kerf Offset (dashed lines) relates to the original shape (solid lines).
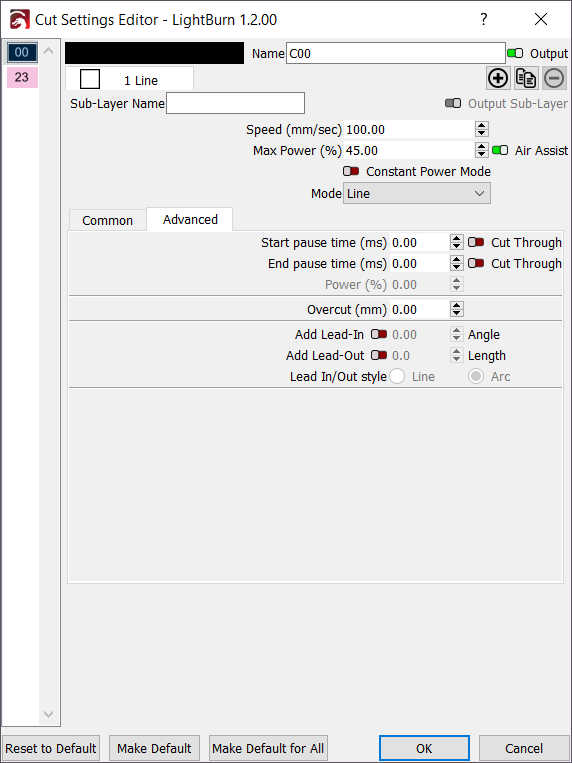
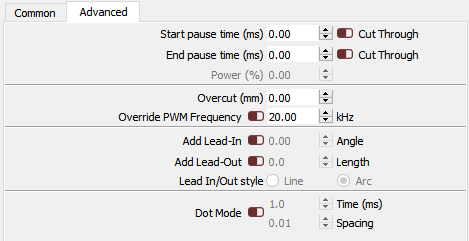
Advanced Settings
Under the Advanced tab you'll find useful, but less frequently used, options, many of which can be used to compensate for lasers that don't fire at the start or end of cuts. This tab will not be available if you are using a galvo laser.
Start / End pause time
These options can be used to add a delay at the beginning of a cut, the end, or both. If you also enable the Cut Through option, the beam will be turned on during this pause, which can be used to prime the cut, for example when cutting very thick material. The Power % value sets the power of the laser during this pause.
If used without the Cut Through toggle enabled, it can be used to add a delay to let the gantry settle down after a rapid move, or allow time for an air assist solenoid to engage.
Cut Through
Cut Through will dwell (pause) with the laser on at the start or end of a cut to help pierce the material there.
Overcut
Overcut will extend a cut, to burn an extra bit at the end.
Override PWM Frequency
If you have an RF Excited tube, this setting allows you to control the PWM frequency of the pulses sent to the laser, and can change the edge finish on certain materials.
Override PPI
Only available on Trocen controllers, the PPI setting (Pulses Per Inch) lets you tell the laser to send an exact number of pulses per inch of travel, instead of varying the beam power directly. This is useful for delicate materials like paper, and is similar to using Perforation Mode, but is handled by the hardware itself.
Lead In / Lead Out
Lead-in and Lead-out are optional lines or curves added to the start or end of a cut. When cutting thick material, particularly if using 'Cut Through' delays, or cutting metal, there is often a mark left at the start of the cut that is slightly thicker than the rest, and can leave an indent on an otherwise smooth edge. With this setting, you can add a small line to the start or end of a cut, so that mark happens off the cut line itself. The 'Angle' value controls the placement of the lead line - a positive number tells LightBurn to put the lead line outside the shape, and a negative number means to put it inside. You can choose to make the lead a straight line, or a short arc.
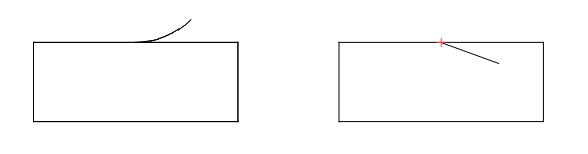
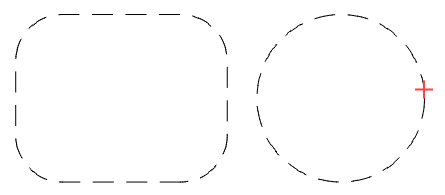
The shape above on the left is using an arc set to +45 degrees, so it starts outside the shape. The one on the right is a line set to -20 degrees, so it appears inside the shape.
Dot Mode
When enabled, the laser will pause and pulse at regular intervals along the path, instead of cutting continuously. The 'Time' value specifies the pause delay in milliseconds, and the spacing parameter sets how far apart the pulses are. This can be an effective way to do stitching holes, or cut very thin or delicate materials, but the constant pausing can shake the machine - using Perforation Mode is often preferable for this reason. This setting is not available on all lasers.