Cut Settings - Image Mode
This mode is only available for images, and lets you choose options to control how LightBurn renders the image data on the laser.
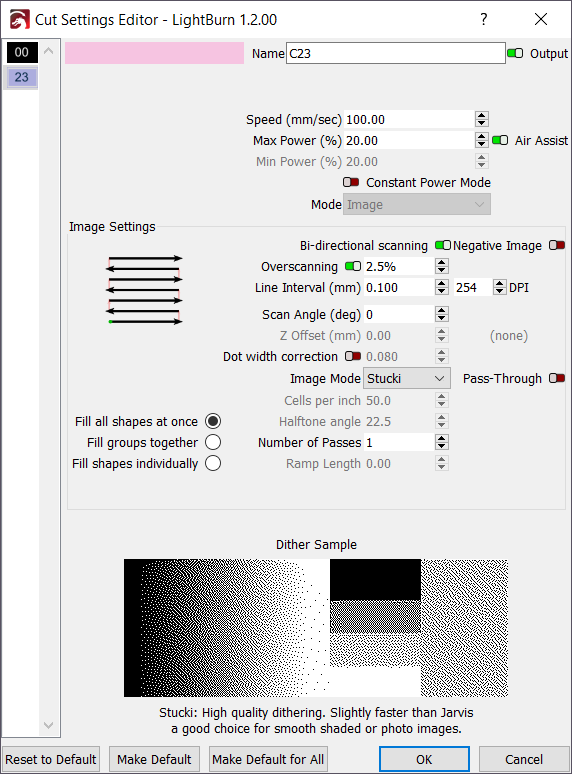
The image above shows the settings available for images. Many of these settings are also available in Fill Mode.
Tip
For image engravings, CO2 lasers are typically run at low power, decreasing speed if needed to make a darker engraving. Diode lasers are often run at high or even full power, depending on material and laser output wattage.
These settings do not allow you to control things like image brightness or contrast. Instead, those are set on a per-image basis and can be accessed via the Adjust Image tool or Shape Properties panel.
Bi-directional Fill
When enabled, the laser will engrave in a side-to-side sweeping motion with the laser on and engraving in both directions. When disabled, the laser will engrave traveling one way, then return to the start of the next line without engraving the return pass. Depending on the type of laser, enabling this can save significant time on long engraving jobs.
Negative Image
This will invert your image during engraving. Light becomes dark, dark becomes light. This is useful for engraving slate or glass, where burned areas become lighter.
Overscanning
When enabled, adds extra moves to the beginning and end of each line to give the laser time to speed up before firing, and slow down afterward.
When Overscanning is not used or not set correctly, engraved jobs appear more burned at the edges and lighter in the middle.
This is caused by the laser slowing down to change scanning direction.
Thankfully LightBurn can compensate for this by running the tool head outside the boundaries of the engraving, but with the laser off. This maintains an even speed on the engraving itself to provide a consistent engrave. You need a little more space either side of the engraving to accommodate this overscanning.
This setting will not be available for DSP controllers or Galvo lasers. See the DSP or Galvo tabs for more information.
On GCode devices, enable Overscanning in your Fill or Image layer.
If you already have this enabled and you are still seeing issues, you might need a larger value for the Overscan setting, particularly if your acceleration is low.
If Overscanning is enabled on a GCode laser and there isn't enough room at the edge of the job to accommodate the extra travel distance, you may encounter LightBurn's Cut May Be Out Of Bounds error.
DSP controllers handle Overscanning in hardware. If a job on a DSP laser requires Overscanning and there isn't enough room at the edge of the job to accommodate it, your DSP controller may return the Not Enough Extend Space error.
Galvo lasers don't use Overscanning. Correcting for excessive burning at edges is handled by the Delay settings in Device Settings.
Line Interval
Controls the spacing between scanned rows, and indirectly controls DPI.
DPI (Dots Per Inch)
Controls the pixel density of the output - this is another way of representing Line Interval. DPI is 25.4 / Line Interval.
Scan Angle
Defaults to 0, meaning the laser will scan back and forth horizontally across the image, progressing from the bottom of the image to the top. If you set this to 180, the laser will scan the image from top to bottom. Setting this to 90 will scan the laser vertically over the image, progressing from left to right.
NOTE: If you have a DSP controller, we do not advise using angles that aren't a multiple of 90 degrees. Horizontal and Vertical scanning is supported natively by the hardware, and it will automatically handle over-scanning beyond the sides of the image to get the head to full speed before engraving starts. Scanning at non-90 degree angles is emulated using normal cutting moves. It works, but it's mostly useful as a style option, and not recommended for general use.
Z Offset
If Z moves are enabled, this setting controls how much to raise or lower the Z axis when executing this fill. Lifting the laser a few mm, for example, can make the beam wider, allowing the use of larger interval values, which can make filling a large area faster.
Cells per inch
Number of Halftone shading dots to compute per inch. Only enabled when the Halftone Image Mode is selected.
Halftone angle
Angle of the Halftone shading patern. Only enabled when the Halftone Image Mode is selected.
Number of Passes
How many times to repeat the entire engraving process.
Ramp Length
Length to ramp in and out of the sides of engraved features. Typically used for rubber stamps.
Pass-Through
When working with images that have been pre-processed for laser engraving, enable this setting to engrave the image as is, rather than resampling using the image modes described below. Line Interval/DPI will be directly tied to the size of the image.
Image Mode
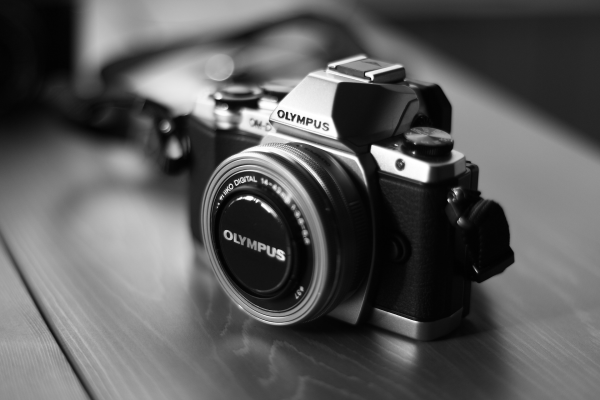
The Image Mode setting controls how LightBurn processes your image. Below you can see a description of each Image Mode in LightBurn, along with an example of how that mode changes the look of the example image. Click on the image previews to see a larger version.
-
Threshold
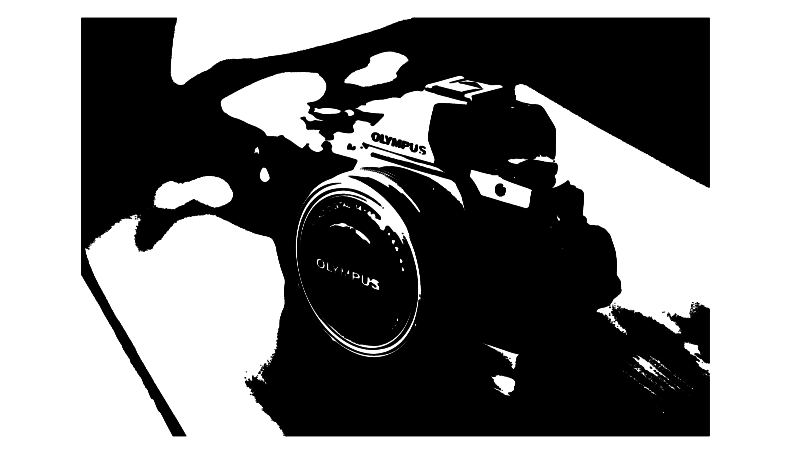 A simple on / off switch if the image is dark / bright at a given location. This should only be used for images that are two-color black/white to begin with, such as an image you dithered outside of LightBurn. Don't use this mode for grayscale or color images.
 -
Ordered
 Also called ordered dithering, this is a step above threshold for grayscale images, and uses densely packed on/off dots to approximate shading, using an ordered/regular grid pattern. This is ok for general use, but works best for images with large areas of solid fill, where diffusion dithering can cause unwanted artifacts (see below).
 -
Atkinson
 A good "in between" mode for solid color or smooth shaded images. It resembles Jarvis but preserves detail better, though very light or dark areas may be blown out.
 -
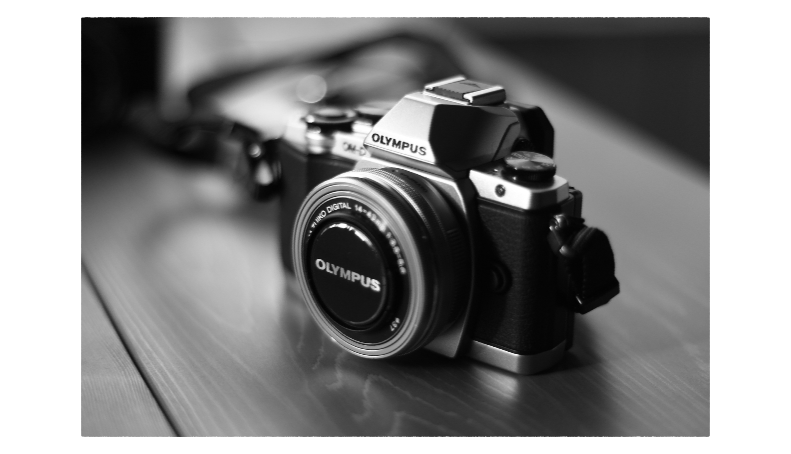
Dither
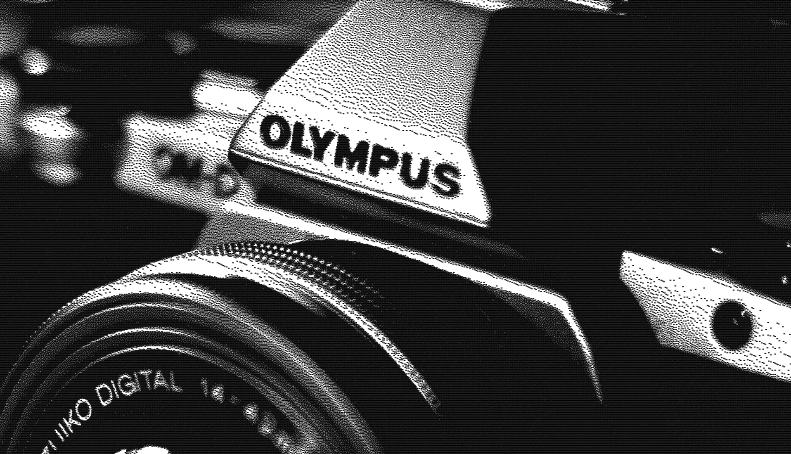 Also called error diffusion dithering, this is the best choice for smoothly shaded images, like photos. This also approximates shading with simple dots, but does so without evident patterning, and tends to produce more subtle shading.
 -
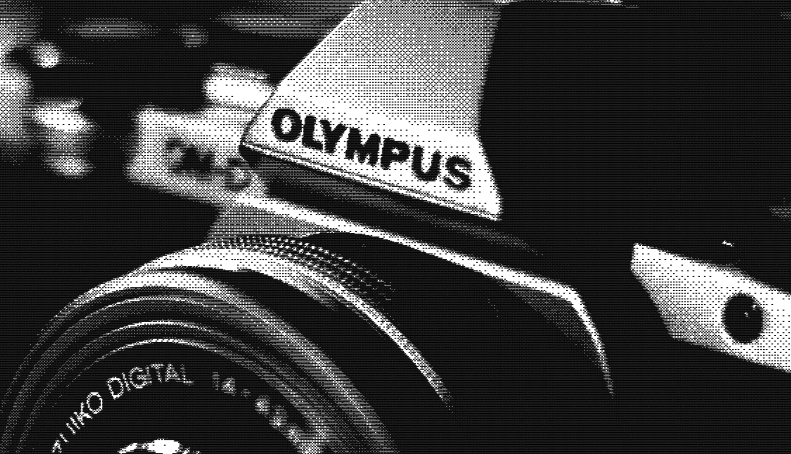
Stucki
 High quality dithering. Slightly faster than Jarvis and a good choice for smooth shaded or photo images.
 -
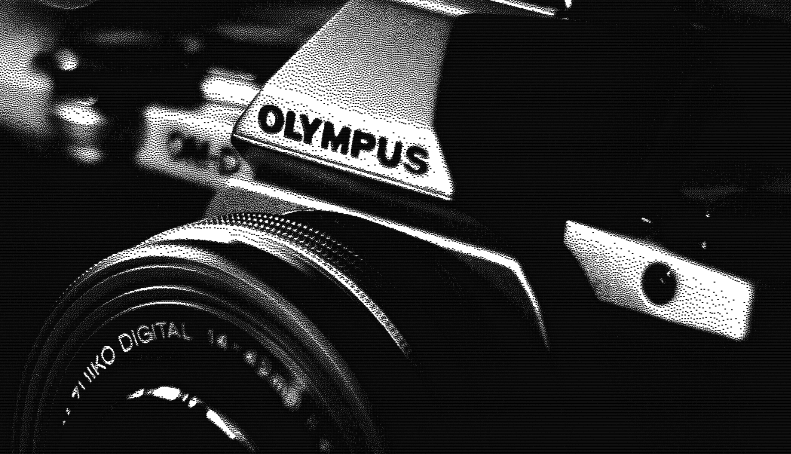
Jarvis
 High quality dithering. Usually the best choice for smooth shaded or photo images.
 -
Newsprint
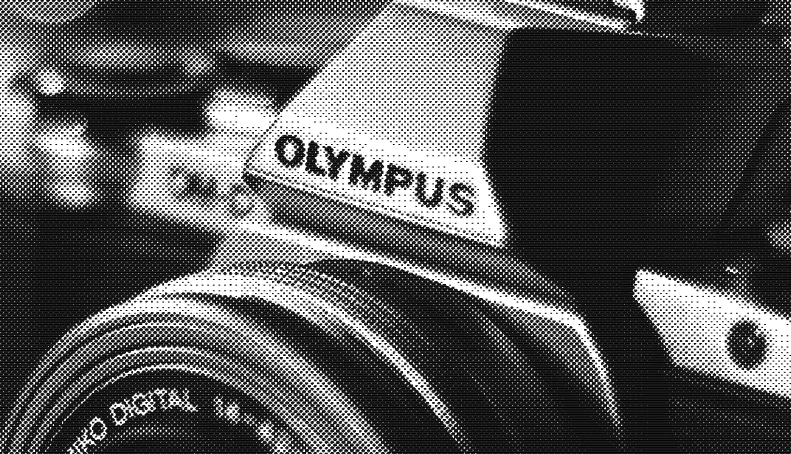 Emulates newspaper halftone. It has good shading, but is visibly patterned. Good for higher DPI settings, or Smoothieware controllers.
 -
Halftone
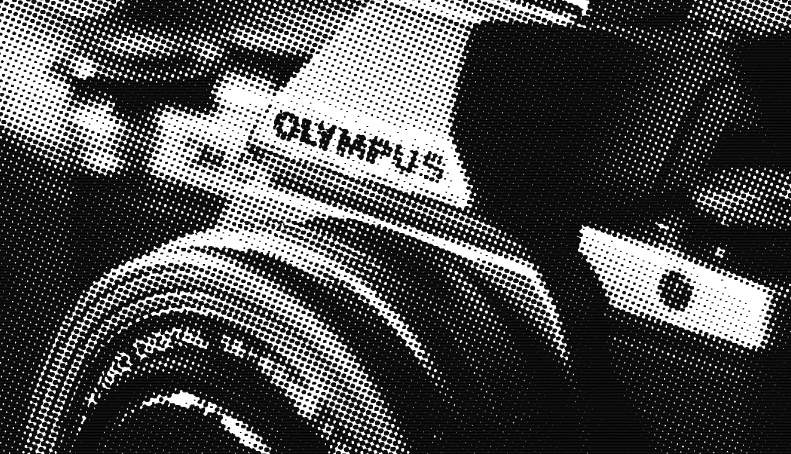 Good quality shading for high DPI images. It is similar to newsprint but can have variable cell size and pattern angle.
 -
Sketch
 Useful for line drawings or handwriting as it tries to detect hard edges.
 -
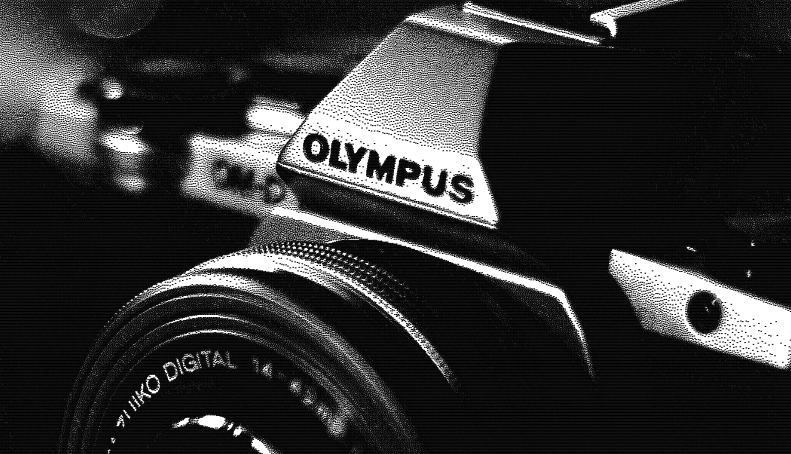
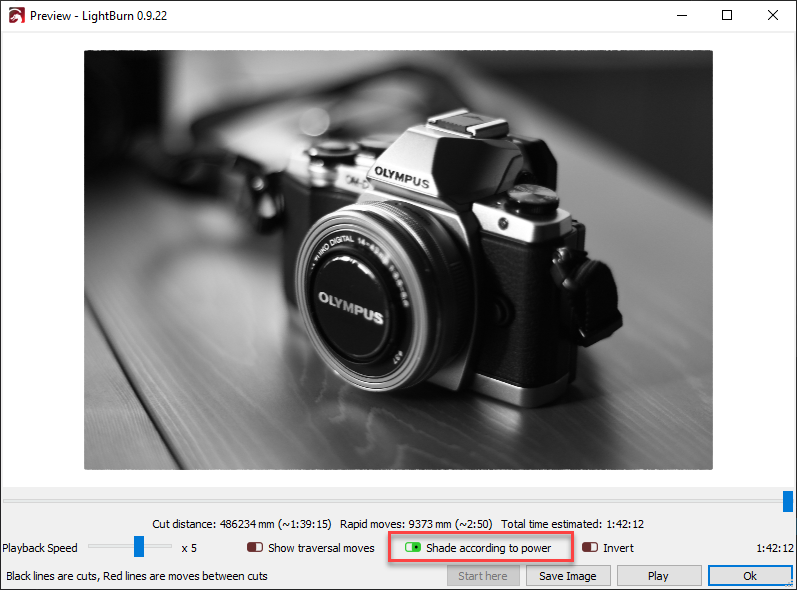
Grayscale
 Varies power output as a percentage between Min and Max power, using Min power for the lightest shades and Max power for the darkest. With a diode laser this can provide great shading but is harder to get right than plain dithering. With a CO2 laser, grayscale mode can achieve variable depth (3D) engraving rather than shading. Images typically need to be specifically created for this use.
Note
When previewing a Grayscale engraving, be sure to check Shade according to power otherwise you will see a completely black preview since, unlike other modes, Grayscale scans every portion of the image, just at varying levels of laser power.
Fill Grouping
These options control which shapes are filled at the same time on the laser. If you run your laser fast, OR your laser accelerates slowly, it is often most efficient to scan things all at once, so the laser spends most of its time moving at the speed you've chosen, and less time changing direction. If you are engraving slowly, your laser accelerates fast, or the design contains a lot of blank space, it can be more efficient to fill clusters of close shapes, or just fill the shapes one by one. If you aren't sure, try different options and use Preview to estimate the time.
- Fill all shapes at once: The default, this setting means that everything on this layer will be filled at the same time, sweeping back and forth across the whole job. If you are running the laser fast (300 mm/sec or more) this is usually the most efficient option, with some exceptions.
- Fill groups together: This setting will fill all shapes in a group at the same time.
- Fill shapes individually: This setting fills all shapes one by one.