Interval Test Tool
About Interval Settings
Finding an appropriate interval setting is an important part of optimizing your engraving quality. The interval refers to the distance between lines when raster engraving.
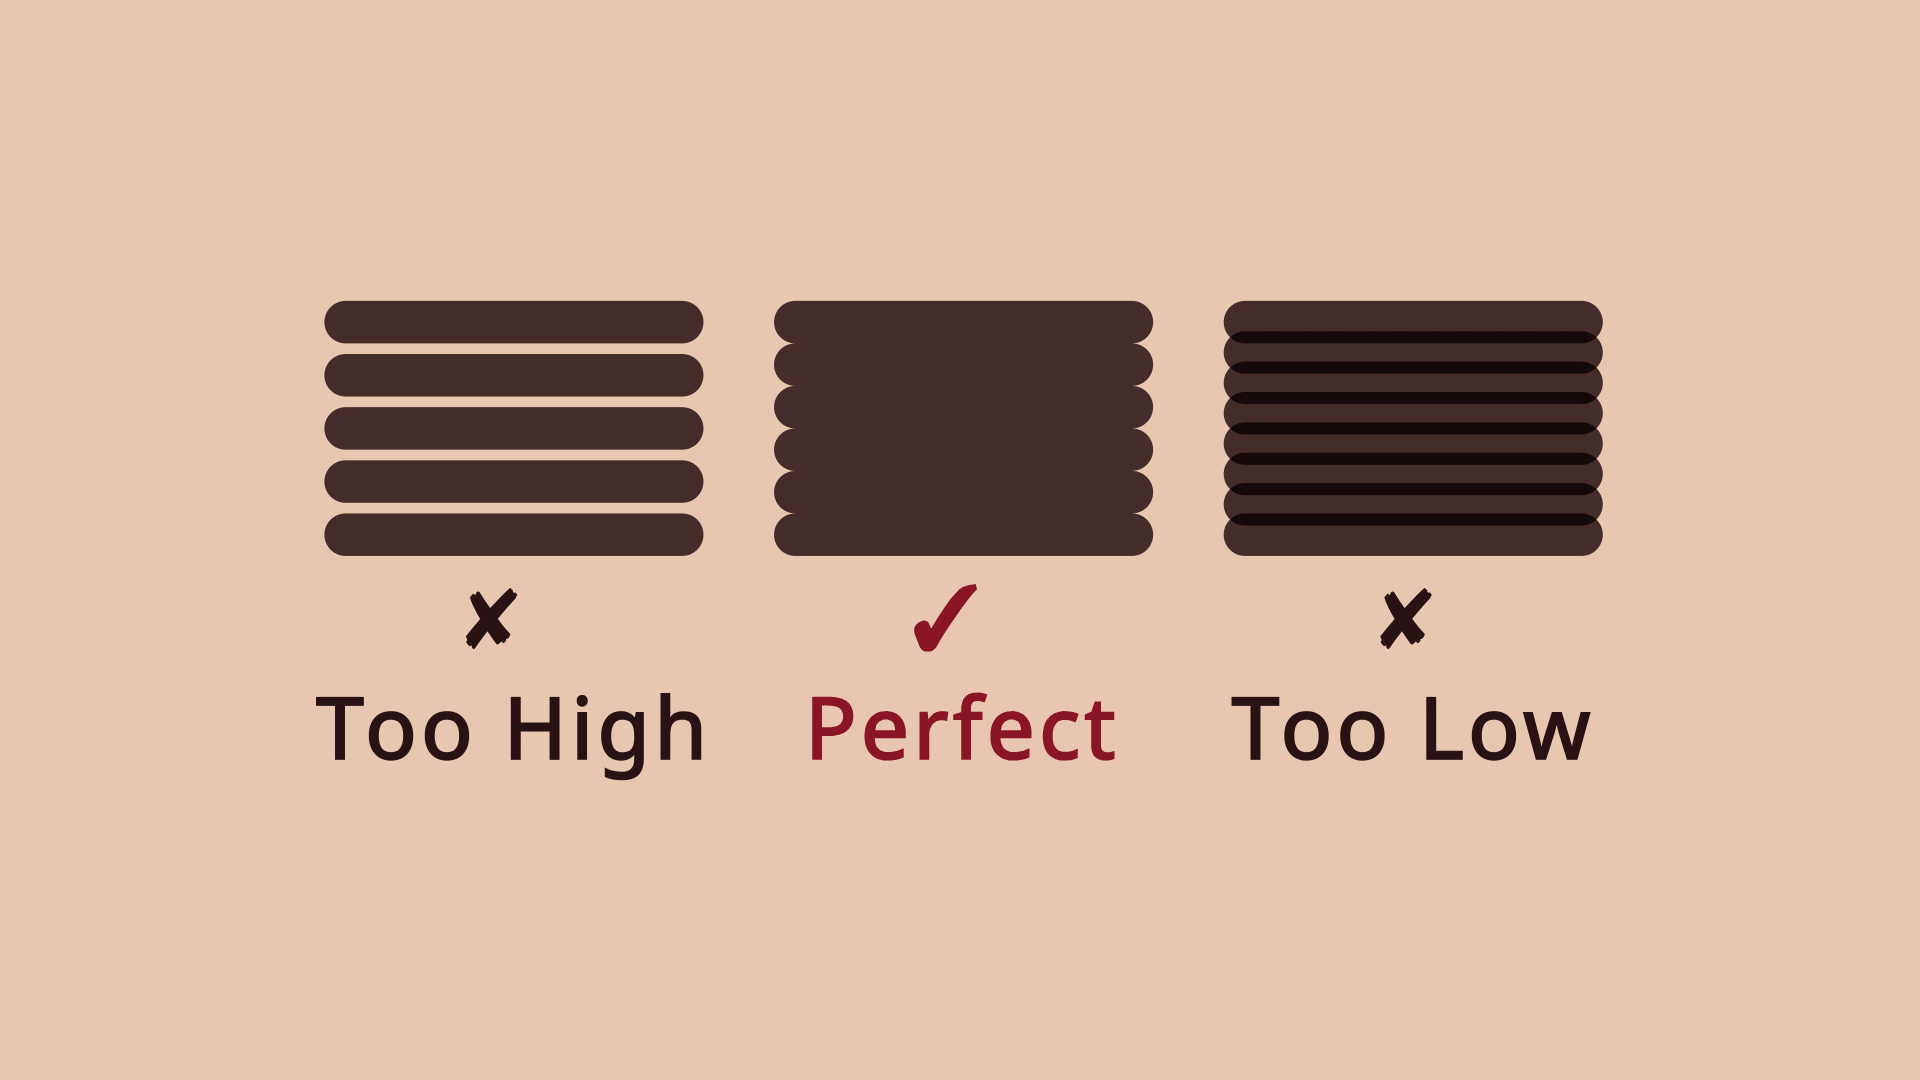
If your interval setting is too high, you'll need more power to achieve the same burn, and you may see gaps between the lines. You may also see stepping on curved edges.
Appropriate interval settings will give you a darker, deeper engraving with cleaner edges.
Lowering your interval settings too far will increase your engraving time, with minimal increase in engraving quality.
Using The Interval Test Tool
Every type of machine and material will process differently, so the Interval Test is a quick way to determine appropriate settings for a given combination of machine and material.
After running the Interval Test, look at your test squares closely with good lighting. You'll want to look for an etch in which you don't see defined lines between the passes (too high an interval) and passes don't appear to overlap (too low an interval). This can vary significantly between materials. See the video above for visual examples.
- Place a scrap piece of the material you're testing into your laser, and adjust your focus appropriately.
- Figure out how much material you have available for the interval test. The default settings for the material test will produce a test grid about 150 mm long and 50 mm tall. You may need to run multiple tests, so keep that in mind.
- Adjust your settings.
- Preview the test to make sure the output is what you expect.
- Frame the test to make sure it's placed and sized appropriately for the material
- Press start to run the test.
If you're using the Material Library to save and apply cut settings, don't forget to create or update a material preset with the appropriate interval. If you aren't familiar with the Material Library, you might want to give it a try - not having to figure out optimal settings every time saves a lot of time and effort.
Interval Test Settings
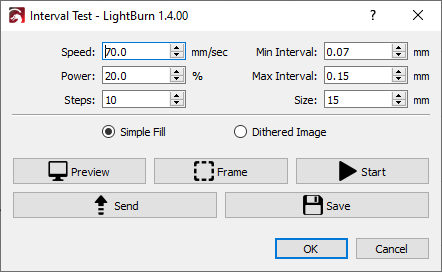
Speed and Power
The speed and power to use for all the swatches. If you've already run a speed and power test with our Material Test tool (see video on YouTube), you can go with those settings. Otherwise, your laser manufacturer likely has recommended settings available to use as a starting point.
Min and Max Interval
The lowest and highest interval settings to use for the test. For most CO2 and Diode lasers, using an interval below 0.1 mm is unnecessary.
Steps
How many sample squares to create. Reducing this will reduce the material needed, but will also result in larger differences between each test square.
Size
The size of the sample square. Reducing this will reduce the material needed, but may make the results harder to read.
Simple Fill or Dithered Image
Simple Fill will generate squares with a solid black fill. Dithered Image will fill the square with a dithered gradient to help you see what your gradients will look like when photo engraving.