Cut Shapes Tool
The Cut Shapes tool in LightBurn allows you to cut vector shapes in a project using a closed shape as the cutting tool. Cut shapes can be used to cut a project into smaller sections that can be run separately, allowing you to create projects that are larger than will fit within the area of your laser. Large scale designs make heavy use of this feature. (1)
- Cutting a single project larger than your laser: https://www.youtube.com/watch?v=n__saOKVupA
To use the Cut Shapes tool, select the shapes you wish to cut, then add the cutting tool shape to your selection (the last shape selected is the cutting tool). In the Tools menu, select 'Cut Shapes' and the software will perform the cut.
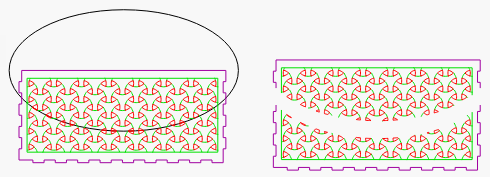
An example is shown below - the black oval is used as the cutting shape, and the result is shown on the right, separated so you can more easily see the cut line.
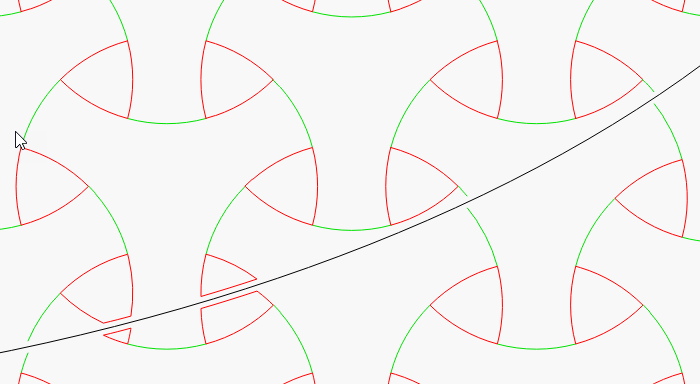
In this zoomed in view, near the lower-left you can see that when the red shapes were cut, the software added a new line, closing those shapes, but did not add anything when the green lines were cut. This is because the red layer is set to 'Fill', and in order for the resulting shapes to fill correctly, they need to be closed. The green layer is set to 'Line' mode, so those shapes are not closed when cut.
Key points to remember:
- The last shape you select is used as the cutting tool
- The shape used as the cutter must be a single closed shape
- The cutting tool shape is discarded - if you need it again, make a duplicate of it (Ctrl+D)
- Shapes that are cut will be closed if they are set to 'Fill', or left open if they are set to 'Line'