Making a Simple Project
We're going to go step-by-step through creating a small, simple project in LightBurn, from start to finish, to show you how to use a few of the basic editing tools, and give you a feel for how things work.
Before you start, make sure you have a laser set up in LightBurn (see Adding your Laser).
This project will be a simple name tag, cut out around the letters, ideally made from thin wood or acrylic, but a piece of cardboard will do.
Creating the text
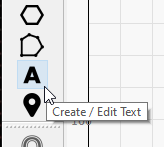
With LightBurn running, and an empty project, click the Create Text button shown below. It normally lives along the left side of the main window:
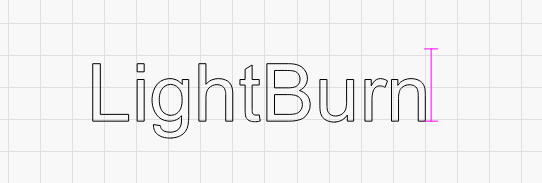
Next, click the mouse somewhere in the middle of the Edit window (the workspace) to get a cursor, then type your name:
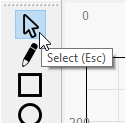
Click the 'Select' tool button on the top left of the edit window, or press Esc twice (once to finish entering text, and again to exit text entry and go back to selection mode).
When you finish the text, you'll see an entry appear in the Cuts / Layers list on the upper right of the display. This is the "layer" that your text is on, and it holds the settings that will be sent to the laser for all the objects on this layer:
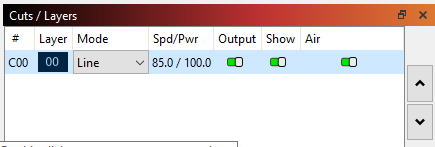
This tells us that the shapes on this layer will be drawn as lines, with 100 mm/sec speed, and 20% power. Depending on your settings, the '100.0' might be different - Diode lasers are less powerful than CO2 lasers, and run slower, so they tend to use mm/minute as units, so the same default value would display as 6000 mm/min. If you have your units set to Inches, you might see 3.9 in/sec, or 236 in/min.
Previewing
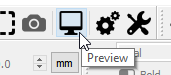
To see how the laser will run your project, click the Preview button in the middle of the main toolbar:
The preview window will pop up, showing the completed job, like this:
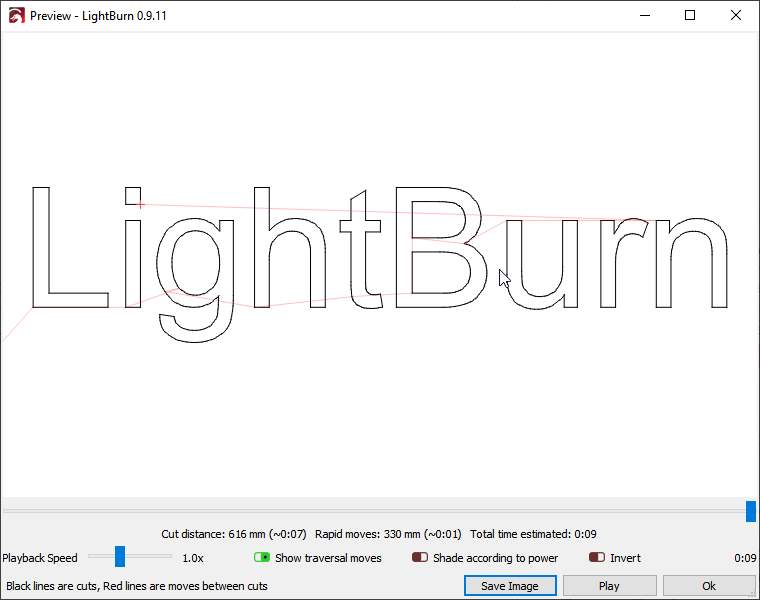
The lighter red lines are showing the laser moving between the shapes (traversal moves), and the black lines are where the laser will burn. Click the 'Play' button and you can watch a simulation of how the laser will run the job. You can also grab the slider and drag it around to see the cut at different points in time. Spot checking the output like this is a good habit to get into, because you'll likely spot mistakes before you burn the project for real, saving time and material. Click the 'Ok' button to close the preview.
For more information on the preview window see its page here Preview Window
Changing text properties
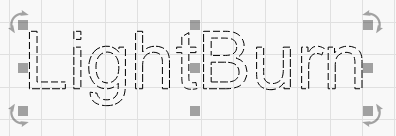
Make sure you're still in Selection mode - the 'Select' tool should be highlighted. Click the name, or click and drag a rectangle around it to select it. When it's selected, it will be drawn as animated dashes instead of solid lines, and handles will appear around the selection to let you change the size, position, or orientation.
The options in the Text Toolbar at the top will activate, like this:

Click the drop down for the font, and change it to anything you like. While you are choosing, the changes will be displayed in real time in the edit window. You can change the height, make it bold or italic, and adjust spacing here too.
Undo / Redo
If you make a change you don't like, you can undo it by clicking the Undo button on the toolbar (or pressing Ctrl+Z, or Edit > Undo in the menu). If you decide you liked it after all, you can also Redo (Ctrl+Shift+Z / Cmd+Shift+Z). Undo and Redo in LightBurn are unlimited - the undo system doesn't reset unless you create a new file or close the program.
Changing the Layer settings
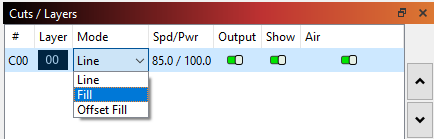
Rather than outline the text, we're going to change it to be solid filled. In the Cuts / Layers window, click where it says 'Line' and change it to 'Fill', like this:
You'll notice that the display in the edit window hasn't changed, but if you run the preview again, it looks quite different. By default, the view in LightBurn shows outlines only, not fills, because it's much faster, and it prevents things from being hidden behind solid shapes that might still be run on the laser.
Adding an outline: The Offset tool
With the text selected, click the 'Offset' button on the left toolbar, shown here:
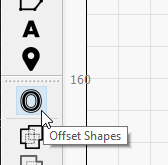
The Offset options window will appear, and you should see something like this:
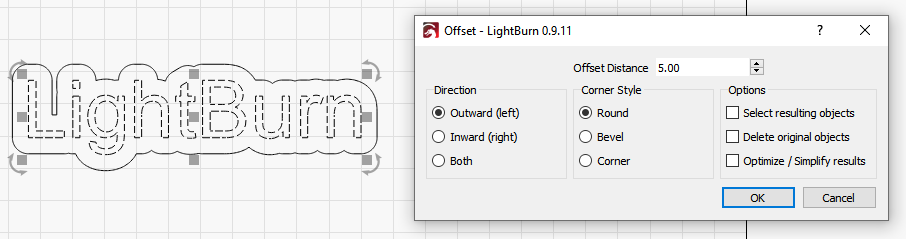
The offset tool creates a new shape by outlining the shapes in your selection at a given distance, either inward, outward, or both, and merging the result. If you point the mouse at the 'Offset Distance' value, you can scroll the mouse wheel to change the number and watch the result change on the fly. You can also click the box and just enter a number as well.
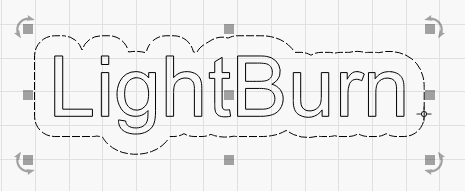
Make the Offset Distance value large enough that there are no internal gaps in the outline - Notice the gap above between the L and the next letter is gone in the version below:
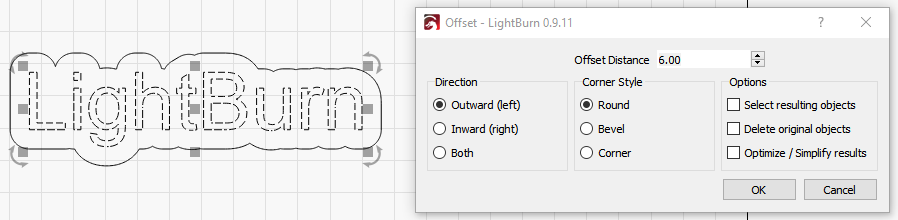
When you're happy with the result, click 'OK'.
Changing Layers
Now, use the left mouse button to click the new outline you just made, so it is the only thing selected, like this:
Then, click the Red button in the color palette at the bottom of the display:
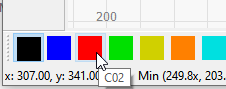
The outline will turn red, and you should see two entries in your Cuts / Layers list, like this:
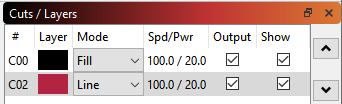
The first, the black layer, is the fill for your text, and the second red layer is for the outline cut.
Speed and Power
This is where things get a little tricky in terms of you being able to follow along. Speed and power settings vary quite a bit between lasers, and LightBurn supports a lot of different types of machines. It also depends on the kind of material you're using - cutting through ⅛" basswood uses much less power than cutting through ¼" plywood or acrylic. For right now we'll assume ⅛" (3 mm) plywood and give some guesses for settings, but you'll probably have to change them.
To start with, click the black color entry in the Cuts / Layers window. Below the list of layers you'll see the Cut Info window, containing something like this:
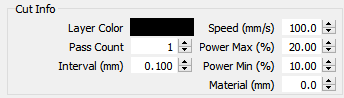
For the text, you want enough power to engrave into the material you're using, but not too deep.
- If you have a CO2 laser, use 200 mm/sec, 15% power (both Power Min and Power Max - more on this later) and leave everything else.
- If you have a diode laser, use 50 mm/sec (or 3000 mm/min), and 50% power.
Understand that this is a rough starting point, and you will probably need to change this later.
Now, click the red entry in the Cuts / Layers window. This is going to be what cuts through the material to cut out the shape. Cutting requires more power and much less speed.
- For a CO2 laser, set 15 mm/sec, 75% power (again for both min and max power)
- For a diode laser, use 2 mm/sec (120 mm/min), and 100% power. Depending on the strength of the diode you have, you might need to go slower than this, or use more passes by setting the Pass Count value higher.
Again, these are guesses, but they're a starting point.
Open the Preview window again (Alt+P, or click the Preview button), then drag the progress slider from left to right to watch how the job will run. You'll see the text engrave first, followed by the outline cut. If you don't see those things, check the settings again, and verify that you have the first layer (black) set to Fill, and the second layer (red) set to Line.
Positioning the Job on the Laser
When sending this to the laser, there are a couple of different ways that it can be positioned, and the one you choose may depend on the kind of hardware you have. If you have a small diode laser that does not having homing switches, you will likely want to run the job using the 'Current Position' mode. For now, that's what we'll recommend for everyone, since it's easy.
If you have an Ortur Laser Master, or other small laser that does have homing switches enabled, you will likely find 'Absolute Coords' to be the simpler setting to use - this means that wherever you place your work in LightBurn is exactly where it will go on the laser.
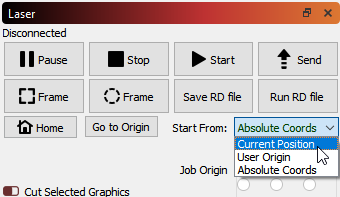
In the Laser window, which is in the lower-right of the main window by default, look for the 'Start From' drop down box, and choose 'Current Position' or 'Absolute Coords'. If you see 'Controller Setting' in this window, it means you have a Trocen Controller, and the start position is set from the controller menus, not from software. Don't sweat it for now.
If you used 'Current Position' mode, you'll see the 9-dot "Job Origin" control under it activate, and you should see a green square on your design in the same spot indicated by Job Origin control, like this:

In the above image, the Job Origin is set to the lower-left, and that's where the green origin square is on the design. That green square represents the position of the laser before you start the job, so the design is going to end up above and to the right of wherever the laser is when we press Start.
Put a piece of material in the bed of the laser, and use the arrow keys on the laser controller (if you have that) to move the head of the laser to the lower-left corner of the material. If your laser controller doesn't have arrows, click an empty spot in the edit window, then use the arrows on the Number Pad of your keyboard to jog the laser around instead.
When you think it's lined up, press the button labeled 'Frame'. The head of the laser will move in a rectangle around where the job will go. If you need to adjust anything, do so, then Frame again.
If you only have the option for 'Controller Setting' in the above window, when you position the laser in the lower corner of the material, press the button labeled 'Origin' on the controller panel to tell the controller this is where you'd like the job to start.
When everything is lined up, close the lid on the laser (or if you don't have one, put on your safety glasses), then press the Start button.
If anything goes wrong, hit the Stop button to abort the job, but if not, let it finish. When it completes, have a look at how things ended up - if the engraving of the name is too deep or too dark, you can increase the speed or reduce the power (or both). If the cut didn't go all the way through, reduce the speed or increase the power (or both). If you don't move your part, you can run the cut again (possibly with new settings) without having to use a new piece of material..
Results and Next Steps
When it's done, hopefully it looks like something like this:
That's it for this quick tutorial - It's only meant to be a starting point, but hopefully it was enough to give you a little foundation, and a taste of how things work.
Next Steps:
We recommend going through some of our "LightBurn Basics" tutorials on YouTube, and we have a great project tutorial that's a little more in depth called the "WIFI QR Code tutorial" that covers more ground, including importing.