Open vs. Closed Shapes
What Makes a Shape Open or Closed
All shapes in LightBurn are made up of lines, curves, and nodes. Sometimes those nodes are connecting points between lines or curves, and sometimes they represent the start or end point of a segment or sequence of segments.
A shape is closed when it is a complete, continuous loop whose start and end points are the same. When a shape's start and end points are different, it is open.
You can view a shape's nodes by selecting it and enabling the Edit Nodes tool. Start and end nodes are green, and somewhat larger than connecting nodes.

When and Why Shapes Must be Closed
Some functions require LightBurn to determine the inside and outside of a shape, and in order to make that determination, the shape must be closed.
The most commonly used function that requires closed shapes is Fill mode, which commands your laser to engrave or mark an area that falls within the outline of a single specified shape, or between the outlines of two shapes. Without knowing what area is inside a shape, LightBurn can't determine what to fill.
This is most obvious to the human eye when looking at line segments. If you draw a simple line segment with a node on each end, it makes no sense to say there is an inside and an outside to it. Following from that, if you assign that line segment to a layer set to Fill mode, it will not be possible for LightBurn to determine an area to be filled.
In other cases, as with shapes that have only small gaps, it may be relatively clear to a human what is meant to be the inside and outside, but software must interpret things literally, based on formal rules. That means if there is any gap at all, any open shape is the same to LightBurn as a line segment, for the purpose of determining an inside and outside.

Some other functions that require the use of closed shapes are:
- Offset Fill mode
- Weld
- Boolean Modifiers
- Cut Shapes
- Slot and Tab Resizer
- Kerf Offset
- Cut Inner Shapes First
Identifying Open Shapes
In some cases, as with simple line segments or shapes with large gaps, it's easy to see that a shape is open, but in others it may not be as obvious.
At times, the gaps can be very small, often so small that they are not visible without zooming in very close. Be aware: it is even possible for a start and end point to be directly on top of one another, but not connected, making a shape open.
LightBurn provides several methods for identifying whether a shape is open or closed.
Edit Nodes
As mentioned above, it is always possible to select a shape and the Edit Nodes tool to identify where its start and end nodes are, and whether they are the same, making a closed shape, or different, making an open shape.
In some cases, you may need to zoom in to see gaps.

Measure tool
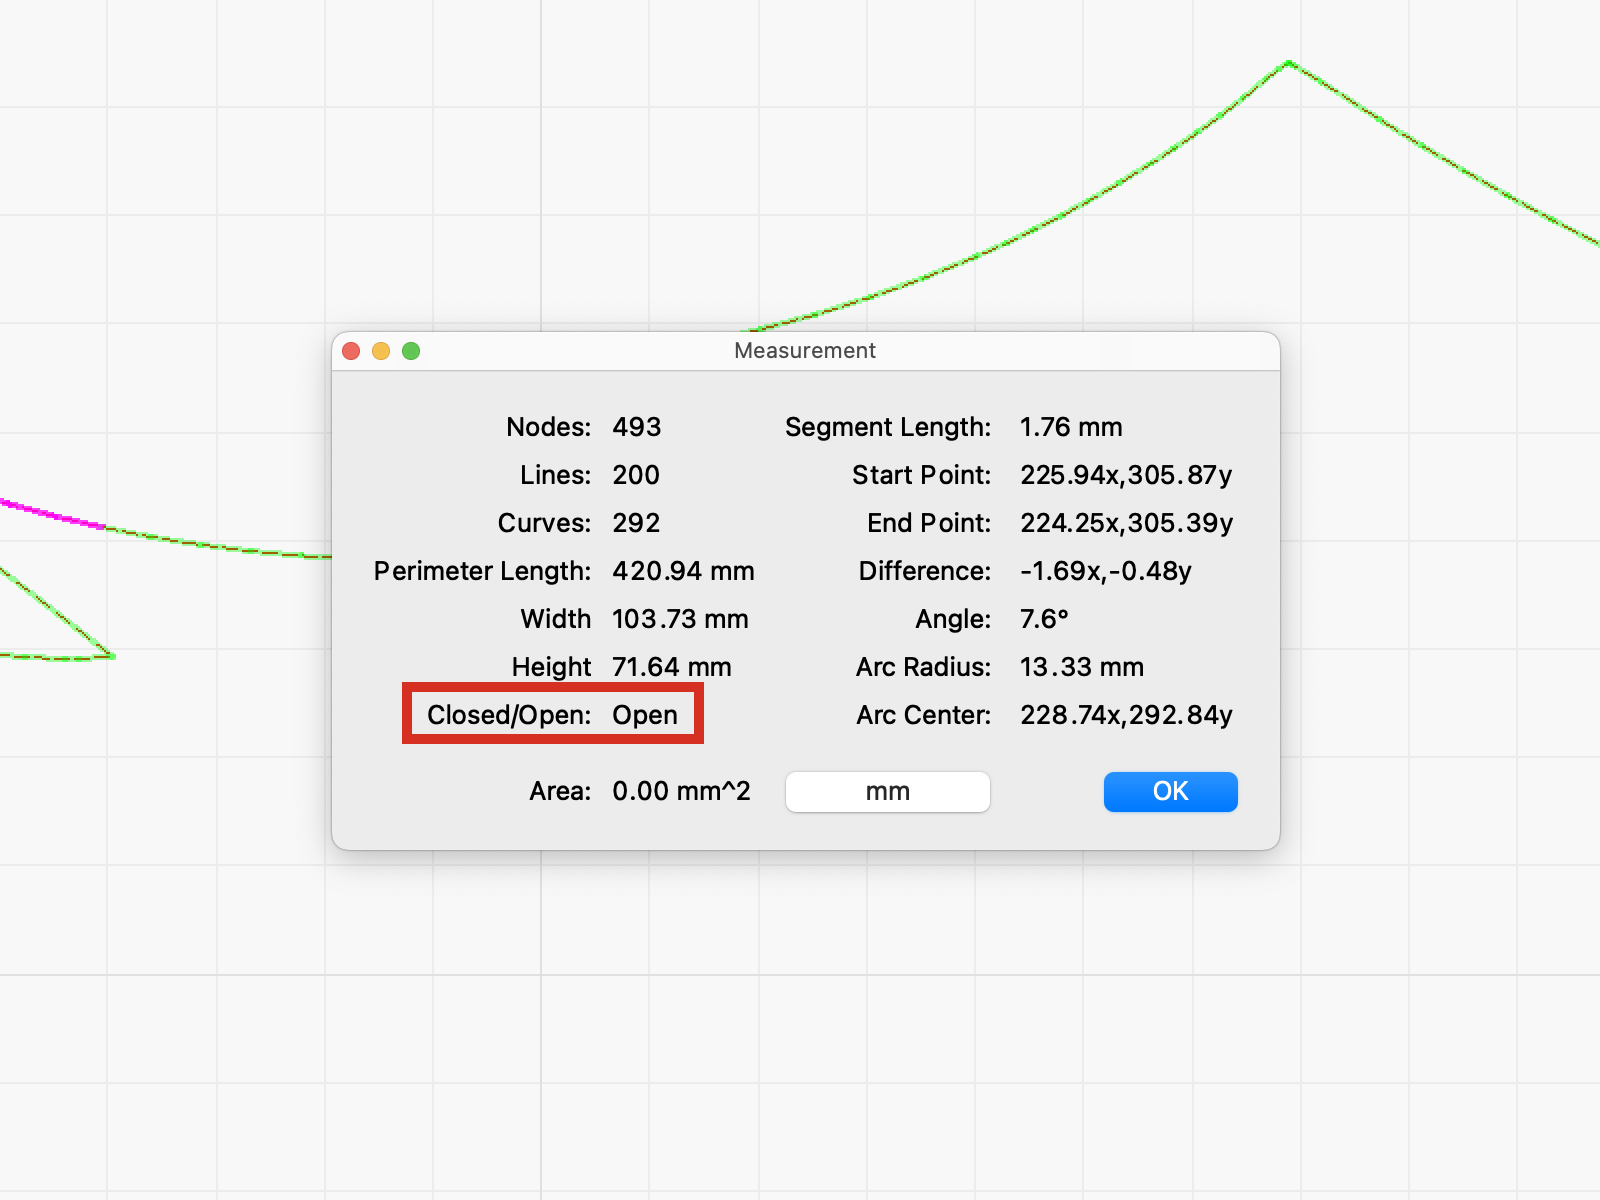
Select the Measure tool from the Creation Tools toolbar (or press Alt / ⌥ + M) and hover over a segment of any shape to see a readout of its attributes. In the bottom right, you'll see the Closed/Open descriptor, and a value telling you whether that shape is closed or open.
Pop up warning
If you have open shapes set to a Fill or Offset Fill layer, and attempt to Preview or Start a job, LightBurn will warn you, and give you the option to click Continue and proceed with the job, removing the open shapes, or Show Me to automatically select them.

Select open shapes
From the Edit menu, you can click the Select open shapes option to automatically select any open shapes in your workspace.
Select open shapes set to fill
Also found in the Edit menu, this option works the same as the Show Me button from the pop up warning, automatically selecting only those shapes in your workspace that are set to a Fill or Offset Fill layer.

Correcting Open Shapes
Change layer or mode
Before attempting to close an open shape, it's important to decide whether that is the best step to take to get the result you're looking for.
In some cases, especially when working with a project you did not design yourself that has shapes with start and end points that are very far apart, the best course of action is to assign those shapes to a layer set to Line mode. Open shapes like these are often meant to be set to a speed and power appropriate to score a material along outlines defined by those shapes, and not to be filled at all.
To see how your result will look, you can set the open shapes to a Line layer, and use the Preview window to check whether the simulation matches your desired output.
Edit Nodes
The Edit Nodes tool is not just an option for identifying open shapes, it can also be used to close them. To join open shapes with the Edit Nodes tool, select and drag a start point onto an end point (or vice versa).

Because this option requires you to close open shapes manually, in cases where you have many shapes to close it is often easier to use a tool that does so automatically.
Close Path
Found in the Edit menu, the Close Path option will connect a shape with one start and one end node by creating a new line between them. The start and end nodes must be within .5 mm of one another, so this option is only for shapes with very small gaps. It cannot be used to closed shapes made up of more than one disconnected line segment.
Close selected paths with tolerance
Close selected paths with tolerance is also found in the Edit menu, and, like Close Path, can connect a shape with one start and one end node.
Unlike Close Path, this option opens a pop up menu that allows you to specify the Distance Threshold, or tolerance, between start and end nodes you'd like to close.
You can also choose whether you would like to join the start and end nodes by bringing the existing lines together with Move Ends Together, or by creating a new line segment between them using Join with Line.
At the very bottom of the window, you'll see a readout of how many open shapes were found, how many shapes have been closed, and how many open shapes remain in your workspace.
Click OK to confirm the changes and close the selected shapes, or Cancel to discard them and leave the shapes open.

Auto-Join selected shapes
Auto-Join selected shapes (Alt / ⌥ + J) is also found in the Edit menu, and is able to join many disconnected segments at once. In order for Auto-Join to work, the start and end points of two segments must be very close together, within .05 mm of one another.
In some cases where Auto-Join fails to join segments with start and end points within the necessary .05 mm tolerance, it can help to first go to the Arrange menu and select Break Apart (Alt / ⌥ + B), before again trying Auto-Join.