LightBurn Bridge
Warning
The LightBurn Bridge is only for use with lasers using Ruida controllers.
The LightBurn Bridge was created by LightBurn to get around some of the limitations of Ruida controllers. Ruida uses the UDP network protocol, which does not guarantee data transmission, and is therefore not reliable enough to use over WIFI. Many computers no longer have a network port, and running a network cable is often impractical or cumbersome. In addition, Apple's device driver for the USB connection to the Ruida has issues that often cause data loss.
The LightBurn Bridge overcomes all of this. It's a Raspberry Pi running software created by LightBurn to act as a relay between your PC and laser. You connect to it using TCP, so the commands are reliably sent even over WIFI. The Bridge forwards the commands to the controller using a short network cable, and relays responses back to your computer.
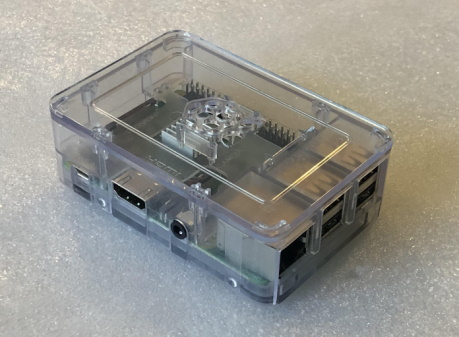
The LightBurn Bridge is simple to configure, requires no drivers, and typically sends data 50% to 100% faster than a USB connection. It looks like this:
If you purchased a kit with everything included, continue below. But if you want to setup your own with a Raspberry Pi you already have, follow the SD card flashing instructions first.
Danger
The bridge is intended to be an appliance. We have tested the software extensively, but we do not support modifications to the hardware or firmware - if you alter the system to add functionality beyond what is covered here, or in the Advanced Guide, you’re on your own.
LightBurn Bridge Setup
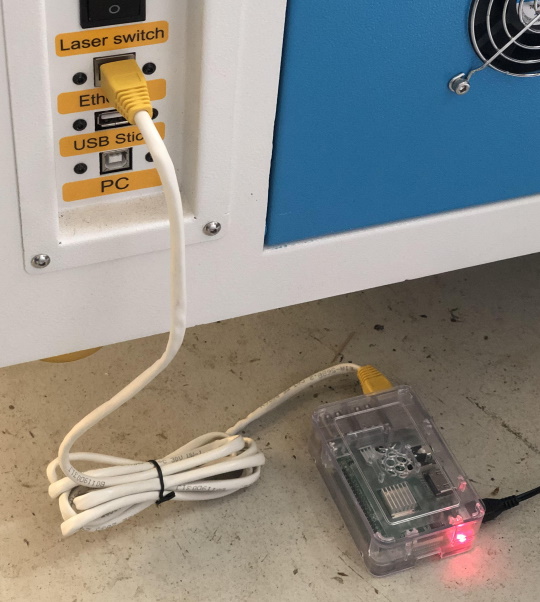
The LightBurn Bridge is pre-configured to connect to a laser configured with an IP address of 10.0.3.3. In the Ruida control panel, set the IP of your laser to this value, then connect a network cable from the controller to the Raspberry Pi, and plug in the Pi with its power adapter. If you need to change the IP address, please check out the Configuration Options, and please note the caveats to doing this, listed there.
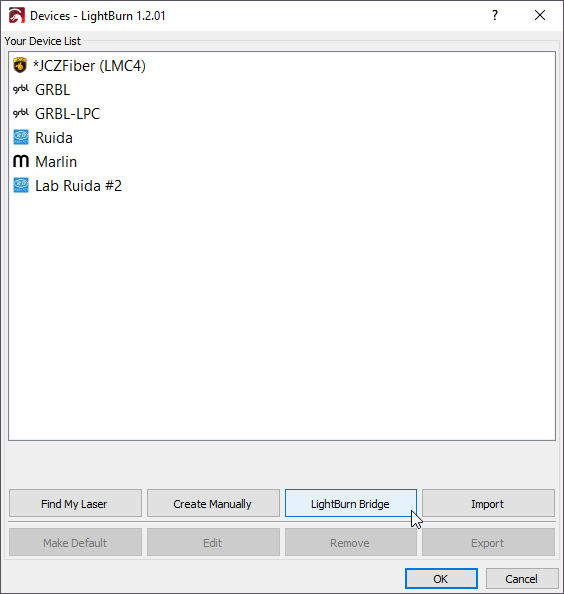
In LightBurn, in the Devices screen, click 'LightBurn Bridge' to set it up:
Connecting the LightBurn Bridge to your network
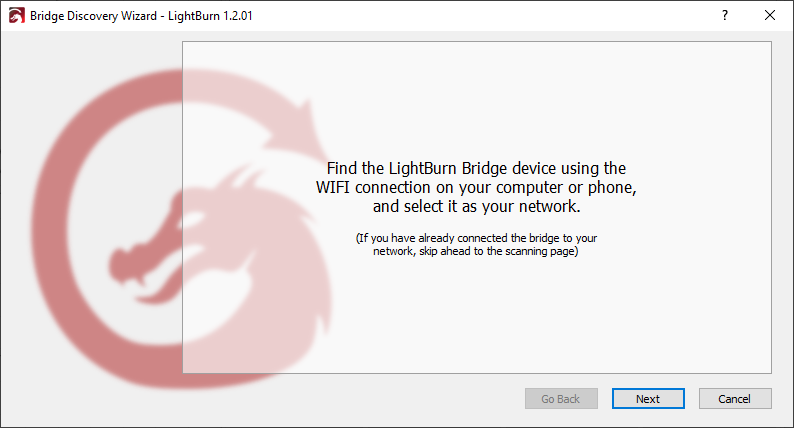
LightBurn will open the LightBurn Bridge discovery wizard to guide you through the setup.
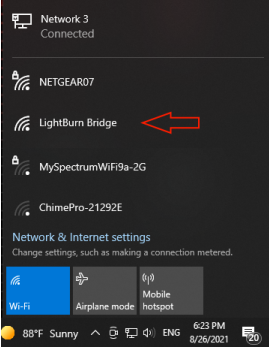
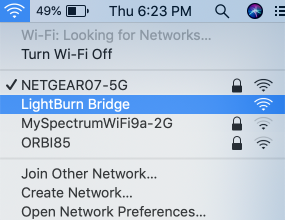
On your computer or a mobile device, use the WiFi settings to find the LightBurn Bridge device, and connect to it:
Note: The access point name you find will typically have a four-character random string at the end of the name, such as LightBurn Bridge E4B7. This is to prevent conflicts if you have multiple LightBurn Bridge devices in the same location.
When you've selected the LightBurn Bridge access point, click Next.
Note: You may also configure the WiFi manually, as shown on the Advanced Usage page.
Configuring the Bridge in LightBurn
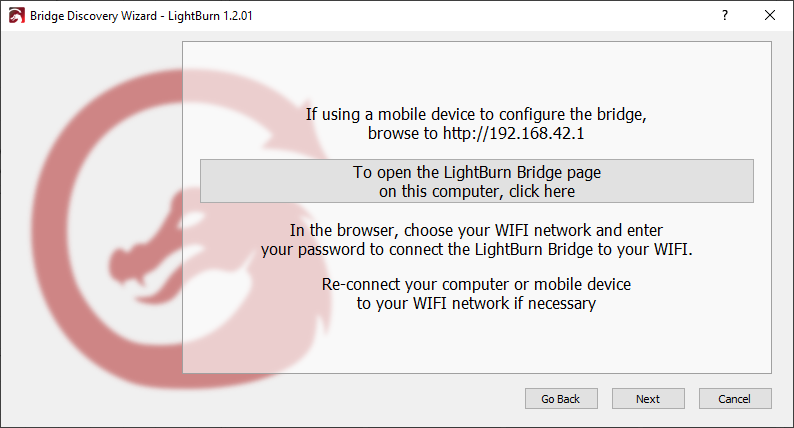
Now you need to tell the LightBurn Bridge which WiFi network to connect to, and give it the network password. In most cases, the configuration page on the Bridge will open automatically. If it does not, browse to http://192.168.42.1 as shown in the wizard page below. If you want to use your PC to configure the Bridge, click the button shown to open your browser to the correct page:
Setting the WiFi name and password
In the browser window, you'll see a page like this:
Select your WiFi network from the list of options, enter your password, then click the 'Connect' button at the bottom. You'll see a message appear near the top, telling you that the bridge is connecting to your WiFi network. You can now close the browser window and go back to the LightBurn wizard.
If you were using your PC to configure the LightBurn Bridge, re-connect the PC to your WiFi network if you need to.
Finding the LightBurn Bridge from your PC
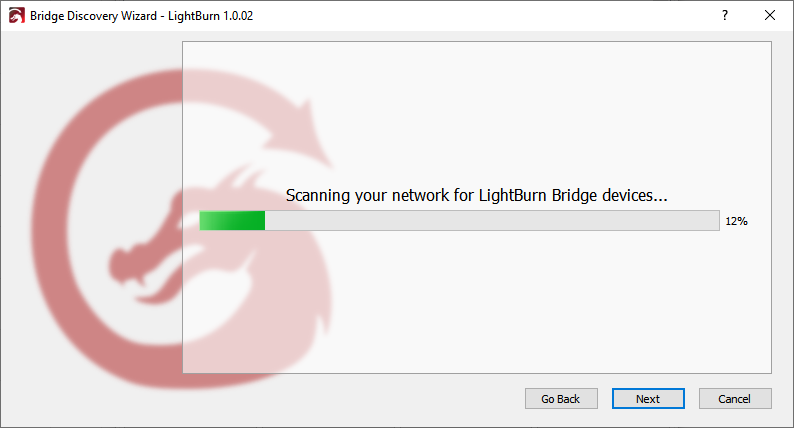
LightBurn will now scan your network, looking for connected devices, to find the new LightBurn Bridge. You'll see a progress bar appear as it does this:
If LightBurn is able to connect to the Bridge device, and the Bridge was able to talk to your laser, you should see something like this:
If everything looks good, click 'Add Device' and you'll be taken to the setup screen for the device, asking you to enter the name, check the size, and so on. Click here to skip to the next section.
If the either the Bridge or the laser are not found, you may need to change the IP address on your laser to 10.0.3.3 (the default for the LightBurn Bridge), or optionally, you can configure the bridge to use a different address for your laser.
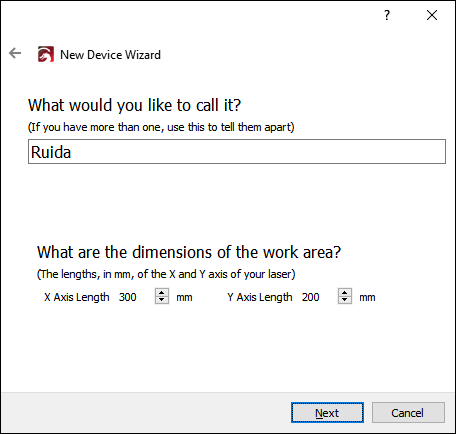
Name and work area size
You can name the laser, which is very useful if you have more than one, or just leave it as is.
You must set the size of the work area for your laser so that LightBurn can try to prevent things from going out of bounds. If you don't know the exact size, you can easily change this later in the Device Settings page.
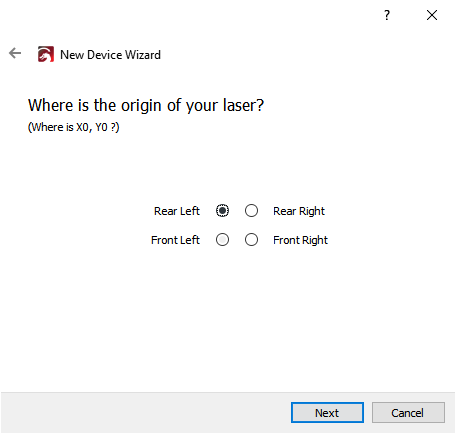
Laser Origin
The origin setting is where the 'zero' point of your X & Y axis meet. If you get this wrong, you can change it later in the Device Settings page. This setting also controls the orientation of the output - if it's wrong, the output from your laser may be mirrored or upside down.
With a DSP controller, like Ruida, Trocen, or TopWisdom, the origin corner will be the corner that the laser head seeks out when you power it up.
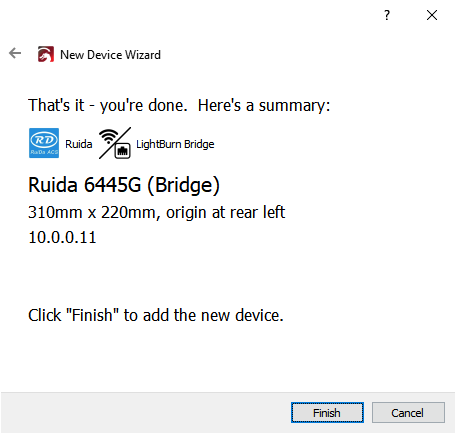
All done!
That's it - The final page will show you a summary of your choices. You can go back and fix anything if necessary, or click Finish to create the new device entry.
Next Steps
If your use of LightBurn Bridge is more complex than indicated here, you may need to take a look at our Advanced Guide for LightBurn Bridge.
