Connecting via Ethernet to Trocen Controllers
To avoid using long USB cables, you may want to send jobs to the Trocen controller in your laser via Ethernet networking. This is a guide on how to do so.
Attention
This section is new, and is a work in progress. Be sure to let us know on the forums or via support if we need to change something. Thank you!
Networking
Trocen controllers operate over IPv4, or Internet Protocol Version 4, which consists of unique external and unique "local" addresses within a network. Trocen controllers need a "static" IP, or one that's unchanging. More modern networking involves DHCP, where addresses are "loaned" temporarily to devices, like laptops and phones.
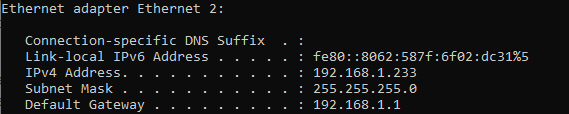
In Windows, if you open the command prompt ("cmd" in the start menu or in the Win+R "Run" box) and type "ipconfig", it'll look something like this.
Choosing an IP
IP Address Example For Home Networks
-
Look for the line in
ipconfiggiving your IP addressIPv4 . . . 192.168.1.225 -
Remove the last section 192.168.1.
225 -
Replace it with a number between 230 and 250 192.168.1.235
This will probably be safe to use on a home network, but it isn't guaranteed. See links to the left for help.
Unfortunately, choosing a static IP address can be a little tricky. Home networks are usually small and pretty simple, so the steps in the blue box to the right will usually be enough to help you choose an unused IP address. If you run into problems with the first number you try, it may be worth trying one or two others to see if there's a conflict.
In more complex network situations, such as a school or shop network, we recommend working with your IT/networking team to select an IP address and ensure that you don't cause problems for your network infrastructure.
More in-depth networking information can be found at sources like Google Support, Simple Wikipedia's explanation, or other technical resources like Cisco or Meraki's websites. This is a complex topic with a wide range of possibile setups, so we are unable to cover every situation.
On Controller
Note
Some Trocen controllers have different menuing and button configurations. This is a guideline, not a hard and fast rule.
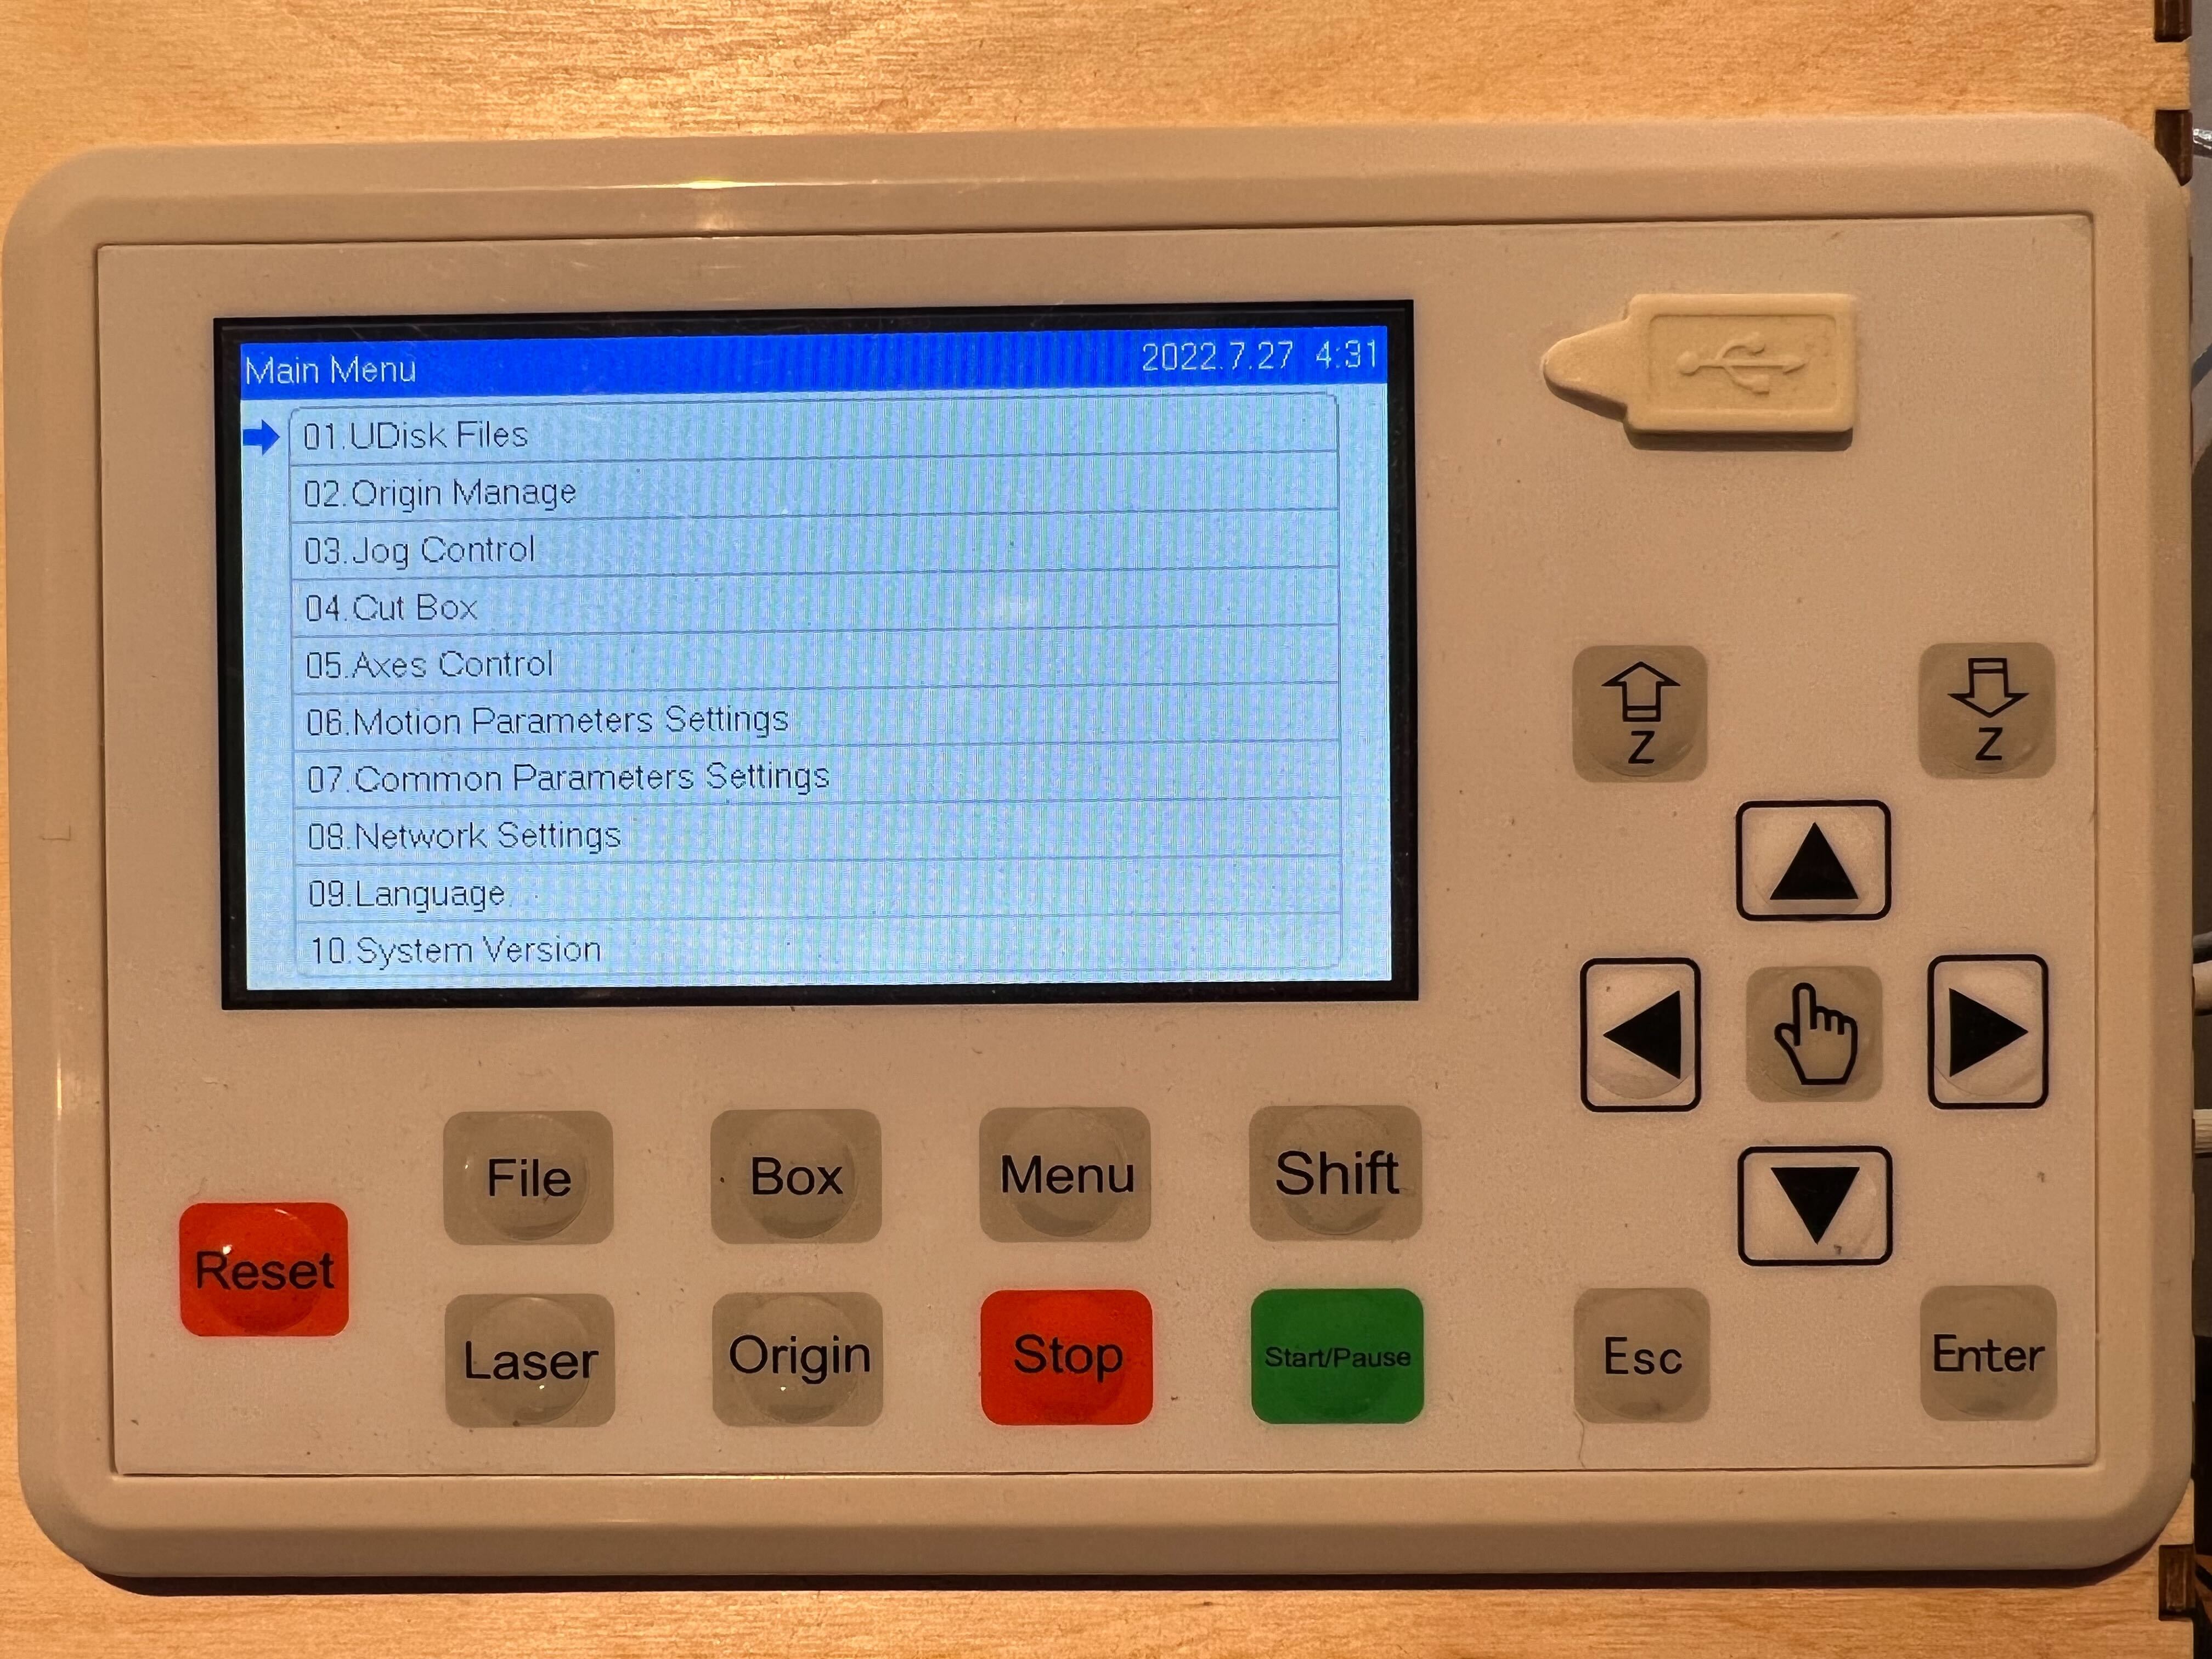
On the Trocen controller, use the Menu button to enter the menu, navigate to "Network Settings , and press enter / the mouse pointer button to access that menu setting.
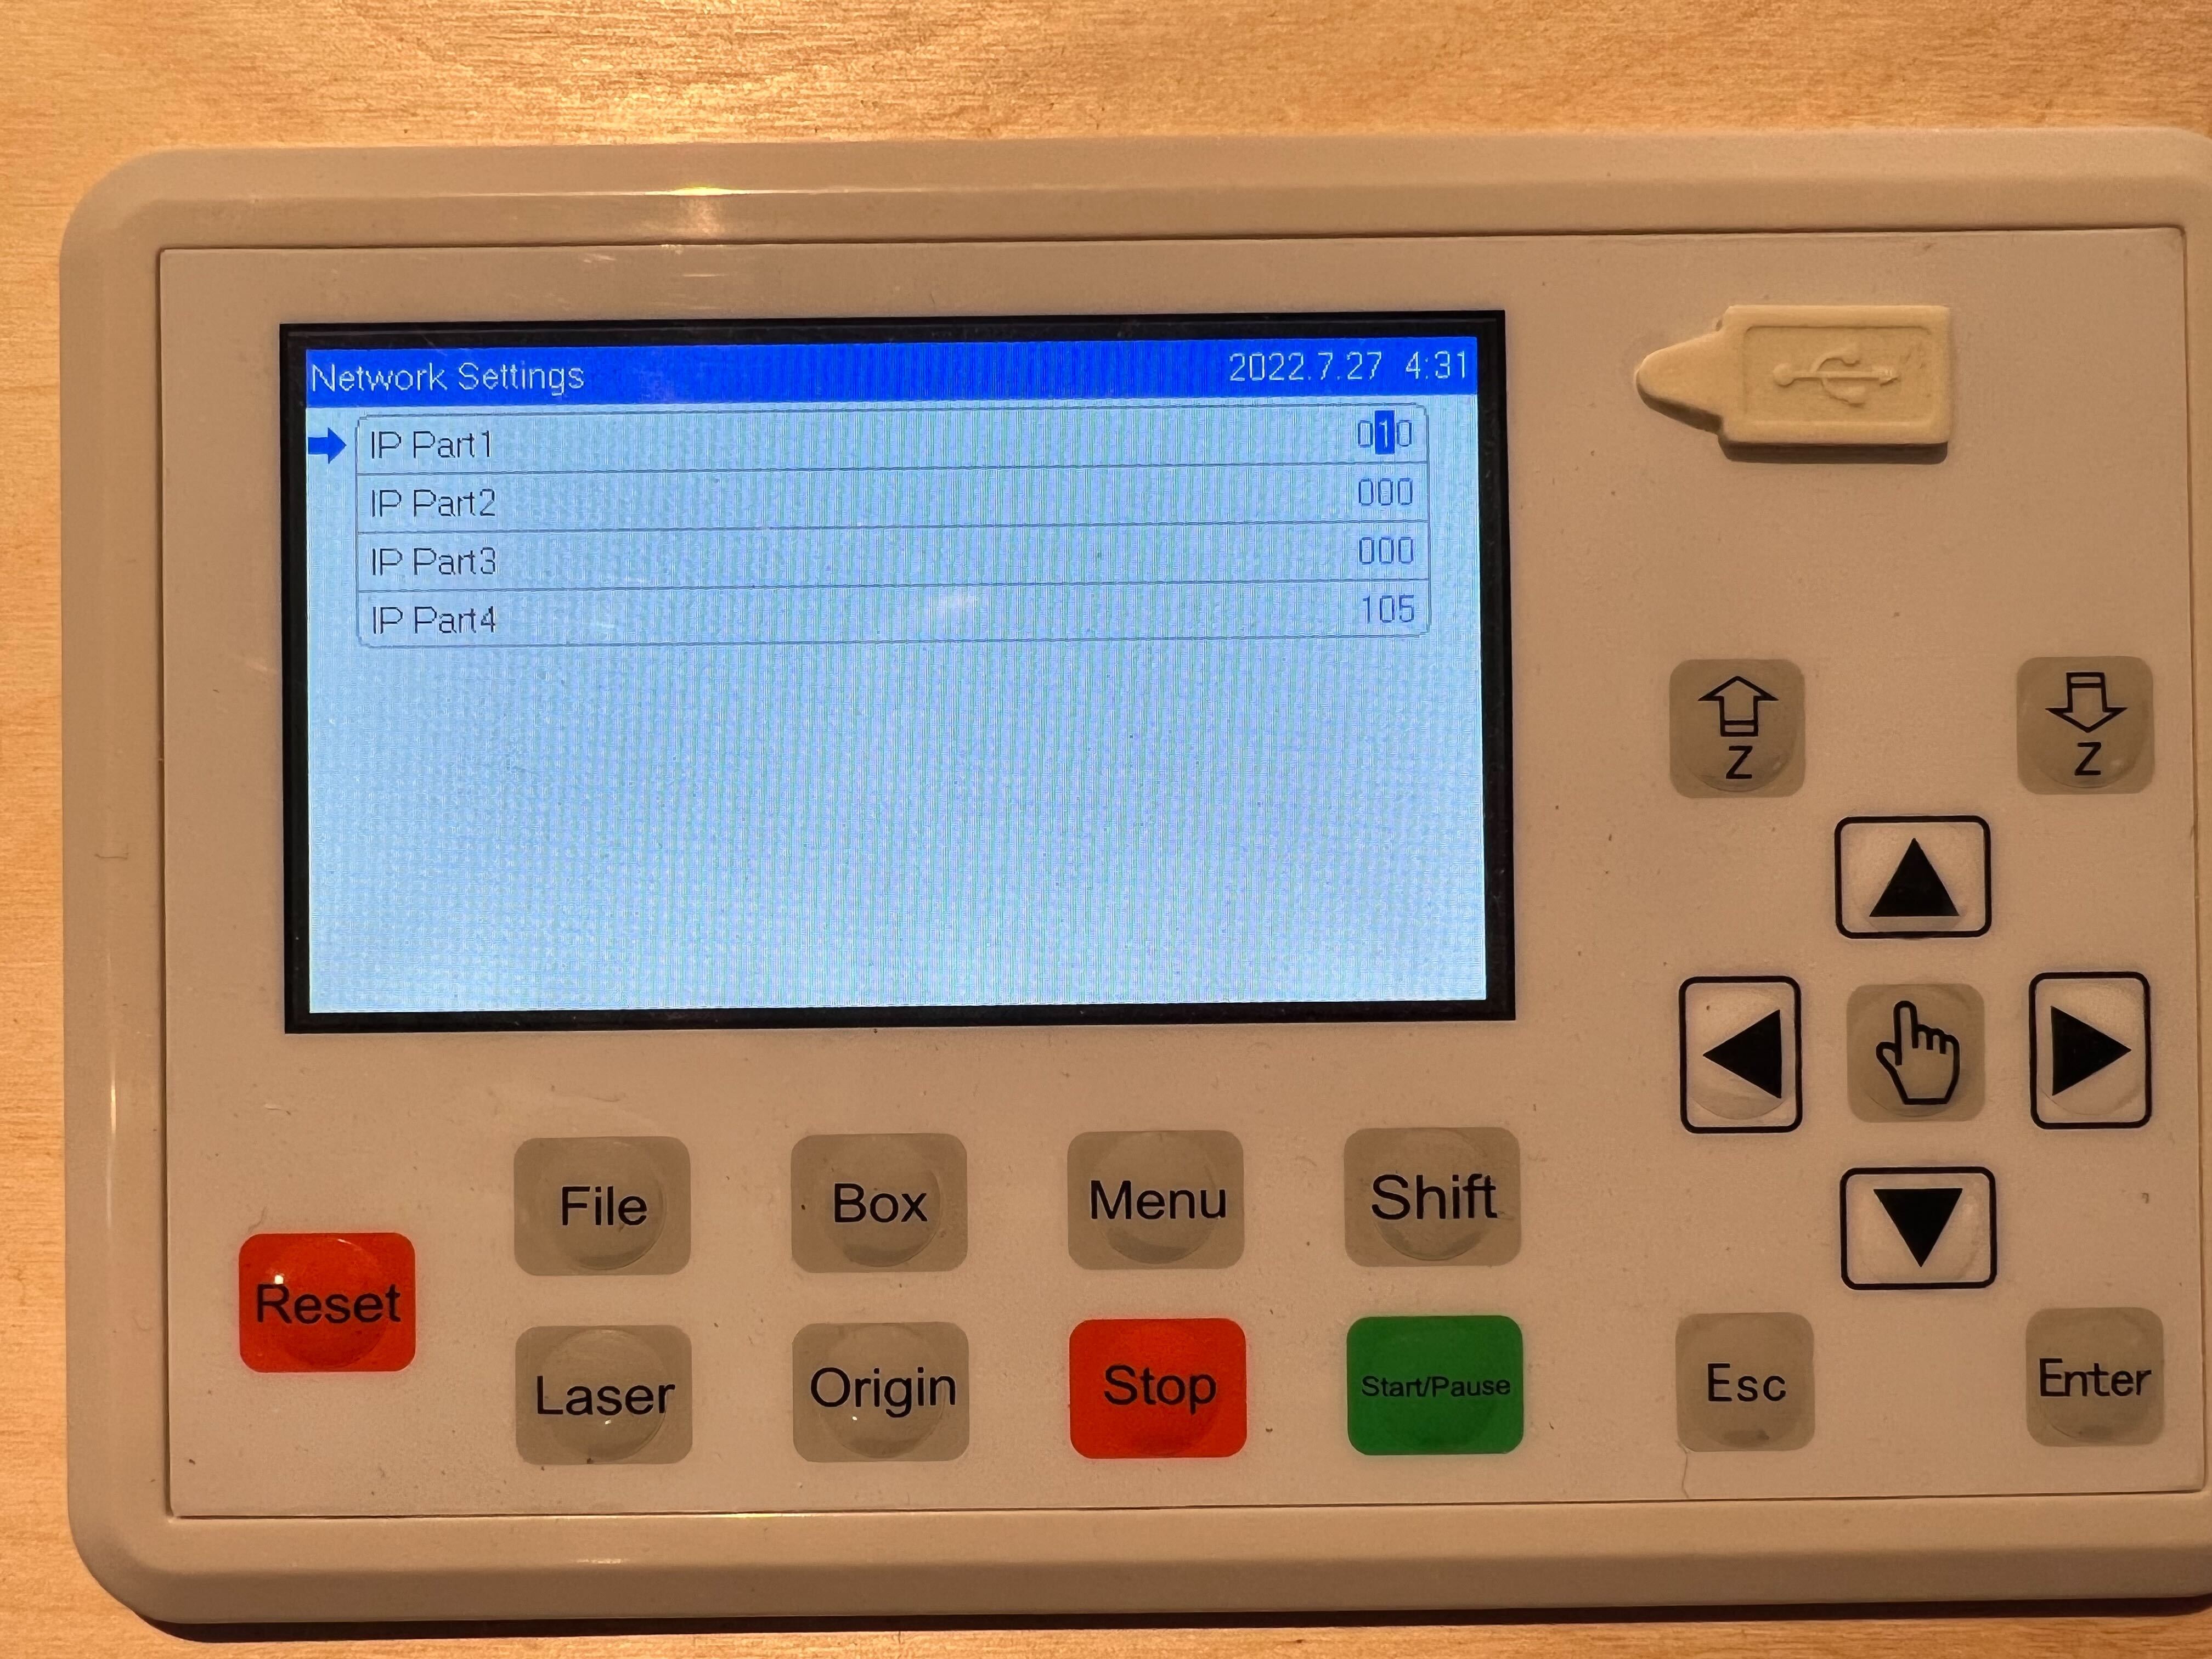
Each octet of the IP will be editable, enter the menu, exit that subsection, and continue to enter your IP for the laser.
When done, exit the menu.
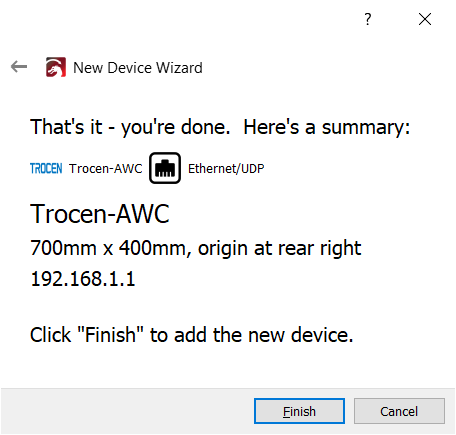
In LightBurn
Trocen controllers accessed over a network are their own type of connection for a device, so in the "Devices" menu, click "Create Manually".
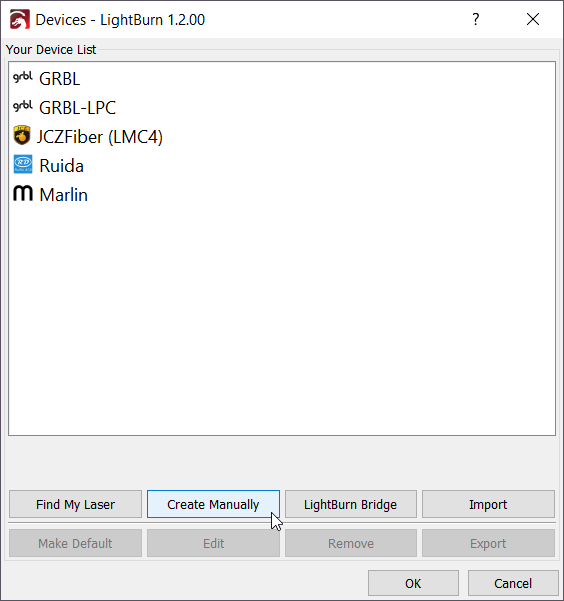
Select the Trocen controller from the list of compatible controllers.
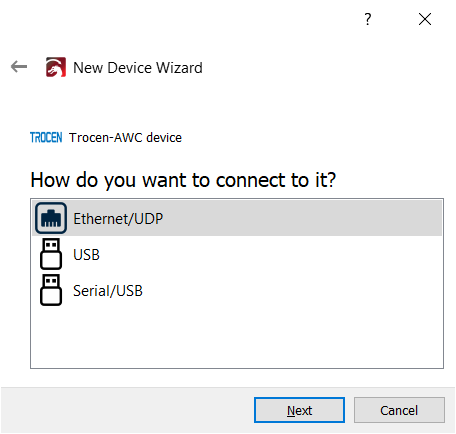
Select "Ethernet/UDP" as the communication method.
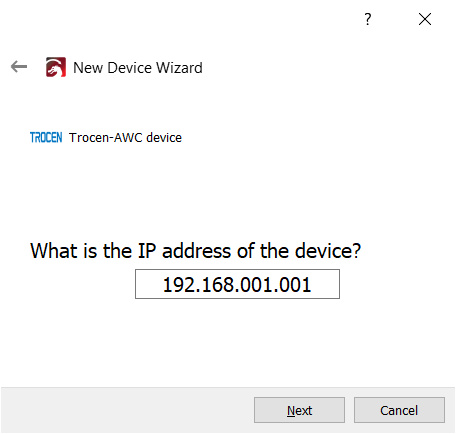
Enter the IP that was assigned or arrived at for use given the information above.
Note
Steps below this point are likely to mirror the setup of any prior USB connections set up for the same hardware.
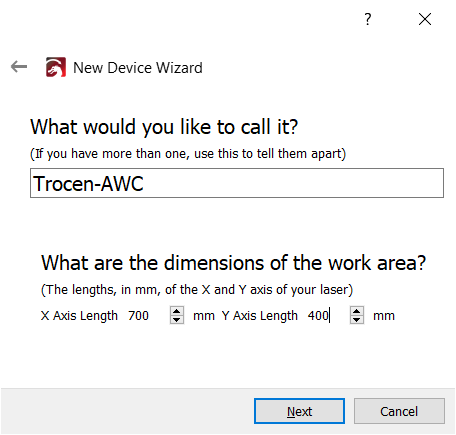
Enter the size of your laser's bed and name the device as it'll show up in your menus.
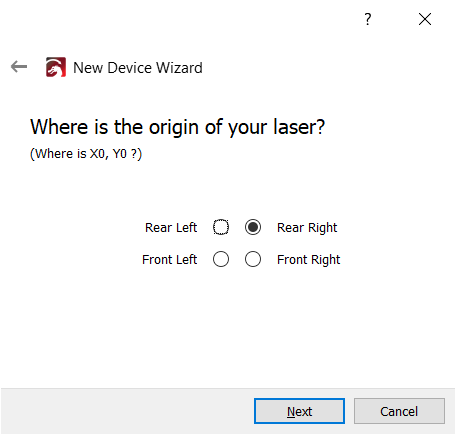
Enter the origin (0,0) position of your machine.
And you're ready to go, assuming all is good!
Verifying
In LightBurn, the status bar on the bottom of the main window will show connection status to the device. In the event LightBurn cannot find your laser, it's likely to show like below.

In the event your networking is spotty, you can right-click the "Devices" button to re-connect to any laser; not just your Trocen controller.
Source
This guide was originally made for our Forums on October 20th, 2019. You can find the original guide here.