Connecting via Ethernet to Ruida Controllers
To avoid using long USB cables, you may want to send jobs to the Ruida controller in your laser via Ethernet networking. This is a guide on how to do so.
Networking
Ruida controllers operate over IPv4, or Internet Protocol Version 4, which consists of unique external and unique "local" addresses within a network. Ruida controllers need a "static" IP, or one that's unchanging. Most modern networking involves DHCP, where addresses are "loaned" temporarily to devices, like laptops and phones. More in-depth networking information can be found at Google Support, Simple Wikipedia's explanation, or other technical resources like Cisco or Meraki's websites. This is a complex topic with a wide range of possible setups, so we are unable to cover every situation.
In order to connect a Ruida controller over Ethernet, you'll need to select a static IP address that doesn't interfere with other devices on your network. If you're comfortable doing that on your own, select an IP address appropriate for your network and jump ahead to setting the IP address on the controller. Otherwise, keep reading for help.
Choose an IP address
Choosing a static IP address that doesn't interfere with other devices on your network can be a little tricky if you aren't already comfortable with computer networking, but home networks are usually small enough that we can get by with picking an address that's unlikely to be used already.
For more complex network situations, such as a school or work network, we recommend working with your IT/networking team to select an IP address and connect your laser to ensure that you don't cause problems for your network infrastructure.
1. Find your computer's IP address
To start, you'll want to find your computer's local IP address. It will be four sets of numbers separated by periods, similar to 192.168.1.19. See below for tips on how to do that on Windows and Mac.
Windows
Open the command prompt (type "cmd" in the start menu or in the Win+R search box). At the command prompt, type ipconfig, and press Enter. Your results will look similar to this:
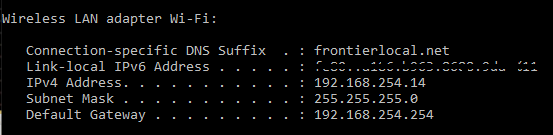
The line that says IPv4 Address is what you're looking for. Make a note of this address and move on to choosing a unique IP address.
Mac
Open Spotlight with Cmd+Space and type "IPv4" into the search bar to bring up your IP address in system settings.
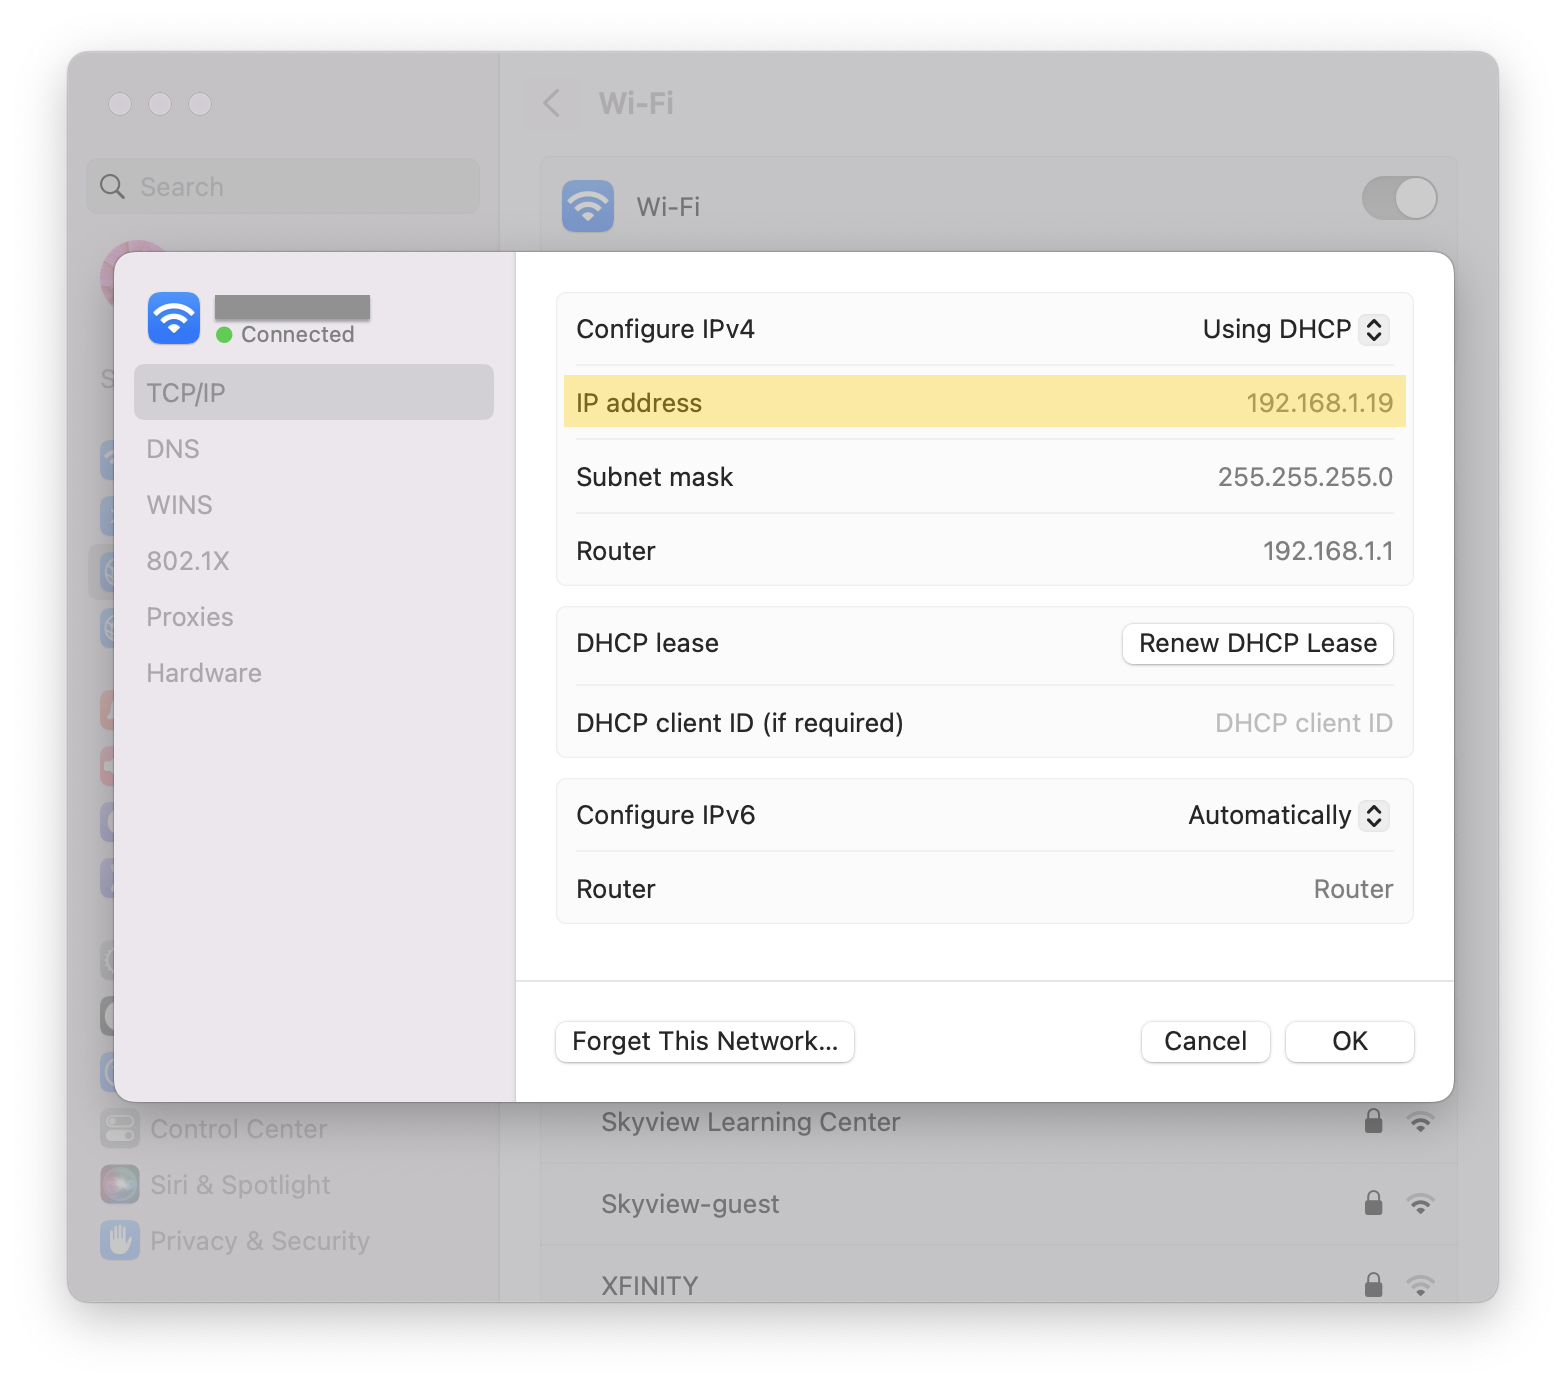
Make a note of this address and move on to choosing a unique IP address.
2. Choose a unique IP address for your laser
Start with the IP address you found in the previous step. The first three segments need to stay the same, but the last segment needs to be a value from 1 to 255 that isn't already used on your network. An easy trick that usually works is to add or subtract 100 from your computer's address. This makes it less likely that another device connecting to your network will automatically be given the same IP address you choose.
| Starting IP address | Try this IP address |
|---|---|
10.10.1.154 | 10.10.1.54 (subtracted 100) |
192.168.2.201 | 192.168.2.101 (subtracted 100) |
10.100.50.14 | 10.100.50.114 (added 100) |
This trick doesn't guarantee a unique address, so if it's not working, try a few different IP addresses by varying the last segment.
Set the IP address on the controller
Note
Some Ruida controllers have different menu and button configurations. This is a guideline, not a hard and fast rule.
On the Ruida controller, use the Z/U or Menu buttons to enter the menu, navigate to "IP config+" , and press enter to access that menu setting. On the right side of the screen, the IP address field and gateway will be visible. Use the left/right arrows to move through the octets (sections), and the up/down arrows to change the value. Press and hold the up/down arrows to quickly change the value.
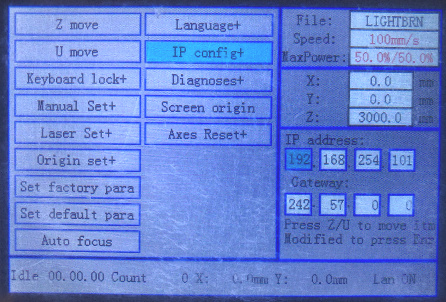
When done, press the "Enter" button.
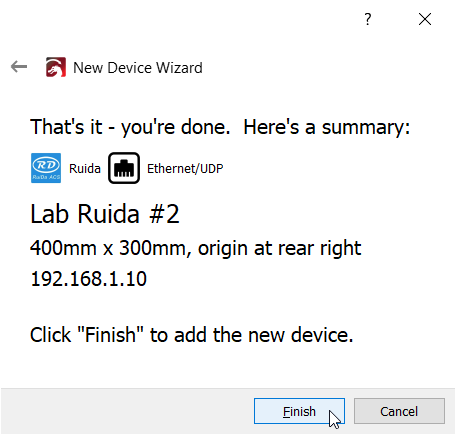
Add the laser in LightBurn
Ruida controllers accessed over a network are their own type of connection for a device, so in the "Devices" menu, click "Create Manually".
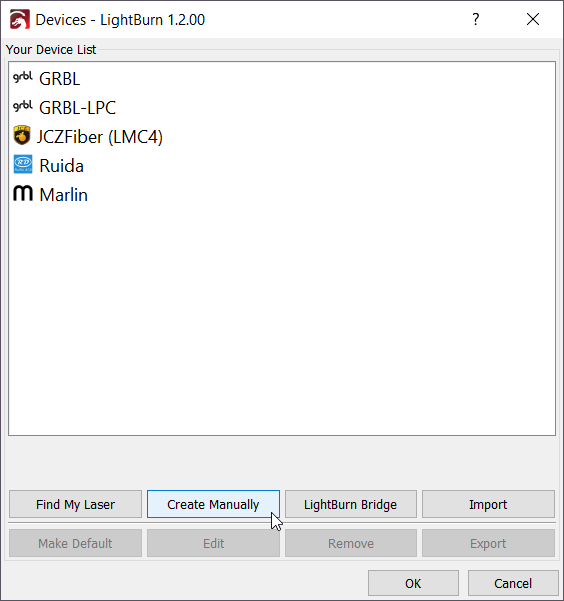
Select the Ruida controller from the list of compatible controllers.
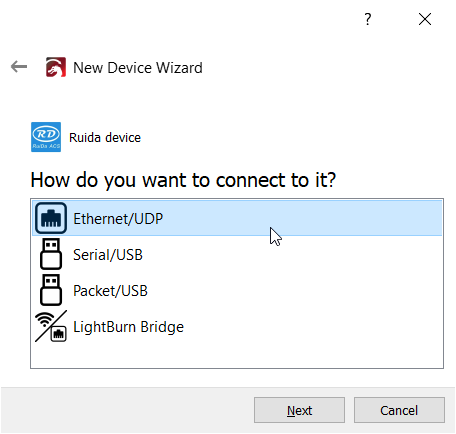
Select "Ethernet/UDP" as the communication method.
Warning
In the event this communication method proves unreliable, you may want to consider using a LightBurn Bridge, especially if you're using macOS. The Bridge provides a much more stable network connection than the Ruida controller's UDP connection.
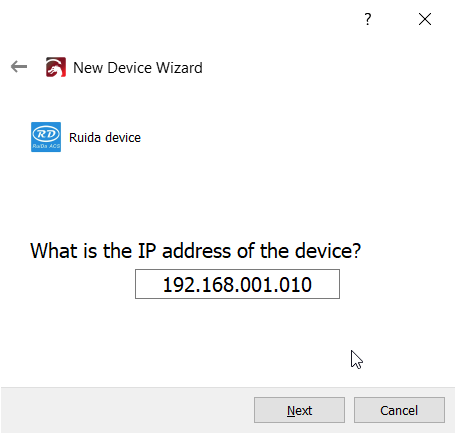
Enter the IP that you assigned to your laser.
Note
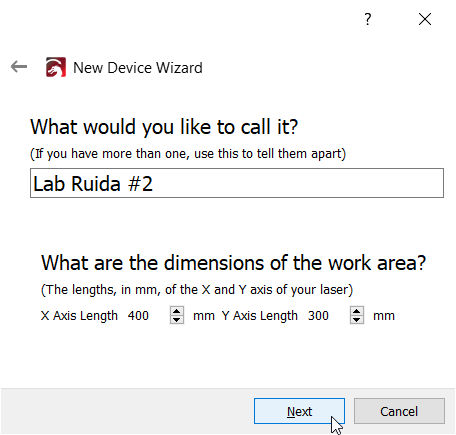
Steps below this point are likely to mirror the setup of any prior USB connections set up for the same hardware.
Enter the size of your laser's bed and name the device as it'll show up in your menus.
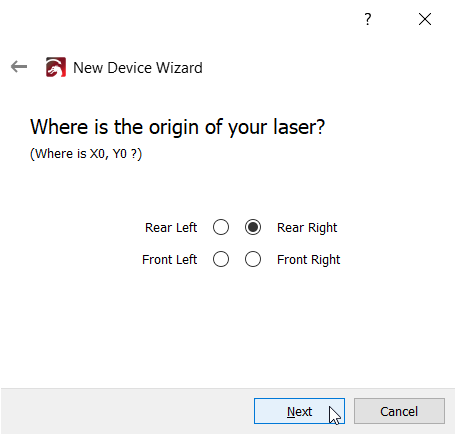
Enter the origin (0,0) position of your machine.
And now you're ready to go!
Verifying
In LightBurn, the status bar on the bottom of the main window will show connection status to the device. In the event LightBurn cannot find your laser, it's likely to show like below.

In the event your networking is spotty, you can right-click the "Devices" button to restart the currently selected device connection.
Source
This guide was originally made for our Forums on October 20th, 2019. You can find the original guide here.