Manually adding a Laser
If you need to add a laser that isn't connected to your computer or is connected over a network, you can add it manually.
I don't have a laser yet!
If you don't have a laser, the No Machine device type added in LightBurn 1.5 can be used to create a simple placeholder device of any size you want.
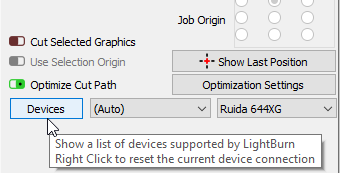
Start by clicking the Devices button in the Laser window to open the Devices window.
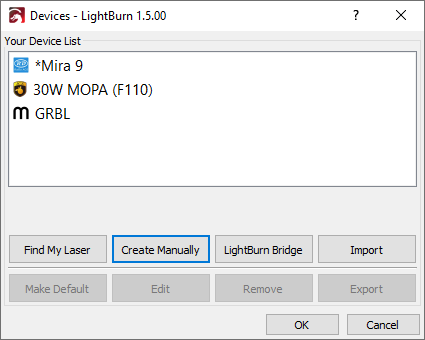
Click the Create Manually button on the Devices window.
Device Type
LightBurn will open the New Device Wizard, and the first thing you'll see is a list of the controllers supported by your version of LightBurn:
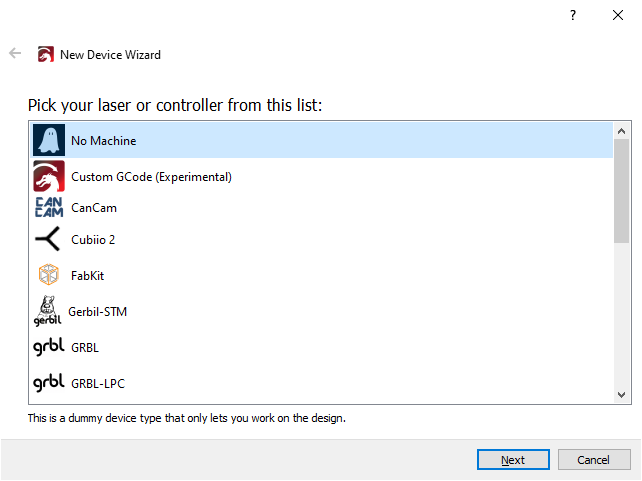
Choose the entry that matches the type of controller or firmware in your laser and click Next. If you don't have a device to connect yet, you can choose the No Machine type to move ahead with using the software.
The Custom GCode device type added in LightBurn 1.5 allows you to create custom templates for generating GCode. This won't be necessary for most users, but if you have a custom machine or purchased a machine from a vendor using non-standard GCode, go to Custom GCode to learn more.
Connection Type
The next step is choosing how you connect to your laser. The choices you see will depend on the type of connection methods supported by your controller and LightBurn. Serial/USB is the most common. Some controllers allow connection by Ethernet (note that this includes both Wi-Fi and wired).
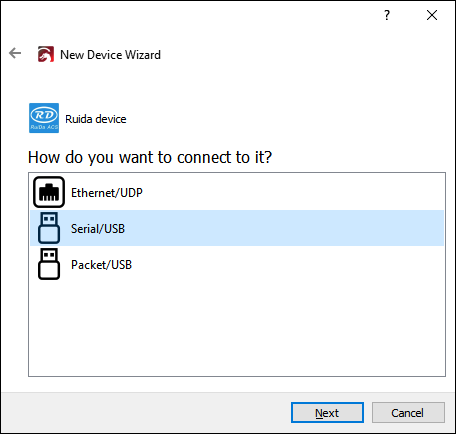
Choose how you wish to connect, and click Next.
Name And Work Area Size
You can name the laser, which is very useful if you have more than one or just leave it as is.
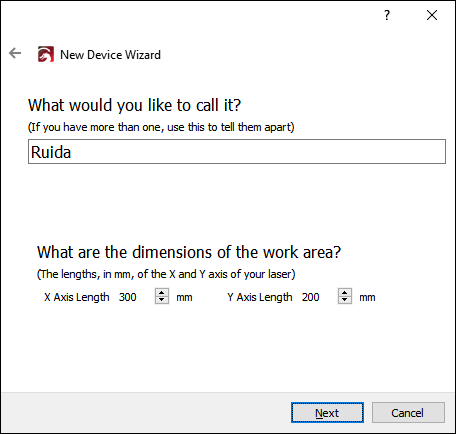
You must set the size of the work area for your laser so that LightBurn can make try to prevent things from going out of bounds. If you don't know the exact size, you can easily change this later in the Device Settings page.
Laser Origin And Homing
The origin setting is where the 'zero' point of your X & Y axis meet. If you get this wrong, you can change it later in Device Settings. This setting also controls the orientation of the output — if it's wrong, the output from your laser may be mirrored or upside down.
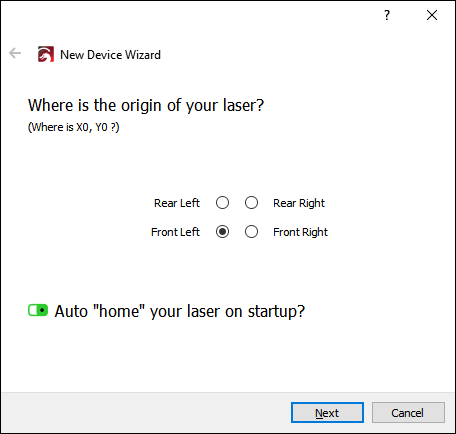
If you have a GCode based controller, like GRBL, Smoothieware, or Marlin, commonly used with diode lasers or smaller hobby systems, in almost all cases the origin will be in the front-left. With GCode based systems, you are given the option to send the homing command when LightBurn first connects. If your laser does not have homing switches, leave this off.
If you have a DSP controller, like Ruida, Trocen, or TopWisdom, common in larger CO2 lasers with metal cabinets and LCD panels, the origin corner will be the corner that the laser head seeks out when you power it up. With DSP controllers, the controller will automatically home itself when powered up, so you will not see the option for homing on startup.
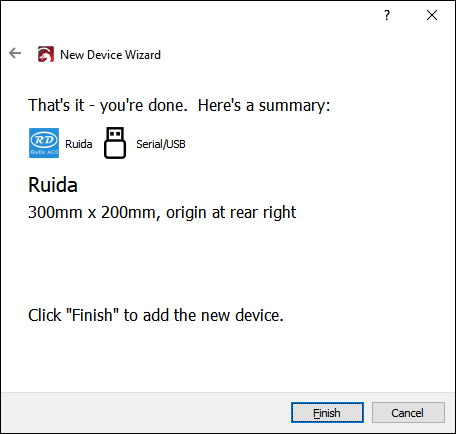
Review Settings
The final page will show you a summary of your choices. You can go back and fix anything if necessary, or click Finish to create the new device entry.
Next Step: Connecting to the Laser