Coordinates and Job Origin
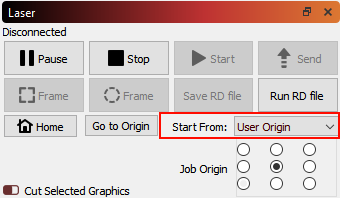
There are a few ways to tell LightBurn where to ouput your project within the work area of your machine, each available in the Start From menu in the Laser window.
Absolute Coordinates
Absolute Coordinates is the simplest option. The grid you see in the main editing window of LightBurn represents your machine's physical work area. Anything you place in the LightBurn grid will be output in the corresponding location in your machine's work area.
Note
Using absolute positioning requires a laser with homing switches and a fixed origin. If you have a small diode laser that does not have homing switches, you will need to manually home the machine. See: Machines without homing sensors / limit switches.
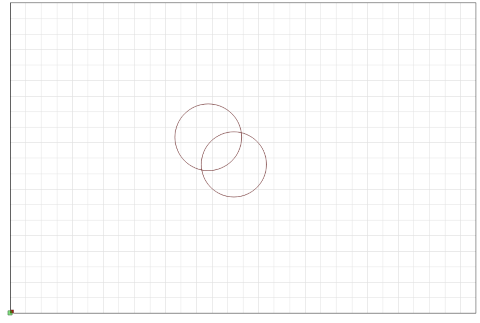
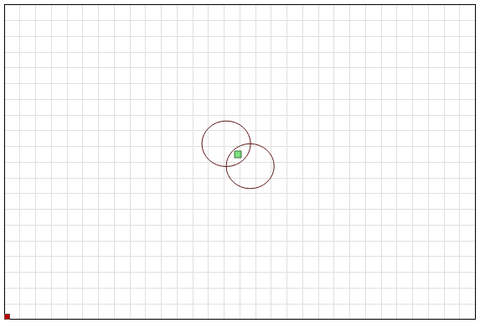
In the image below, the two circles placed in the middle of the LightBurn grid will be cut in the middle of the machine work area. The green square in the lower left of the image represents the Job Origin, and the red square in the same place shows the Machine Origin. When using Absolute Coordinates these are always in the same place.
Current Position
With Current Position selected, your job outputs relative to the current position of the laser head when you hit the Start button. The Job Origin control in the Laser window tells LightBurn how to orient output relative to the laser head.
In this image, we're starting from the Current Position, with the Job Origin set to the lower left:
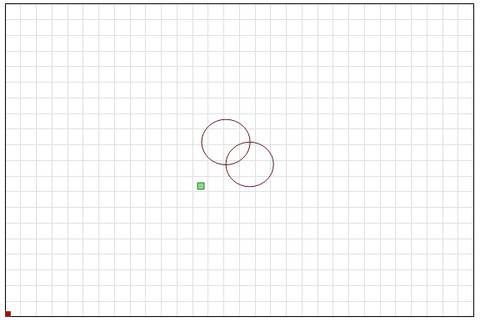
Notice that the green Job Origin indicator has moved. This represents the position of the laser when you start the job, so the laser is going to move slightly up and to the right from wherever it is, cut the two circles, and go back to where it started.
Now imagine that you want to etch this two-circle pattern onto a coaster or a phone case. Lining it up from the lower left is not easy. If you change the Job Origin setting to center, you get this instead:
The job will be centered around the current position of the laser head. If you position the laser head directly over the center of the item you want to etch, the output will be centered on the item.
User Origin
User Origin works almost exactly the same as Current Position, except that the starting location is programmable. To set a User Origin, you must first jog your laser to the location you want your job to start from, then set the origin.
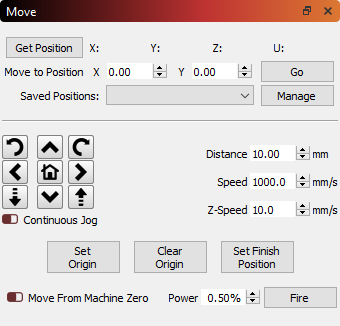
Some lasers with digital displays, such as those with Ruida controllers, have an Origin button which you press to set the origin. GCode-based systems use the Set Origin button in the Move window in LightBurn to do the same thing.
After setting the origin, you are free to move your laser around the workspace. With User Origin selected as the Start From mode, the laser will move back to that programmed location and start the project from there.
As with Current Position, the Job Origin setting determines how output will be oriented relative the user-defined origin.
Finish Position
Note
The Finish Position option is only available for GCode-based controllers. DSP controllers manage this internally.
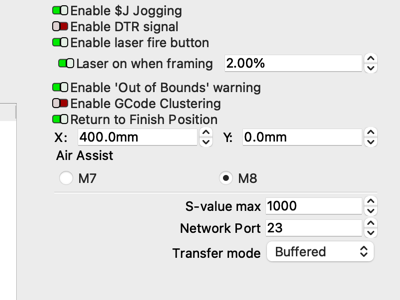
LightBurn allows you to control where you want the head of the laser to return after a job is finished. By default, it will return to 0,0, but this is not always optimal for all machines.
To change your laser's Finish Position, go to the Move window and use the arrows to position your laser head wherever you would like it to return to after the job is finished, then click the Set Finish Position button. Your machine will now remember that spot for future jobs. Finish Position can be adjusted at any time by repeating the above steps for a new location.
Using Finish Position requires that the job is running in Absolute Coords or User Origin mode. Finish position does not work when using Current Position.
Users with GCode-based lasers can also adjust or disable the Finish Position in the Device Settings window.