Using the Camera
You can use the camera in LightBurn to display an overlay in the workspace, allowing placement of designs directly on objects or oddly shaped materials. You can also trace artwork from the camera.
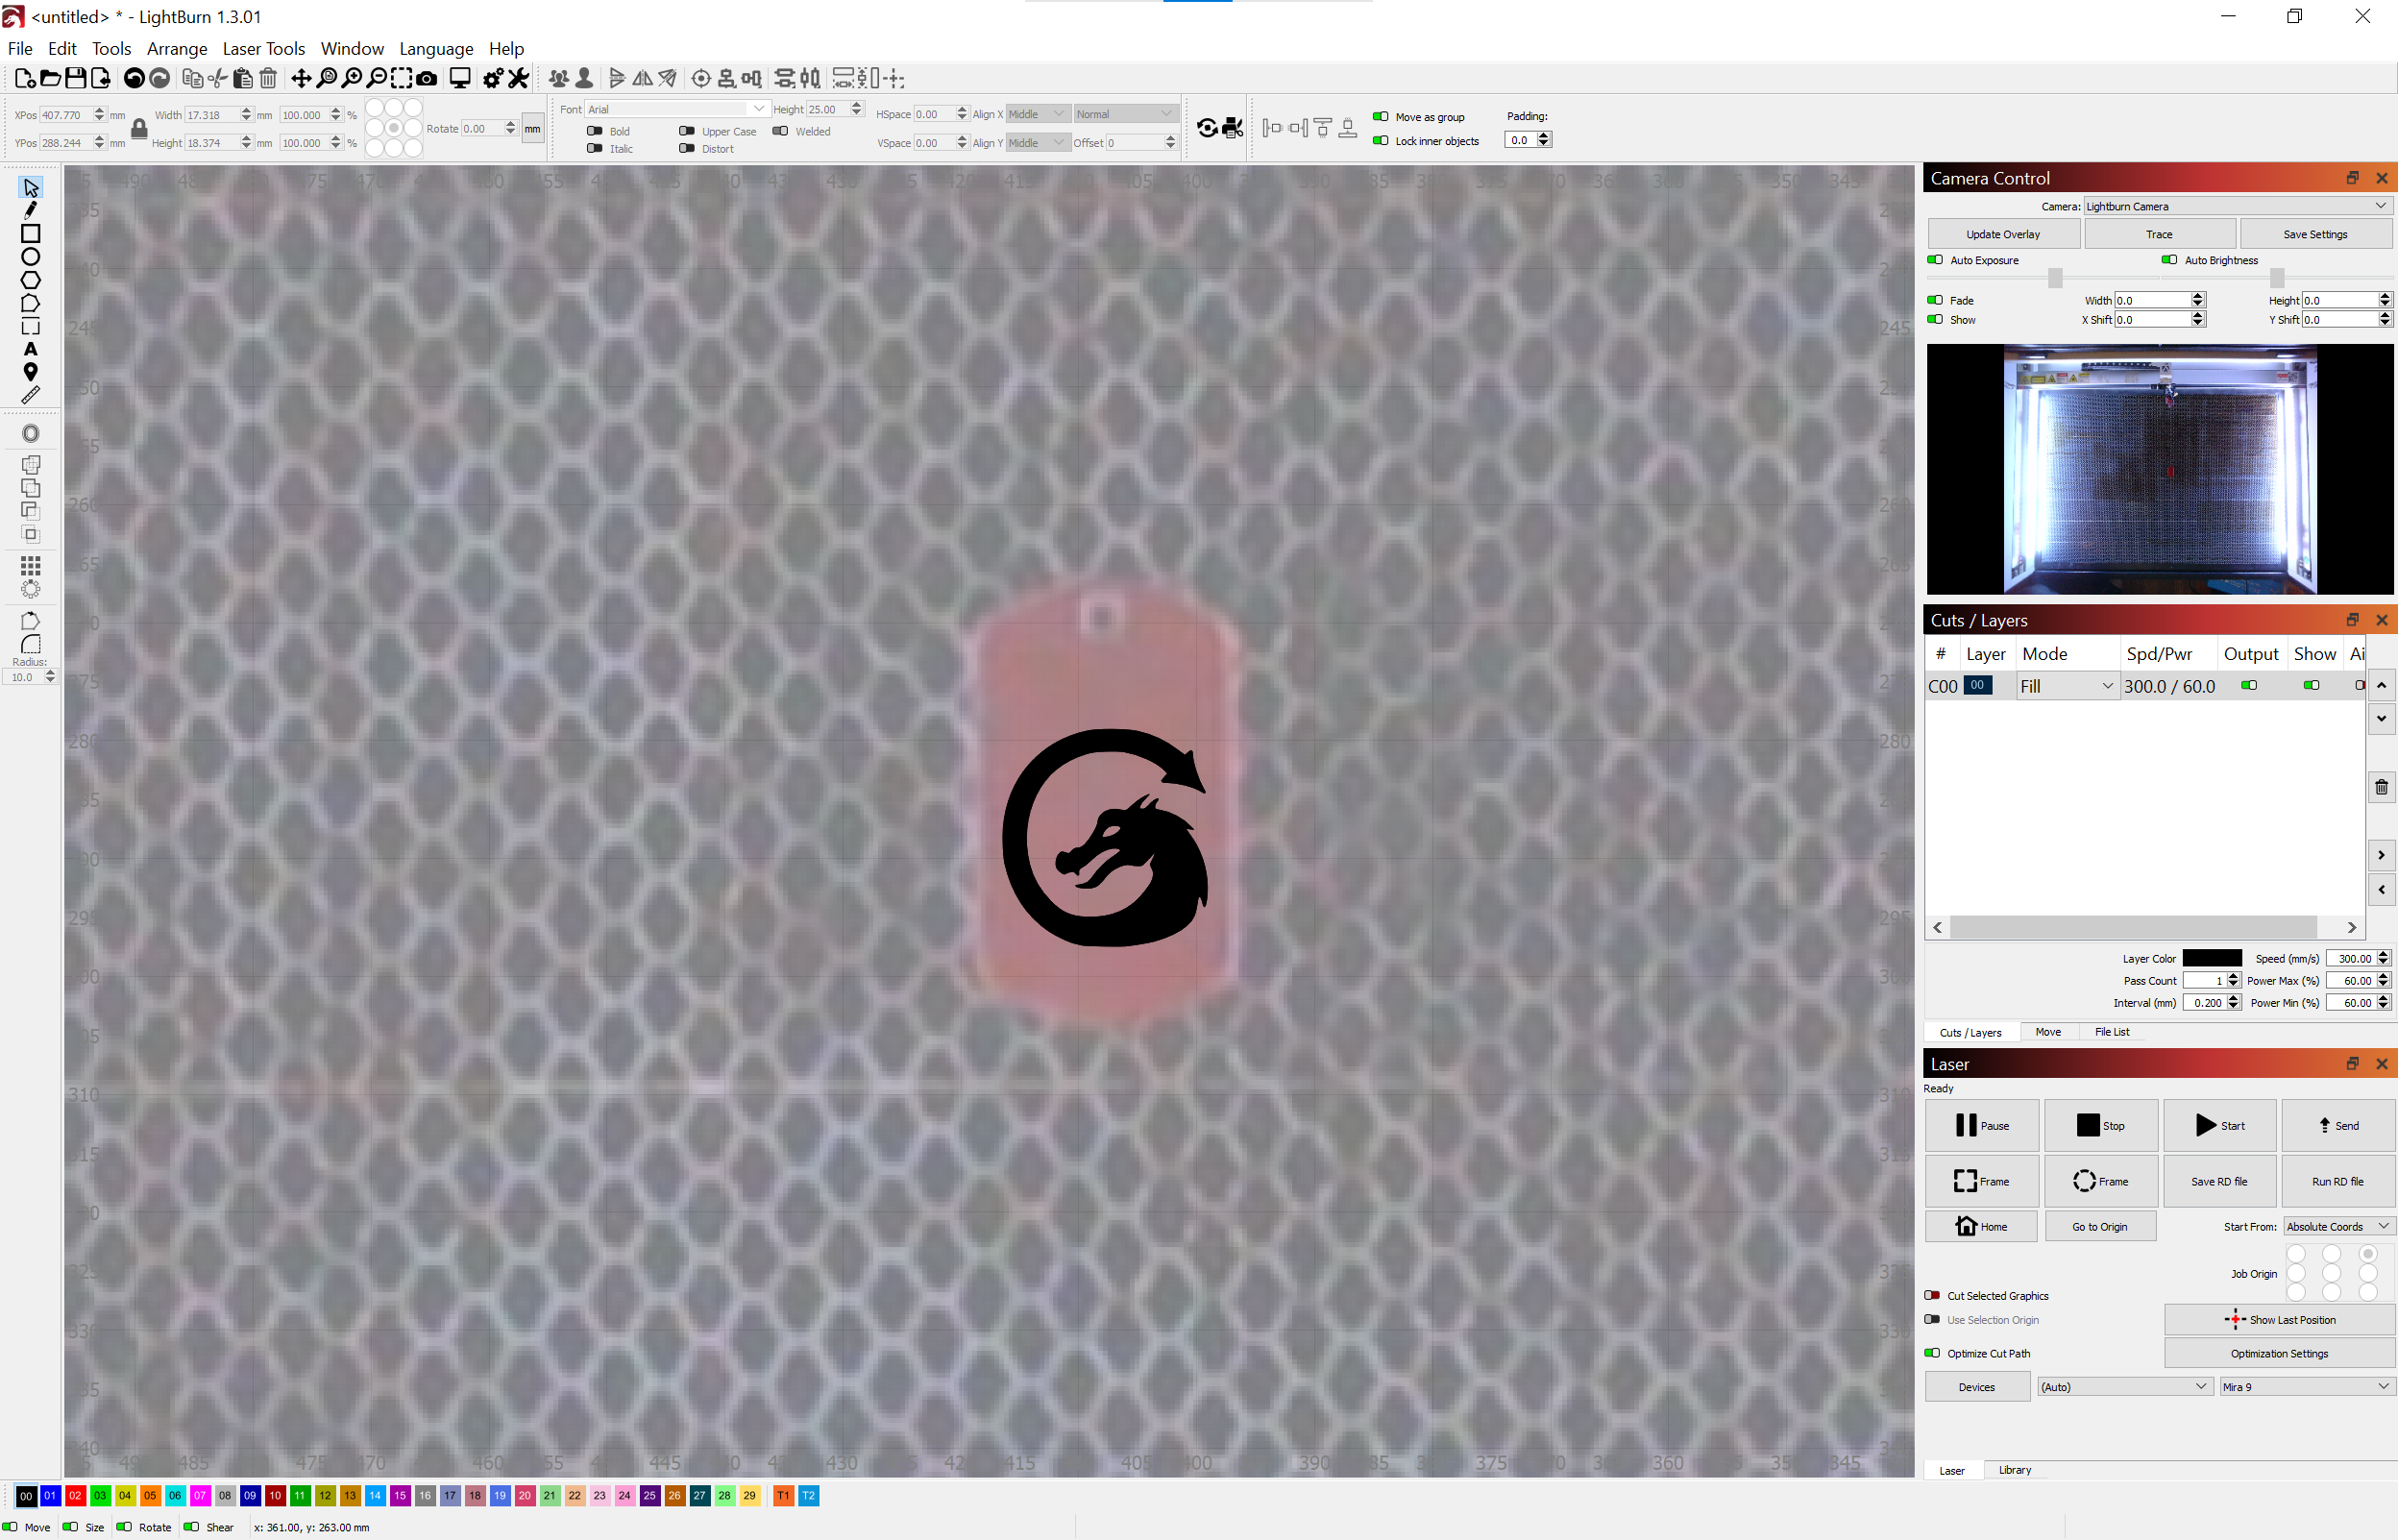
To begin, you'll want to make sure the Camera Control window is visible. It can be turned on from the Window menu if not currently active.
Camera Control Window
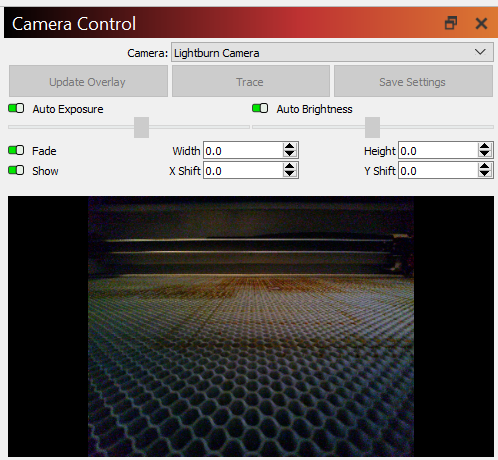
| Camera | Select the appropriate camera |
| Update Overlay | Capture a new image to use as the camera overlay |
| Trace | Open the camera trace dialog |
| Save Settings | Save the Shift and Scale adjustments |
| Fade | Toggle whether or not the camera overlay is dimmed |
| Show | Toggle whether or not the camera capture is visible as an overlay |
| Width/Height | Scale settings for the camera capture |
| X Shift/Y Shift | Shift the camera capture |
| Preview | A preview image of what the camera sees |
You can also right-click on the window to open the camera selection tool, calibrate and align your camera, and import/export your camera calibration and alignment settings. As of version 1.4, you can import and export head-mounted camera settings in addition to fixed cameras.
Tracing from the camera
Tracing an image using the camera works in the same way as the regular image trace function, and you can find more detail on the trace settings on that page.
To begin tracing, click the Trace button in the Camera Control window. This will bring up a preview of what will be traced.
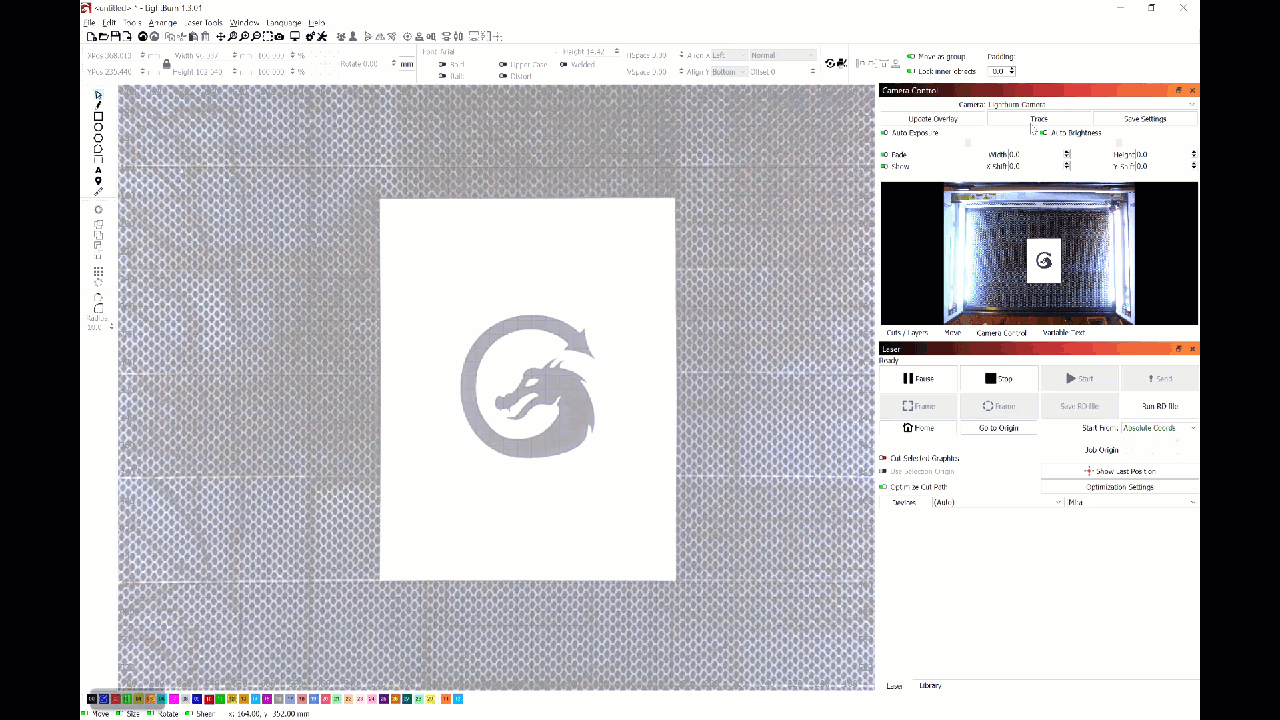
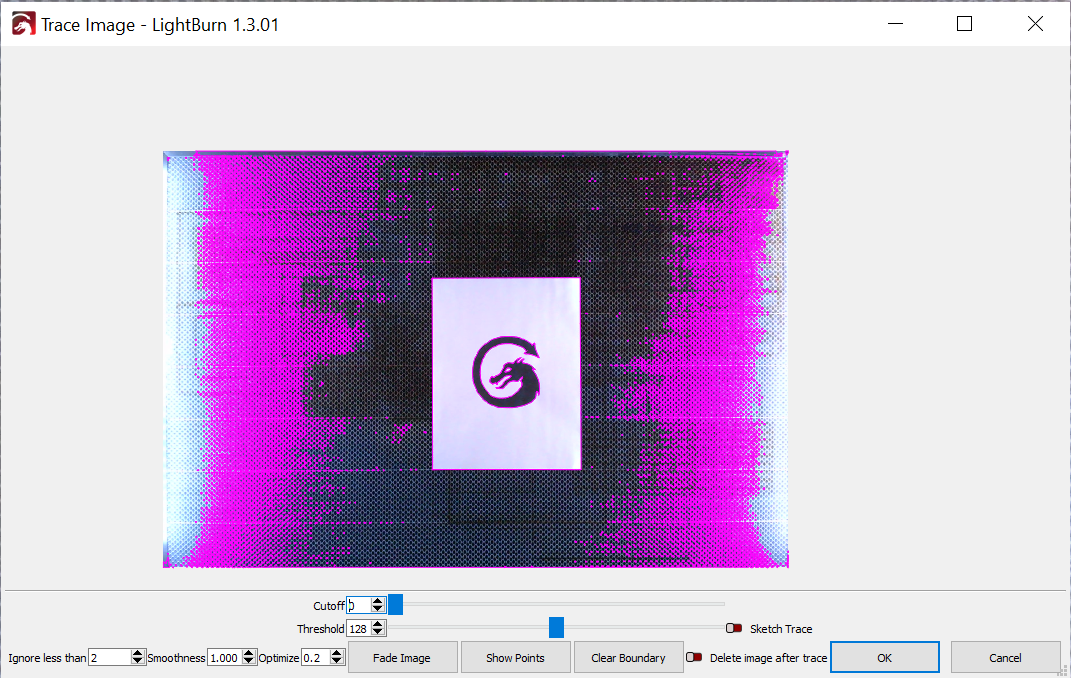
It's likely that the artwork you're tracing won't take up the camera's entire view. In the image above, you can see that the edge of the paper and the honeycomb bed are both being caught in the trace, when all I really want is the LightBurn logo. You can draw a boundary around the artwork you want to trace to tell LightBurn to ignore everything outside that boundary.
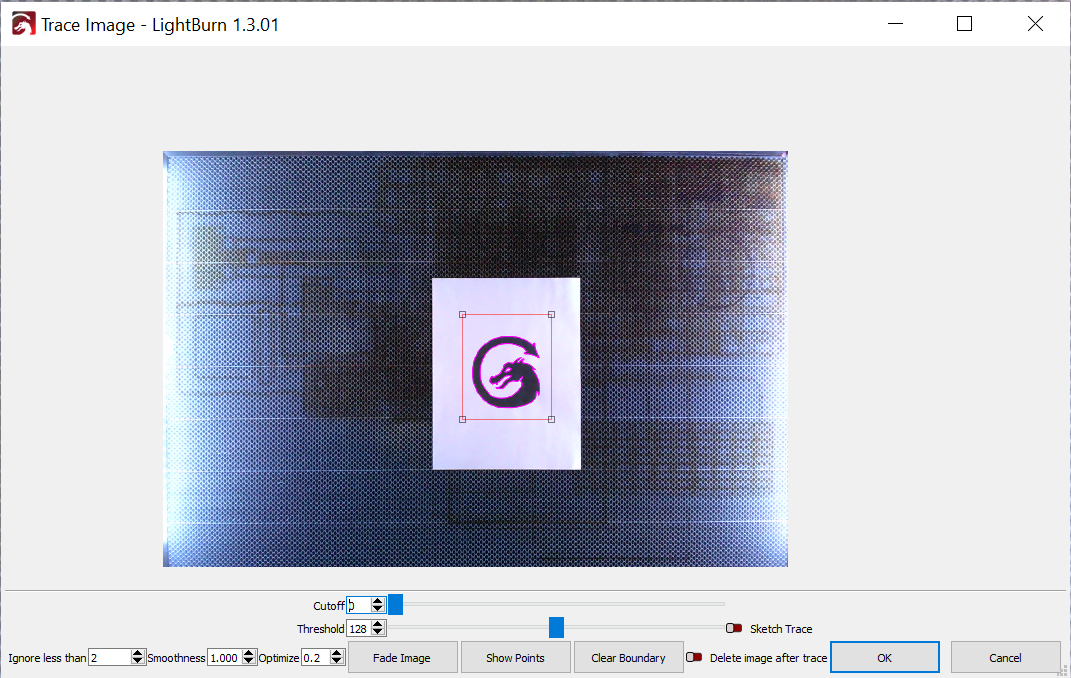
After pressing the OK button, the artwork is processed.
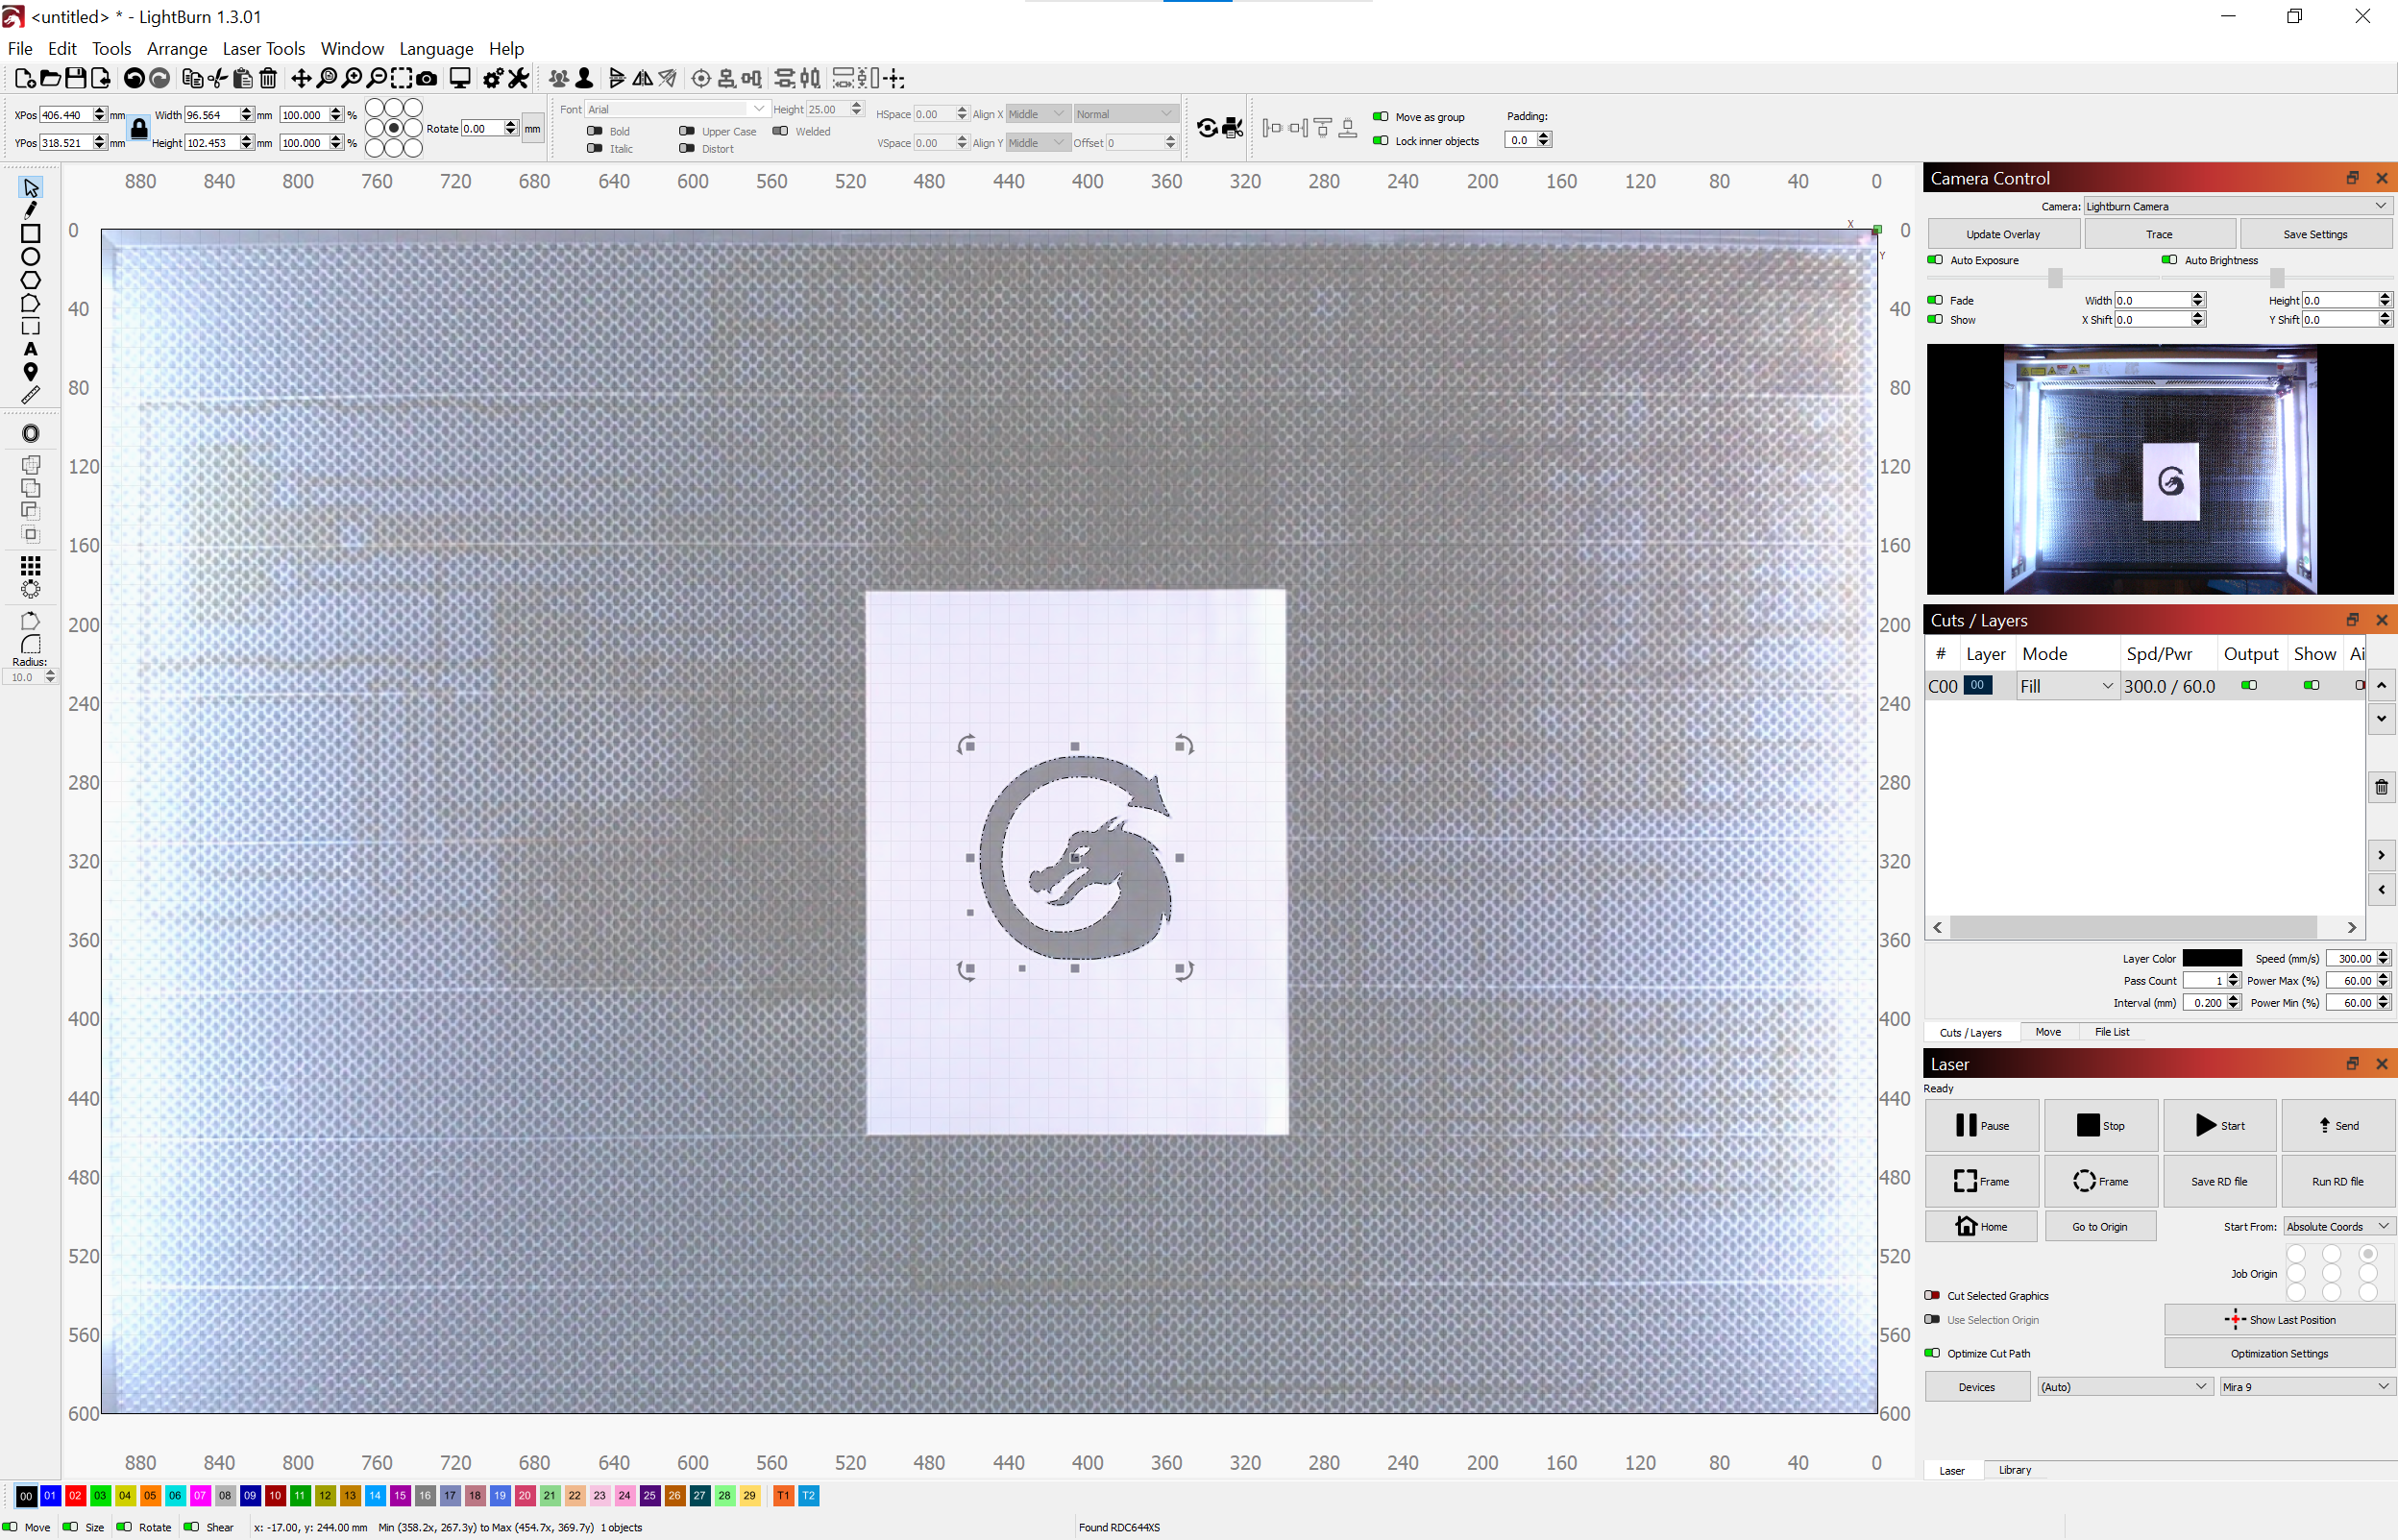
Using the Overlay
The camera overlay can make placing designs easier. When using it, LightBurn will automatically switch the Start From setting to Absolute Coords. This is necessary so the artwork placement on the screen matches the output on the laser. Also remember to update the overlay when you move things around on the laser bed.