LightBurn UI Tour
If you've never used LightBurn before, the main window might seem a little intimidating. Try not to let it scare you - we'll break out the important sections to start with. LightBurn also has some features to make it easier to learn:
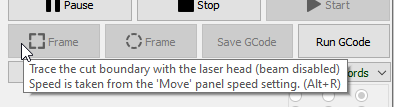
- Tool tips: If you hover the mouse over a control, you'll see a small bit of text pop up that describes that button or feature, like this:
Help
If you hover the mouse over something and press the F1 key (help), LightBurn will launch the help page for that feature in your browser. Most of the panels and buttons on the main window of LightBurn will do this.
The Main Window
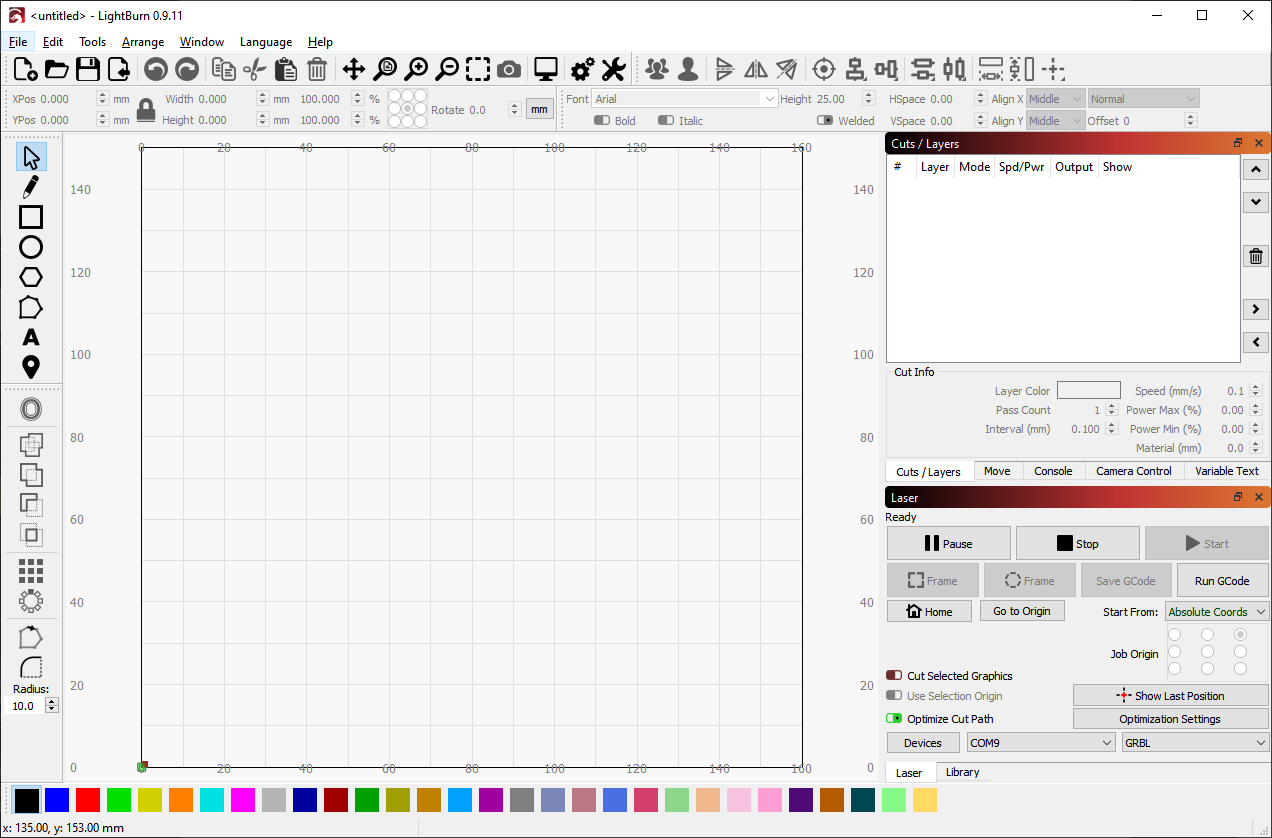
This is the default layout for the main LightBurn window:
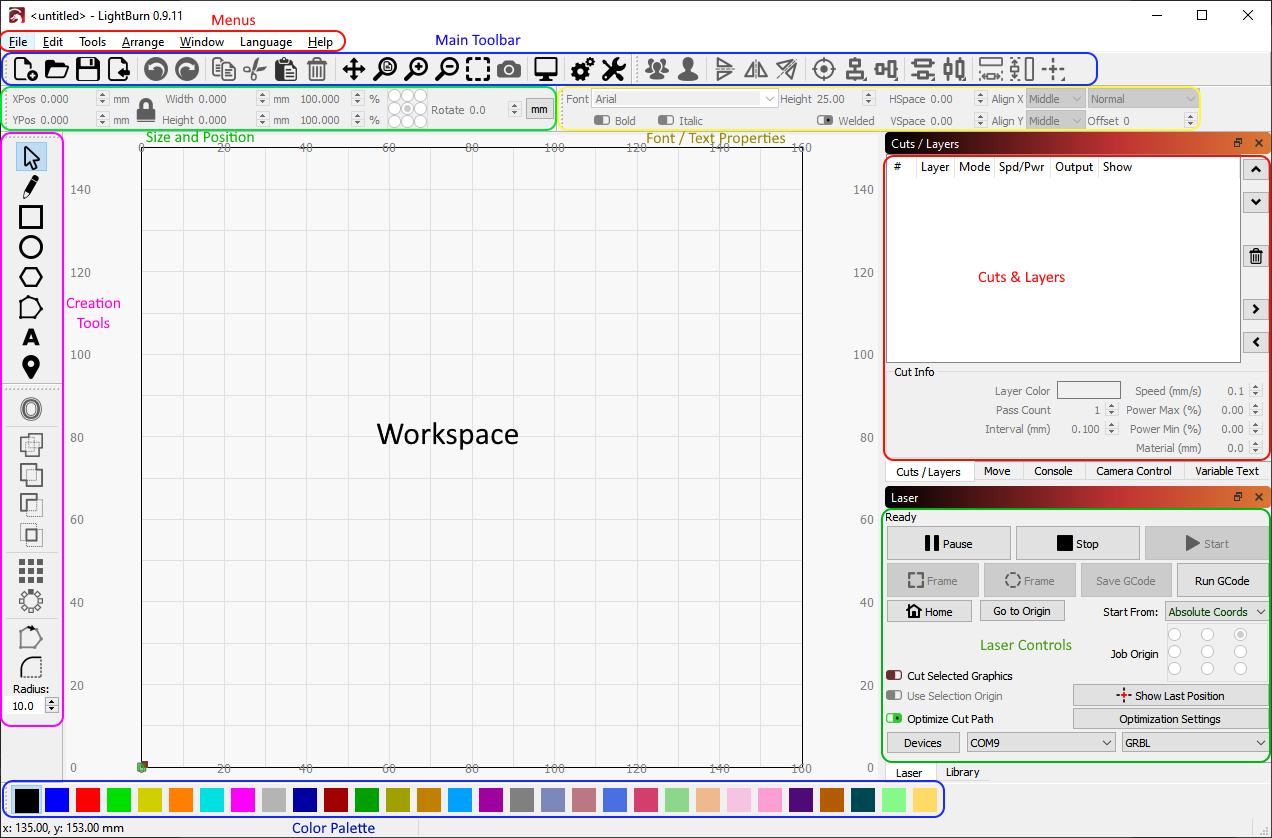
Here it is again, with the sections labeled:
It's worth noting that along the very bottom of the main display is a status bar that will occasionally show information like an automatic backup in progress, position of the cursor, laser connecting, and so on.
The main sections of the user interface are all linked as chapters, so you can skip around as needed. It's a big application but you don't need to know all of it to use it well!
For a full list of the windows and dockables in LightBurn, see the section on the user interface.
These are the windows you will use most commonly, though there are others. If you ever close one accidentally and want it back, go to the menu bar, click the Window menu, or just right-click an empty space on the toolbar, and re-enable the window you want back.
Menus
Almost all desktop software uses menus in some form. The menu bar at the top of the main window gives you access to almost every feature available in LightBurn.
Depending on the operating system you're using the menus might appear a little differently, and some features may be removed if your laser doesn't support them.
If a feature has a shortcut, it will be shown next to it in the menu, as shown above. Learning the shortcuts for the features you use most often will make using LightBurn much faster, and sometimes there are even 'shorter' shortcuts - you can find these in the help menu under Help > Quick Help and Notes.
See Menus for detailed information.
Main Toolbar
The main toolbar in LightBurn gives you quick access to commonly used functions for opening or importing files, saving, using the clipboard (copy & paste), moving or zooming the view. Right beside it is the Arrangement toolbar, containing some commonly used arrangement tools for arranging and aligning shapes.

If you aren't sure what a button is for, hover the mouse over it and it will tell you:

See Main Toolbar and Arrangement Toolbar for detailed information.
Creation & Modifier Tools
The shape creation tools are normally arranged vertically, but we're showing them sideways here. By default, these are docked along the left side of the work space for quick access.

The first tool, 'Select' is probably the one you'll use most, and is the default tool chosen when LightBurn starts. The others are used to create basic shapes like circles and rectangles, text, and lines, and there are few for modifying shapes in more complicated ways, like merging shapes, or creating lots of copies of shapes.
See Creation Tool and Modifier Tool for detailed information.
Color Palette
The color palette lives along the bottom of the main window by default, though a common alternative is docking it next to the creation tools along the left.

Lasers don't print in color, so these colors are used to assign different kinds of operations to the shapes in your design. A common convention is to use bright red for cuts, though how you use the colors is up to you.
With nothing selected in the workspace, click a color entry and subsequent new shapes will be created in that color. If you have something selected, clicking a color entry will apply that color to the shapes in your selection. The colors currently in use in your design will also appear as entries in the Cuts / Layers window, where you can choose the operations that each color will represent.
See Layer Colors for detailed information.
Tool Layers
There are two special layers at the end of the cut palette, labeled T1 and T2. These are Tool Layers and are used for creating non-output shapes in your designs. These layers have no cut parameters and will never be output to the laser. For example you could use them for:
- Indicating pre-determined material size and position on your machine
- Guide-lines for aligning shapes
- Apply Path to Text (without the path being output)
- Image Masking
Cuts / Layers
The Cuts / Layers window shows the colors currently in use in your design, and lets you quickly access the settings assigned to each color.
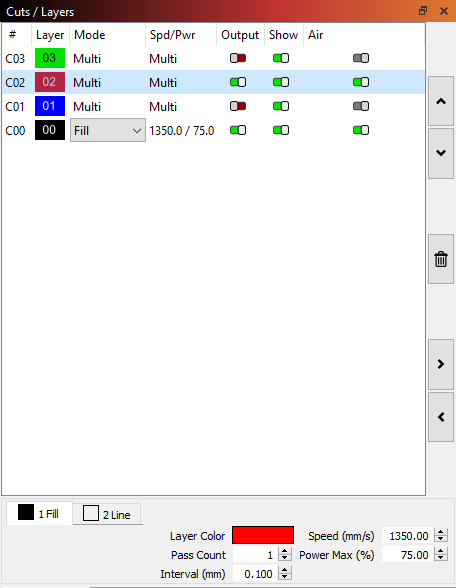
The first column shows the name you've assigned to this layer, followed by the color, then the Mode (Line, Fill, both, or Image). Then the speed and power are displayed, followed by the options to enable or disable sending this layer to the laser, or displaying it in the workspace.
Underneath the layer list you can see and change the basic settings for the currently selected layer. Double-clicking an entry in the layer list, it will bring up a larger Cut Settings Editor with a more complete set of options.
See Cuts / Layers Window for detailed information.
Size and Position / Numeric Edits
The Numeric Edits toolbar lets you resize, position, and rotate shapes, and change the unit of measure.

The Lock button can be used to maintain the aspect ratio of your objects when changing the size, and the 9-dot control lets you choose the positioning and sizing origin point. The number entry boxes accept equations and units as well--e.g. entering 5 mm, 5in, 5", or 5*3 mm will be processed into the correct result.
See Numeric Edits Toolbar for detailed information.
Fonts and Text Controls
The font and text toolbar will activate when the Create Text tool is used or when text objects are selected.

This toolbar lets you change the font, size, spacing, alignment, and automatic character welding settings. The Fonts and Text toolbar also includes settings for variable text, e.g. serial numbers, dates, and data tables read from CSV files.
See Fonts and Text for detailed information.
Laser Window
The Laser Window is used to select the active machine, test the framing (the artwork's outer bounds), run and stop the machine, and choose the file processing, order, and artwork positioning within the workspace.
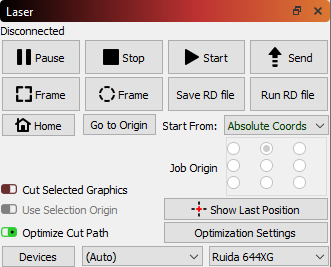
Note that this window may look different for you depending on the type of laser chosen and the options it supports, and some options will be hidden if you are in 'Beginner Mode'.
See Laser Window for detailed information.
Workspace / Edit Window
The workspace, or edit window, is the drawing area where your design is laid out. The size of the border and grid within the workspace represents the available work area on your machine. The artwork arranged and displayed within the workspace will be processed and sent to your machine for production.
Next Step: Zooming, Panning, and Selection